




First Signs of Flowering Stage Weed - Guide to Cannabis Budding Week by Week

- 1. The pre-flowering stage week-by-week
- 1. a. The pre-flowering stage: week 1
- 1. b. The pre-flowering stage: week 2
- 1. c. What about autoflowers?
- 2. The flowering stage
- 2. a. The flowering stage: week 1
- 2. b. The flowering stage: week 2
- 2. c. The flowering stage: week 3
- 2. d. The flowering stage: week 4
- 2. e. The flowering stage: week 5
- 2. f. What you need to do after harvest
- 2. g. Wet trimming vs dry trimming
- 2. h. Drying cannabis plants
- 2. i. Curing cannabis buds
- 3. In conclusion
The flowering stage consists of the pre-flowering and flowering phases. This is when you see pistils starting to appear on the bud sites all over your cannabis plants, and they will develop into beautiful-looking and smelling flowers that contain what all cannabis consumers love: terpenes and cannabinoids. This stage is the most important one for us growers; this is when we’ll see the beautiful buds develop. We’ll need to take even more care than in the previous stage. When our cannabis plant is flowering, it is even more difficult to deal with pests and any other types of deficiencies, as this can directly affect our buds, so here's our 2026 article about the last of the growing stages of weed.
1. The Pre-Flowering Stage Week-by-Week
After your cannabis plant has received its first days of a 12/12 light cycle, either indoor or outdoor, it will enter the pre-flowering stage. However, automatic cannabis doesn’t depend on a light cycle to start flowering and will flower in an 18/6 light cycle.
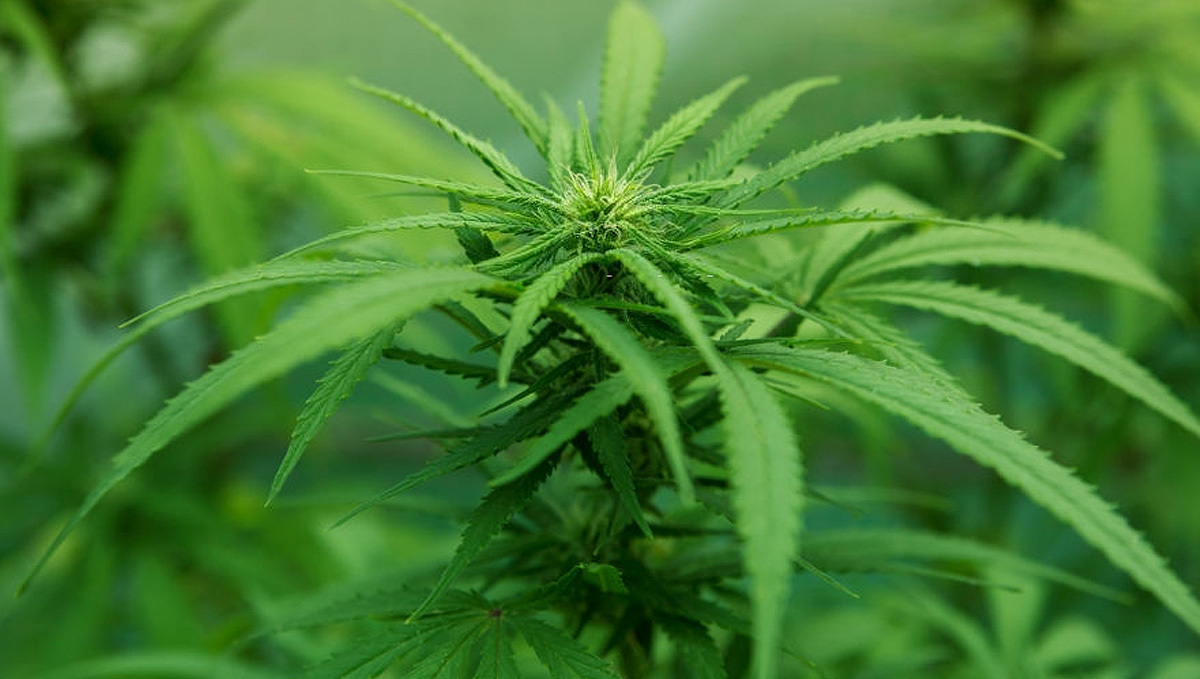
This means that with autoflowers, you don’t need to decide when to start flowering. The plants will make this decision for you when they are ready. Usually, it happens when they reach a certain size or age or a number of nodes. This makes things much easier, so autos are an obvious choice for beginners.
But if you choose a photoperiod variety instead, it’s up to you to decide when to switch to 12/12. Unfortunately, there is no one-size-fits-all answer to the question of the best time to start flowering. Look at how big your vegging plant is, keep in mind that it can get 2-3 times bigger in flower, and make sure you’ll have enough space. So now that your cannabis plant is the right size and has gone through the whole vegetative stage healthy, it’s time to start transitioning into the flowering stage.
The Pre-flowering Stage: Week 1
The pre-flowering stage can take up to 3 weeks, depending on the genetics and growing conditions, but in most cases, it will take around 2 weeks for both autoflowering cannabis and photoperiodic genetics.
The time and how much they stretch also depend on the Sativa/Indica ratio. Sativa-dominant strains, like our Sour Jealousy Auto, may stretch much more in the pre-flowering stage, while dominant Indicas like GMO Auto may stretch very little or not stretch at all.
Emerging female hairs at the nodes are the first sign of the flowering stage, but it’s not the flowering stage per se. It’s the transition from the vegetative stage to the flowering stage. Remember that autoflowers will enter the pre-flowering stage automatically, while photoperiodic strains need a change in the light cycle to do so, so make sure you know the basics before choosing one or the other.
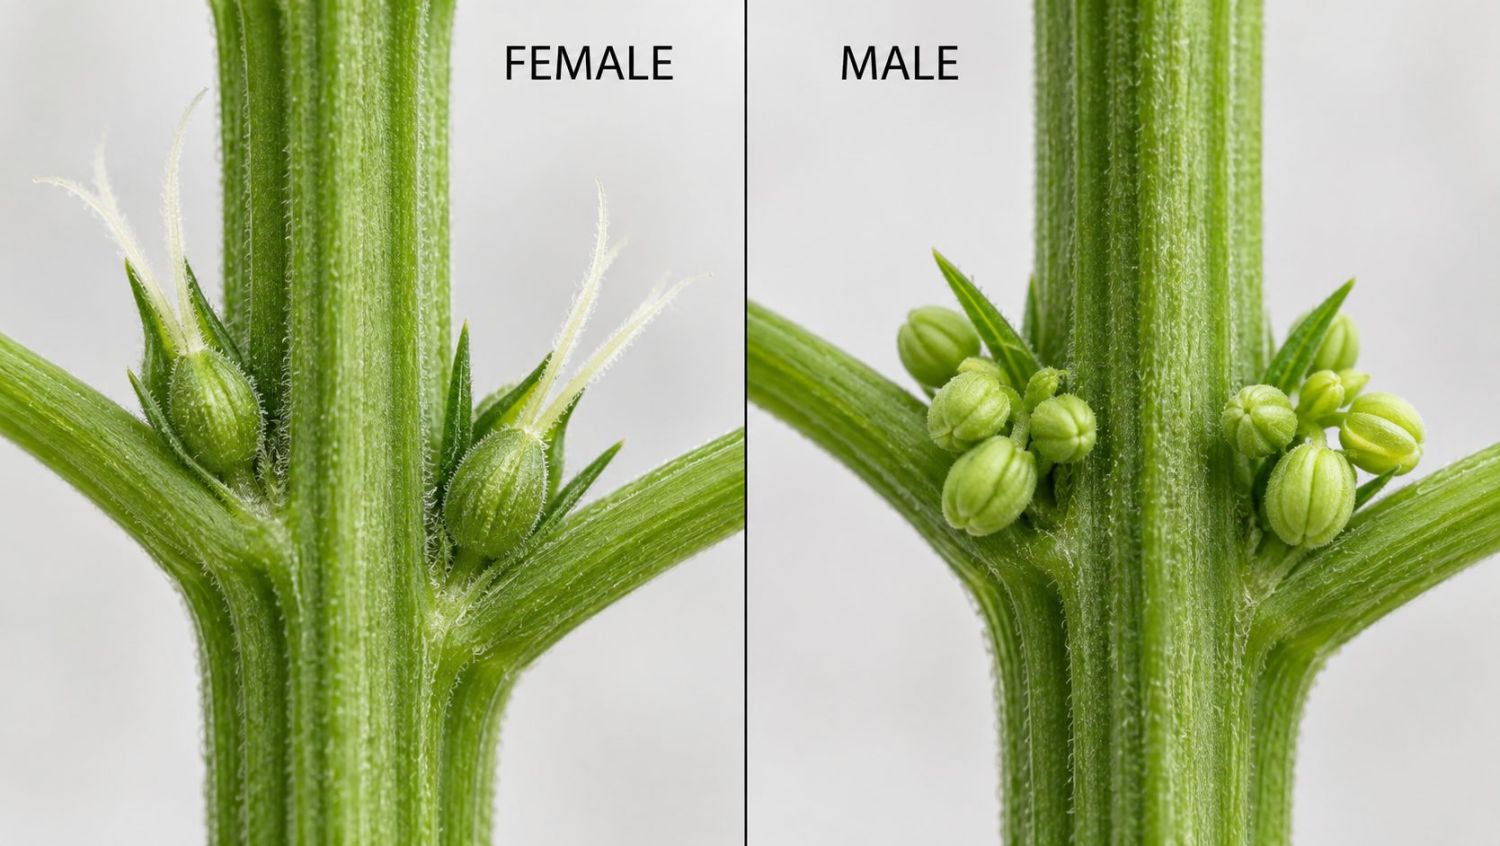
Most home growers are not breeders, and their goal is to make buds and not seeds so you will see your plant showing signs of its sex. If it’s a female, it will start growing pistils, a small number of trichomes, and slowly start to smell like a cannabis plant should.
If you’re growing regular seeds, your plant could be a male, and it will start to grow pollen sacs.
So if you are growing regular cannabis seeds, that means there's a 50% chance of getting male plants. If you happen to get male plants, instead of the buds starting to swell, you will see the pollen sacs growing and ultimately opening up, looking like typical small flowers.
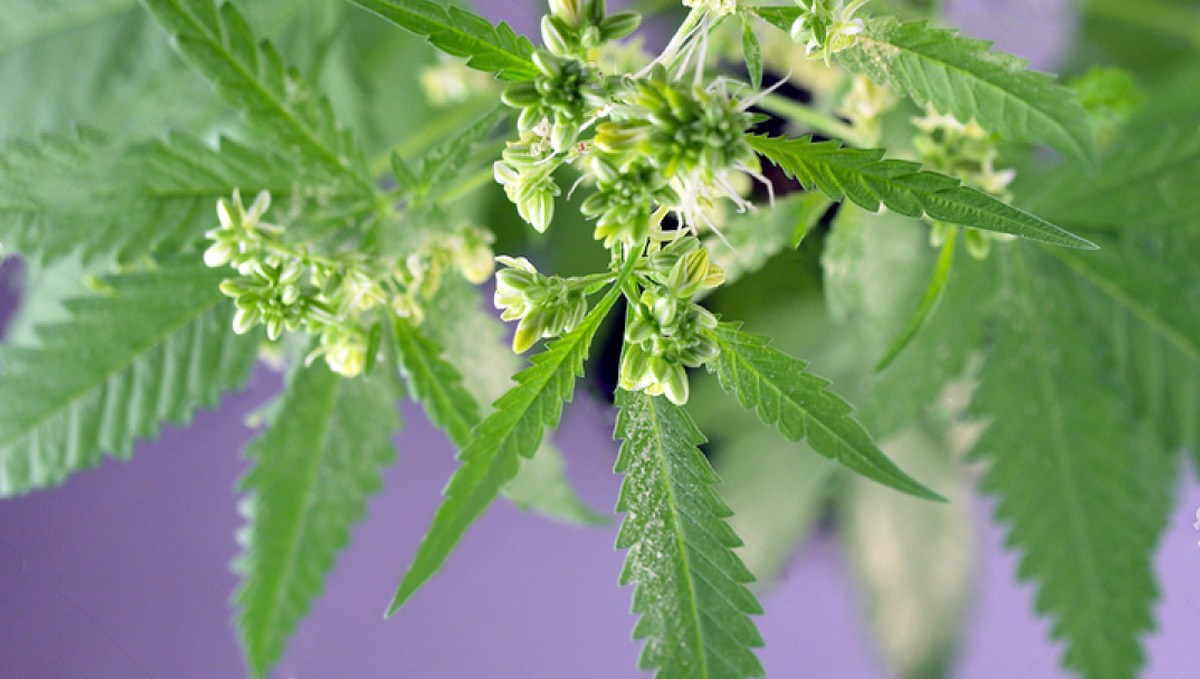
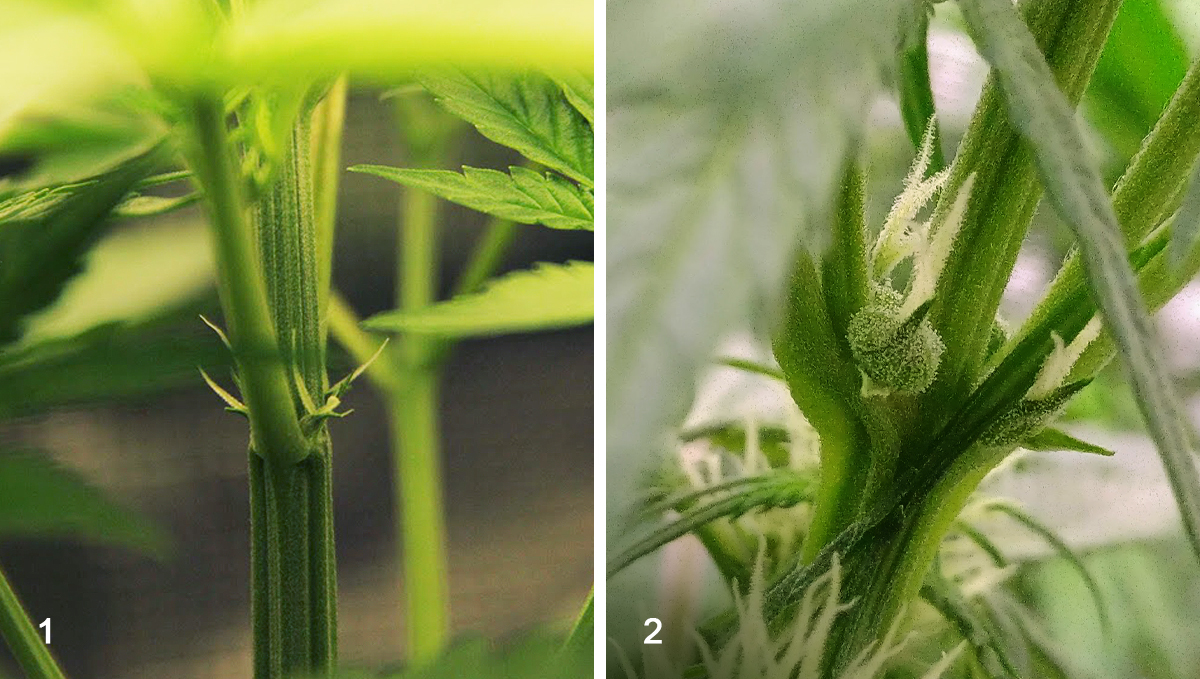
Anyways, now that you know your plants are female, you can go ahead and continue the pre-flowering stage without worrying about pollination. But before seeing any flowers or pre-flowers, the first sign that you have a female plant is the stigmas, also known as pistils or "white hairs".
These white hairs mean that your cannabis plants are female and sexually mature, meaning that your cannabis plants are ready to start producing beautiful buds.
It doesn’t matter if you’re growing photos or autos. The pre-flowering stage will be the same for both types of cannabis plants, despite usually taking longer for photoperiodic cannabis. Once your plants have shown their sex, the second sign that indicates your cannabis plants are transitioning from veg to flowering is the flowering sites turning into a light bright green.
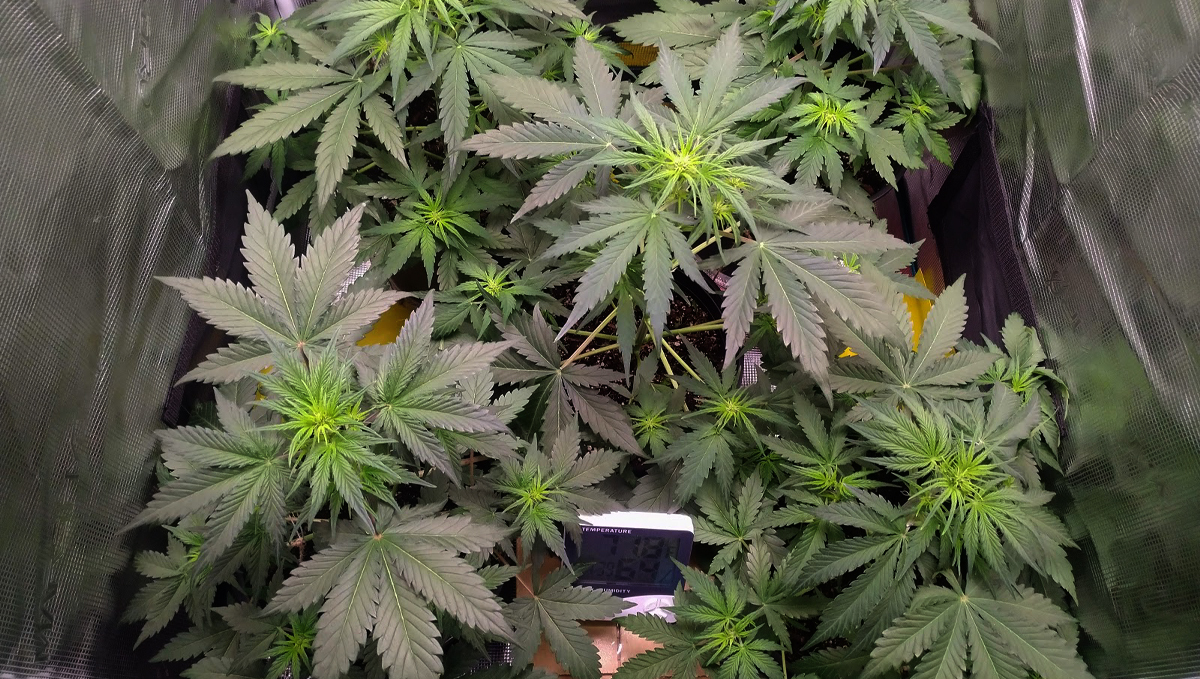
As you can see in the image above, all of the flowering sites turned bright green; that’s a sign that your plants will start growing a lot of white hairs and that the buds will start to take form in no time.
The Pre-flowering Stage: Week 2
After 1 or 2 weeks, depending on whether it’s an auto or photo and the genetics, the pre-flowers should look similar to this, and when this happens, it means that your plant has completely transitioned to the flowering stage.
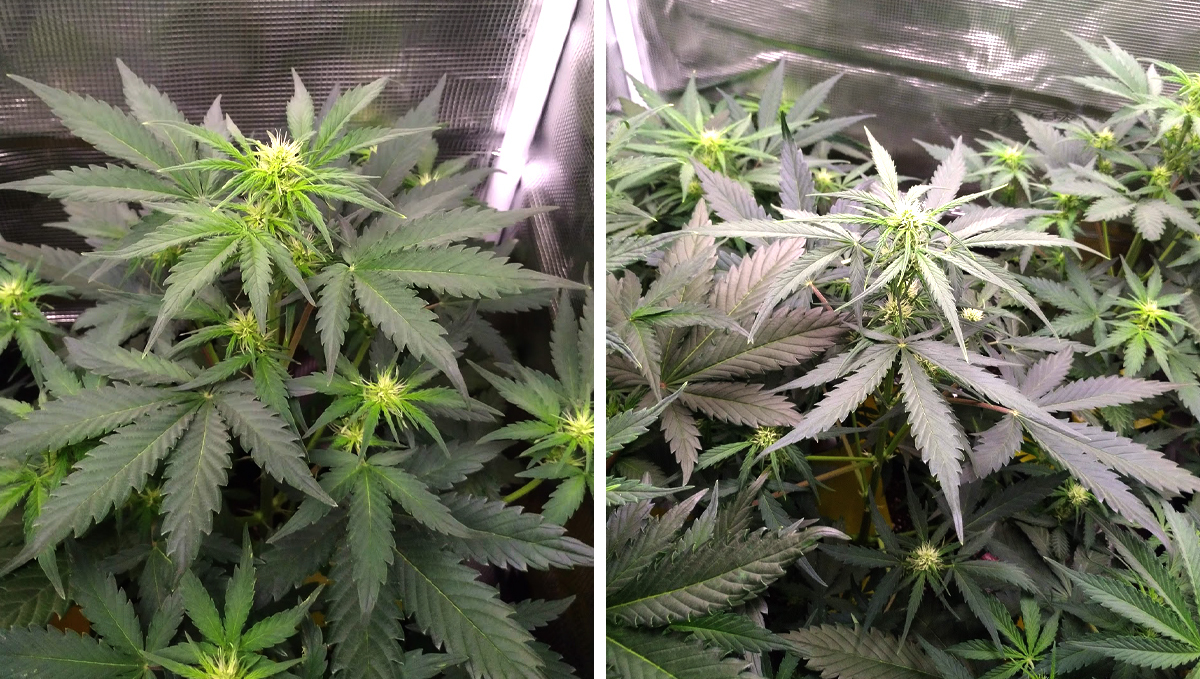
As your plant develops further into the flowering stage, it will slowly start absorbing less nitrogen and will start to need more of the other macronutrients, like phosphorus and potassium.
This doesn’t mean you should stop giving it all other nutrients, but it means you will have to increase the amount of phosphorus and potassium you give it every week to allow it to develop properly.
You will also see her growing a lot. It sometimes can even double its size in a couple of weeks; this is referred to as the “flowering stretch". This happens because your plant wants to grow as much as it can before starting to develop what would be its reproductive parts (buds), to guarantee the survival of the species.
The “pre-flowering stretch” solely depends on genetics. Sometimes they grow a lot, sometimes not. The stretch can either be your worst enemy (if you have little space) or your best friend—if you can afford to grow a monstrous bush, such as Strawberry Gorilla Auto RF3 or some other big and high-yielding strain.
What About Autoflowers?
As mentioned before, photoperiods usually take longer than autoflowers to go through the whole pre-flowering stage, but if you’re dealing with autoflowers, there’s no need to worry because the process is the same, and you will see the same signs as your plant develops.
2. The Flowering Stage
After around 2 weeks into the pre-flowering stage, your plant is ready to start the final phase, which is the flowering stage. It doesn’t matter if you’re flowering outdoors or are running an indoor flowering stage. In this stage, you’ll see your plant start to truly develop the buds.
You will slowly see the buds swell, the trichome production going up, and most importantly, the smell starting to become strong. Depending on the genetics you’re growing, the flowering stage can take from 5-6 weeks up to 10 weeks, so if you were wondering how long is the flowering stage outdoors or indoors? Now you know that it depends on several factors, but mainly genetics.
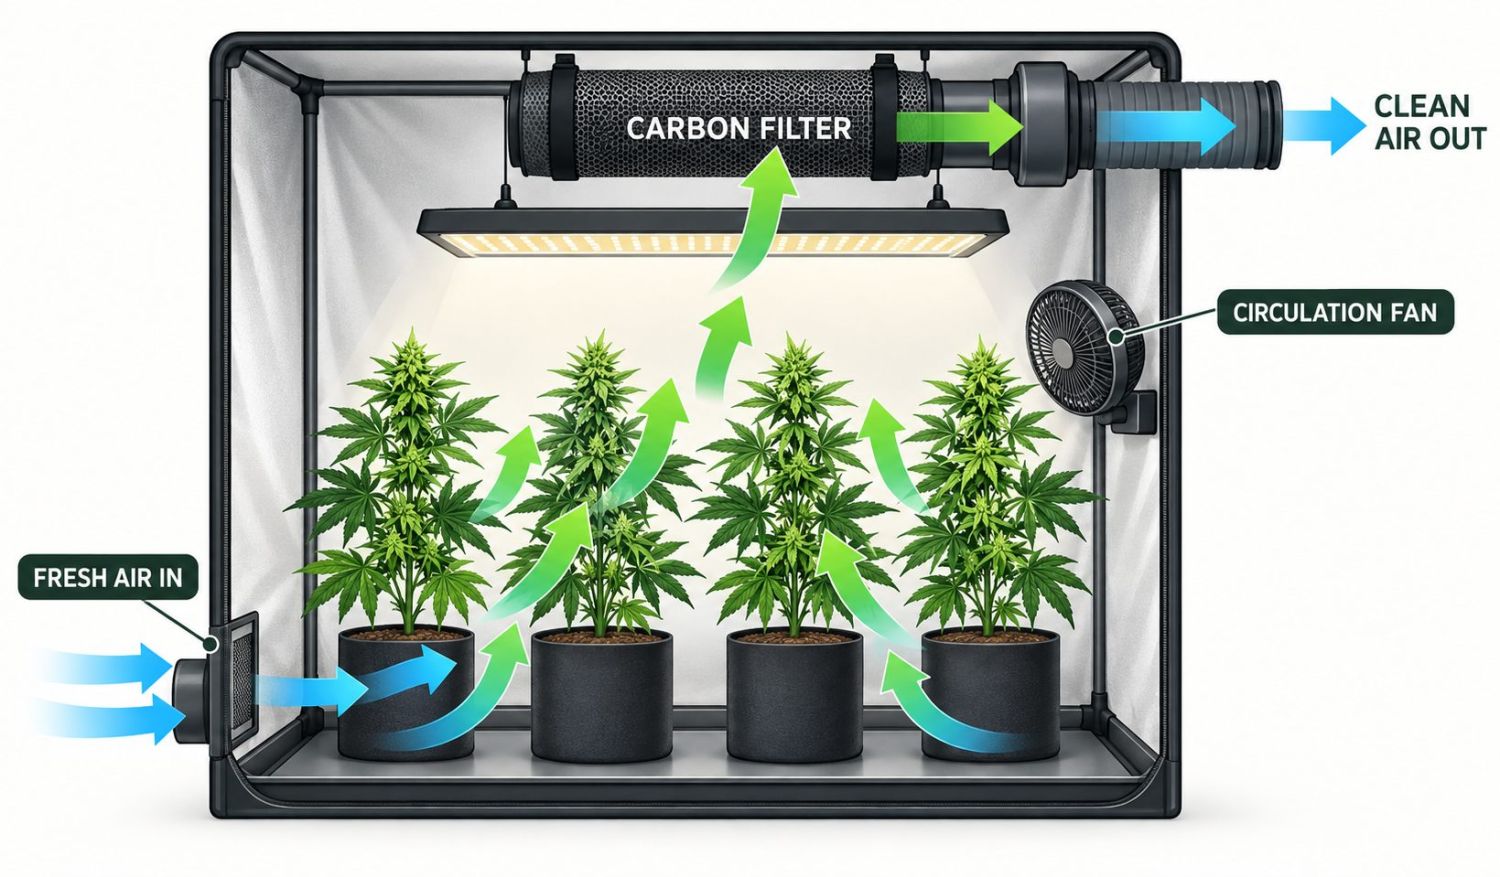
In any case, you will have to mask the smell to avoid problems, so if you weren’t using anything to mask the smell, this is when you want to invest in an air filter or something similar. In this stage, the smell will be pungent and can attract unwanted attention to your grow room.
This is also when you have to be the most careful with the environment you’re growing in. If you were to get a mold infection or anything else that can harm your plant, this is the worst time to have it happen.
Because the bugs can get stuck on the buds or get inside the buds, you will have a really hard time getting rid of them. For example, ants can get stuck on trichomes, and you will have to pick one by one, making it a really hard and laborious task.
The Flowering Stage: Week 1
When your plant officially enters the flowering stage, the buds will start to take form, and with bigger buds comes increased trichome production. This means that if it wasn’t smelling before, your grow tent will start smelling quite strong. As you see the increase in bud production, you will have to supply your plant with an increased amount of nutrients. Usually, at this stage, your plant can handle a full dose of nutrients or even more, but remember to always follow the manufacturer's guidelines because overfeeding can shock your cannabis plants.
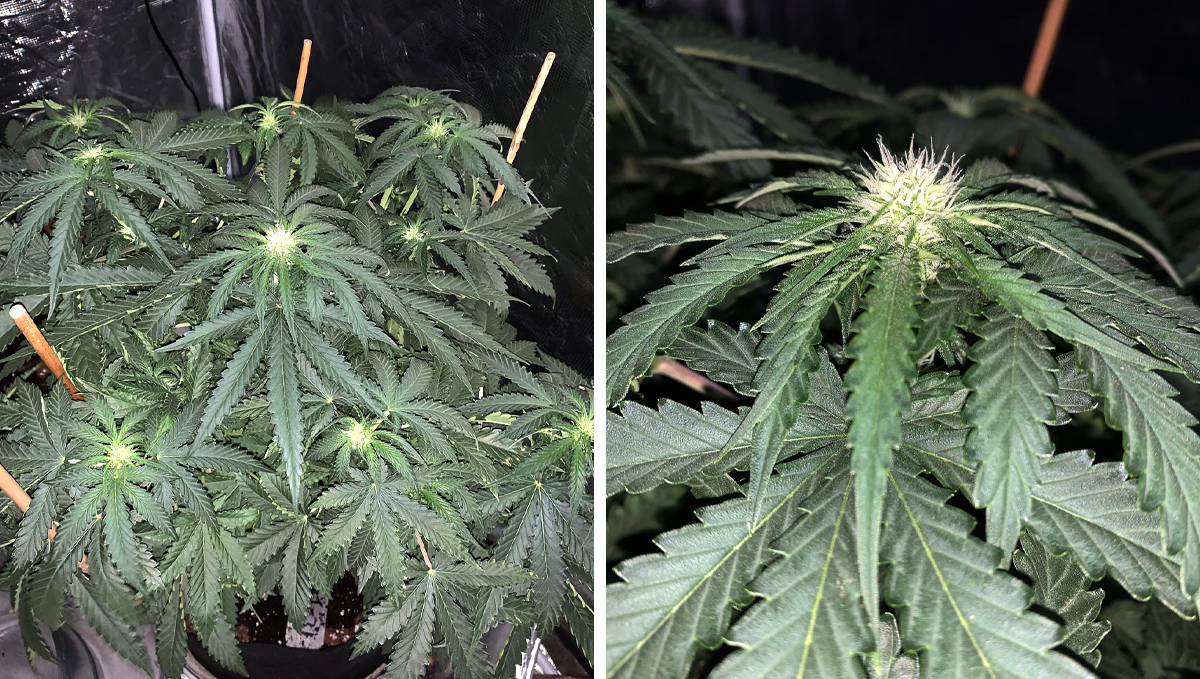
As you can see in the image above, the buds are far from being ready, but they have started taking the shape that we all know. The hairs will still grow a bit more before the calyxes (the parts that make the actual bud) start fattening up.
The Flowering Stage: Week 2
The second week into the flowering stage is when the white hairs start getting long. By now the hairs should be all over the place, meaning that you will see a lot of them growing in every direction and in every bud site.
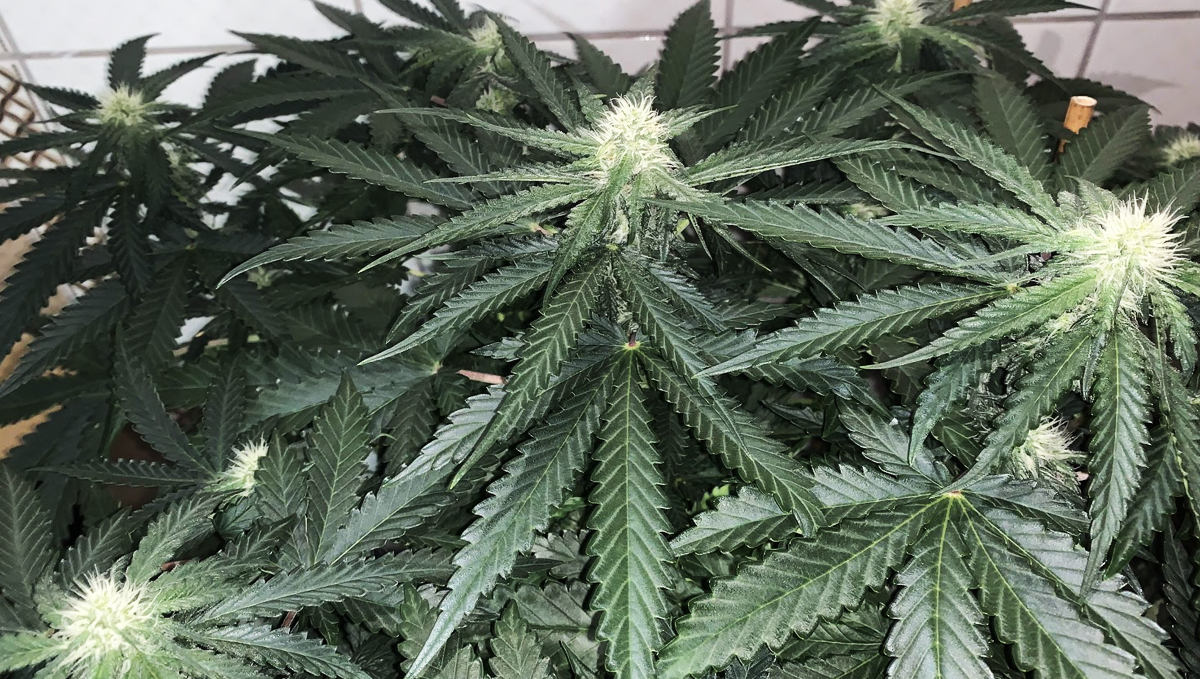
Also, this is when the trichomes will start appearing exponentially. Your plant and surrounding foliage won’t be as frosty as it will get in the last weeks, but you should be able to see the resin on the buds and surrounding foliage with ease.
The Flowering Stage: Week 3
When your cannabis plants reach the middle of the flowering stage, in this case in week 3 of flowering, you will see a huge difference in the buds after every couple of days. This happens because the foundation of the flowers is established, so now it’s just a matter of fattening up those beautiful buds.
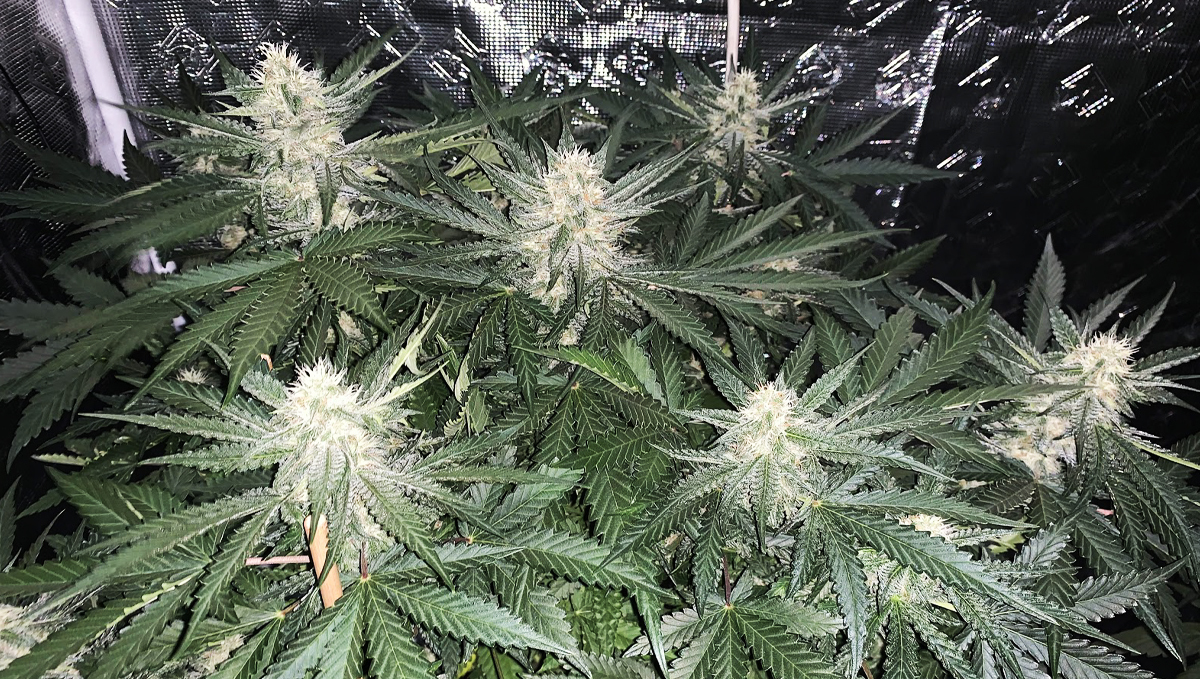
Just by looking at the picture in week 2 and week 4, you can see there’s a huge difference in bud density and amount of trichomes. What last week were hairy buds with not a lot of resin are now relatively fat buds that become frostier due to the increased trichome production, and from this point forward it only gets better.
The Flowering Stage: Week 4
By week 4 of flowering, there’s nothing much to say. If you’ve done everything properly, the buds should be looking and smelling great, and if you’re keeping a good environment, there’s not much to do. Just keep an eye for bugs and signs of deficiencies, but it should be fairly simple by now.
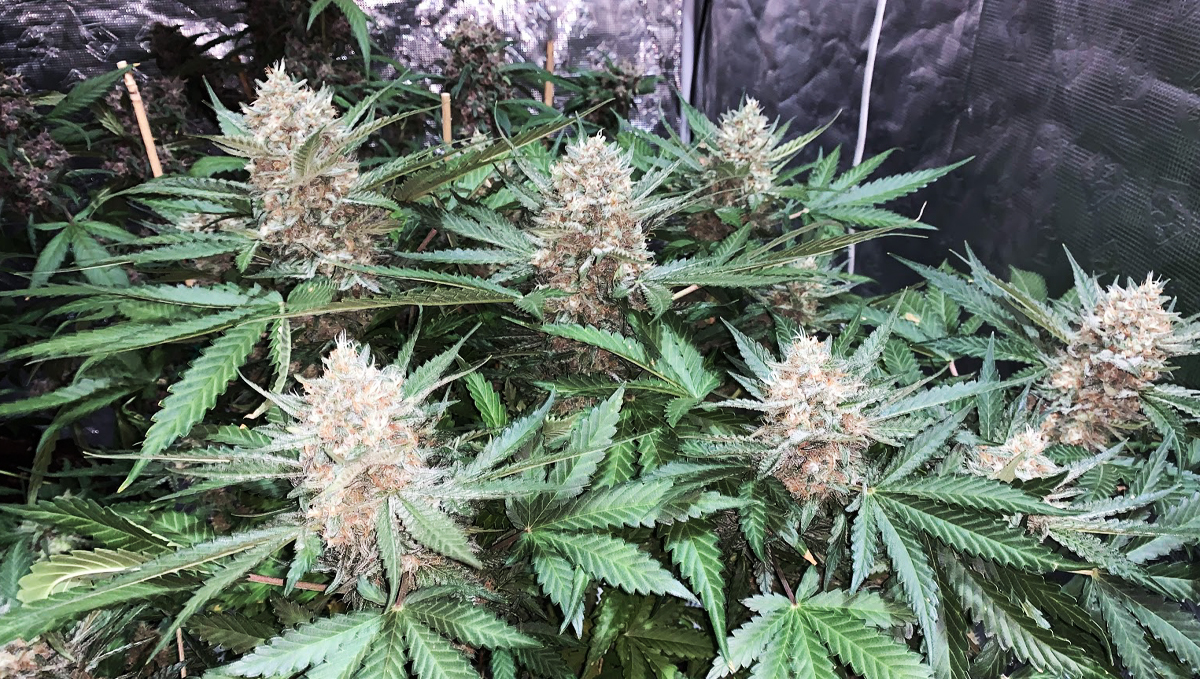
Despite looking like they’re completely ready, harvesting now will not only affect the yields (because the buds will get a bit denser) but can end up affecting the effect, due to the cannabinoids inside the trichomes not being at their peak potency, so make sure you harvest at the right time to truly feel the full potency of the strain you’re growing.
The Flowering Stage: Week 5
Week 5 of flowering marks the last week of the flowering stage. Remember that this is not the case with all cannabis strains. If the genetics you’re growing take a bit longer, you can still guide yourself with these pictures, but it will take a bit longer for you to see the differences that we're seeing here from one week to the next.
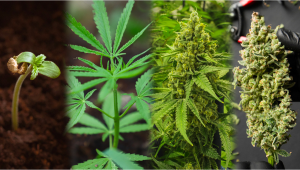
While most autoflowers are really THAT fast, photoperiod strains usually need at least 4 more weeks to become fully mature.
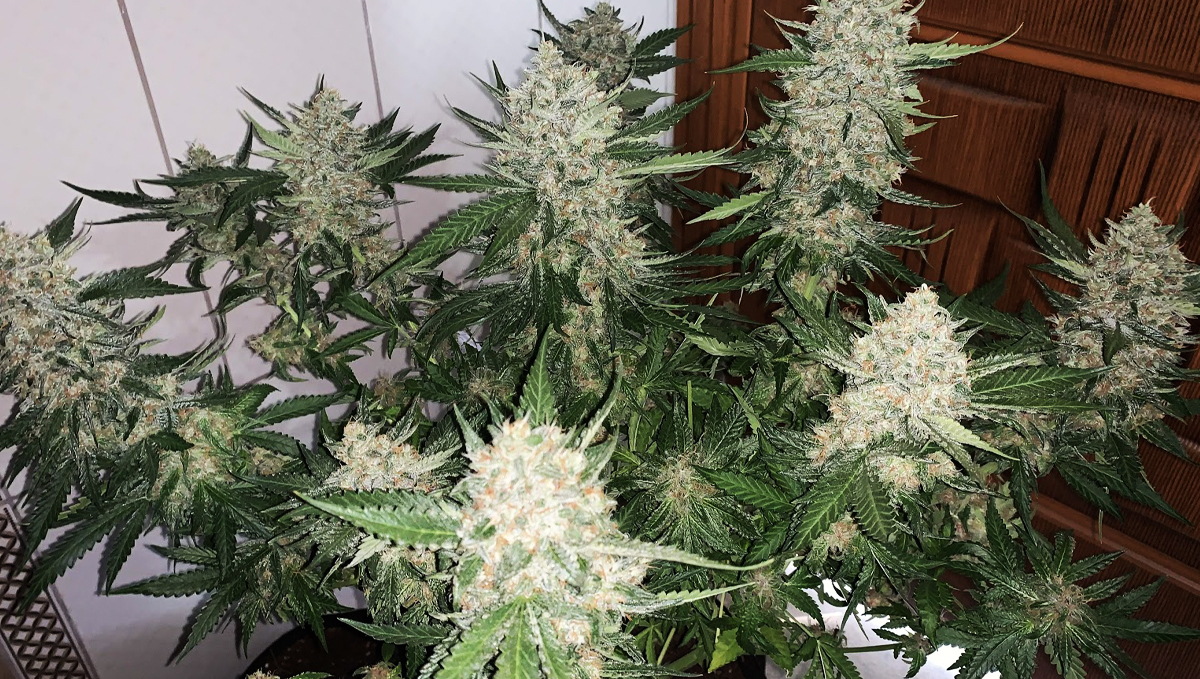
During the last days of flowering, there’s not much to do other than wait and, if necessary, start the flushing process. This process should be started when the buds are dense, and there’s no more visible growth from one day to another. You should flush for at least one week before harvesting to allow your cannabis plant to clean itself of the remaining minerals in it, depending on the type of medium, as flushing in organic soil is optional.
This will result in a flower with a better aroma and flavor. Without a properly cleaned flower, it’s impossible to get a genuine experience from strains with more subtle and multi-faceted terpene profiles, like Purple Lemonade Auto RF3.
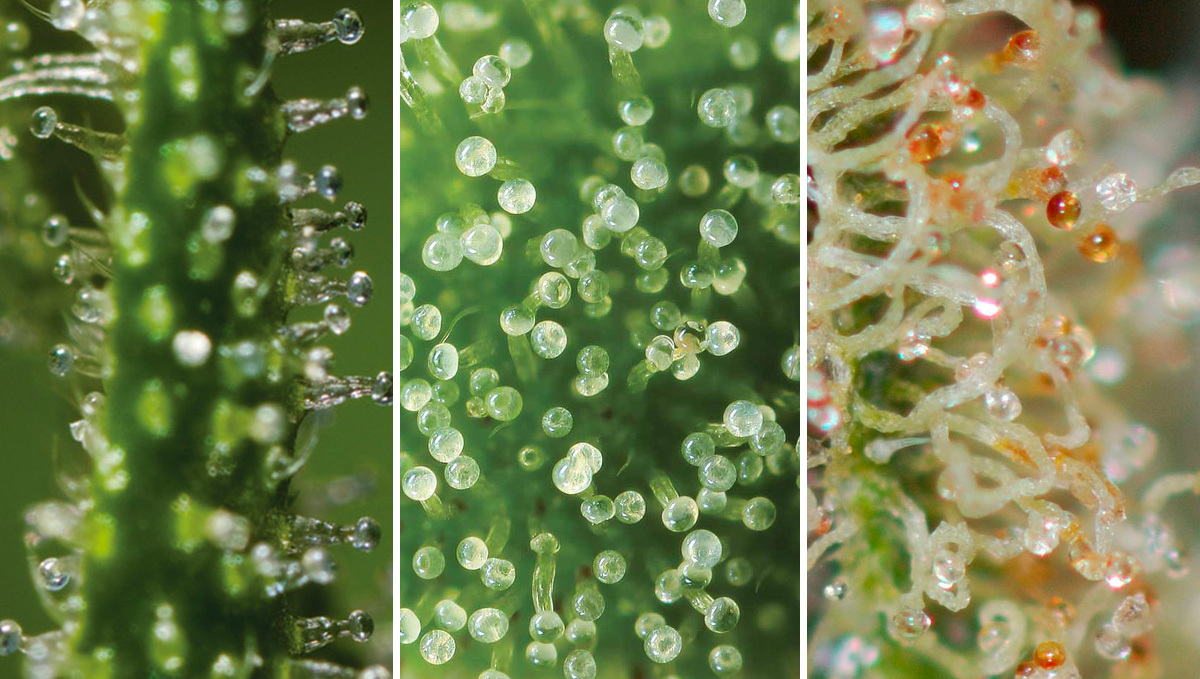
Now, you should know that the standard practice for when to harvest is the state of the trichomes; Trichomes can be clear, cloudy, or amber, and each one provides a different effect.
Clear trichomes are not completely mature, so the effect will not be strong, while cloudy trichomes are at their peak potency that provides a more cerebral effect, whereas amber trichomes will provide a more corporal effect.
So now that you know when to harvest for the desired effect, make sure your cannabis plants are bug-free and leave them in complete darkness for 48 hours.
In the meantime, prepare the dry room for the number of plants you will harvest in the following days. After removing them from darkness, they’re ready to be trimmed and harvested.
3. What You Need to Do After Harvest
Chopping down your plants is not the last step of growing cannabis. After harvesting your plants, you still need to dry, trim, and cure. So read along to learn more about these stages.
Wet Trimming vs Dry Trimming
Opting between wet vs dry trimming is super important, as it can affect potency, smell, and the smoothness of the flowers, but going for one or the other depends on your experience, preference, and drying conditions. In order to know what works best, you’ll need to understand them a little bit more.
Wet Trimming
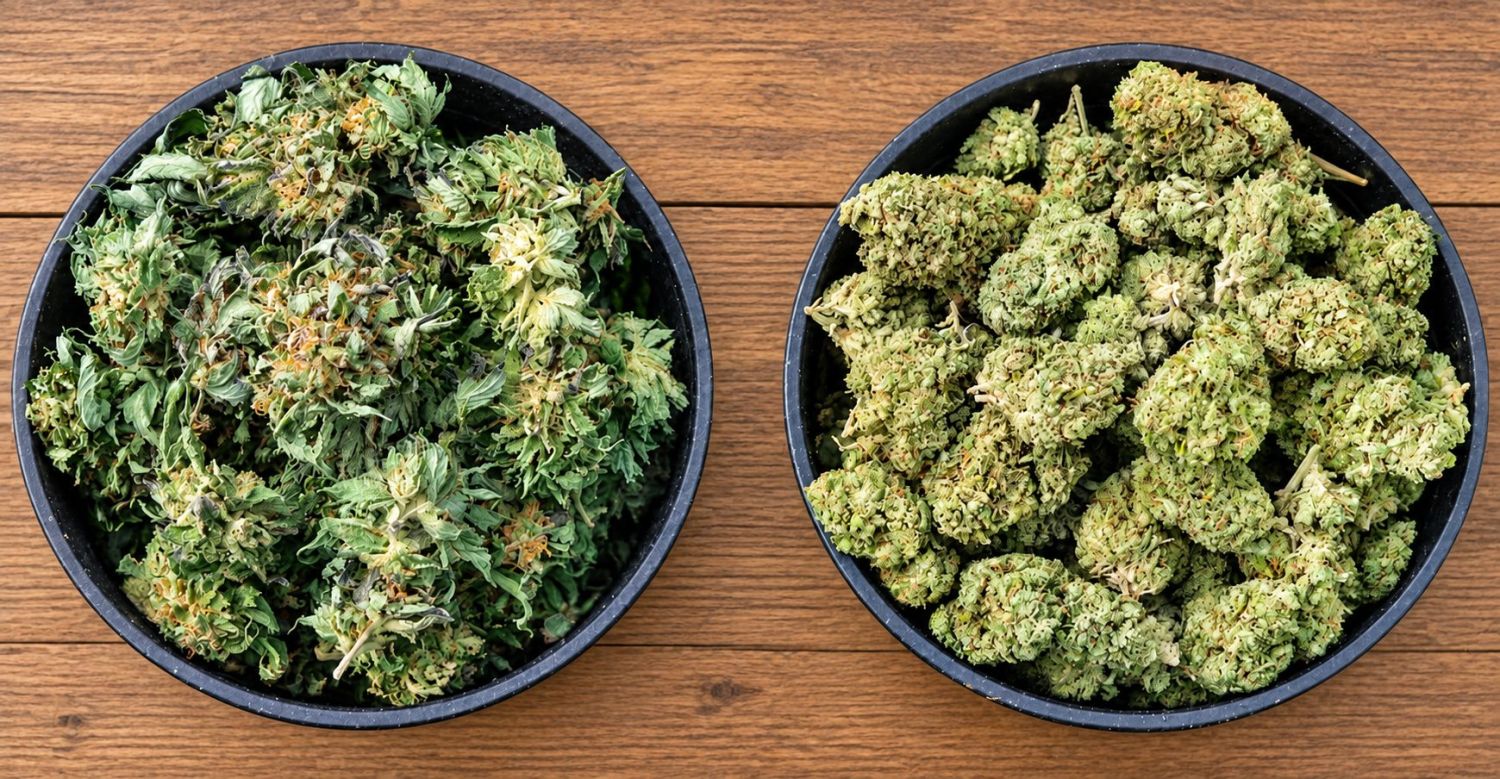
Wet trimming is when you trim your plants before drying, meaning that you have to remove the leaves right after chopping down your plants. This method is generally recommended when you cannot maintain optimal drying conditions of 15-20C and 55-60% relative humidity.
Pros of Wet Trimming
- Wet trimming makes it easier to remove fan leaves and sugar leaves because leaves tend to shrivel up when they’re dry.
- Wet trimming takes up less space as you’re not hanging the entire plant like you would when dry trimming.
- Fan leaves retain moisture, so wet trimming results in less chance for mold to attack your harvest.
Cons of Wet Trimming
- Wet trimming must be done immediately after harvest, which can take a lot of time depending on the number of plants you’re growing.
- Can reduce the quality of the flowers, as it can cause plants to dry faster than they should, affecting quality negatively.
- Wet trimming will get your hands and scissors super sticky, so you will have to clean everything with rubbing alcohol regularly.
Dry Trimming
On the other hand, dry trimming is when you trim your plants after drying for a couple of days or when the drying process is over, meaning that you will have to hang your plant whole (with all the leaves) and only remove them once the drying process is finished.
This method is generally recommended when you can maintain optimal drying conditions of 15-20C and 55-60% relative humidity.
Pros of Dry trimming
- Dry trimming allows you to have more control over the drying speed as leaves retain moisture, ensuring your plants don’t dry too quickly.
- Allows you to take your time when drying, making it an easier experience.
- Dry trimming usually results in a smoother smoke, as buds will lose more chlorophyll, which means your harvest will have a better flavor.
Cons of Dry trimming
- It can be more difficult to trim dry plants because the dry leaves can get stuck onto the flowers.
- Dry trimming means there’s a higher risk of mold due to the moisture in fan leaves when drying.
- Dry trimming requires more space as you’re hanging the entire plants, leaves and branches included.
Drying Cannabis Plants
After harvesting your plants, it’s time to hang them in the drying room. This process can help preserve and enhance the flavors while getting rid of chlorophyll, which gives flowers that plant taste.
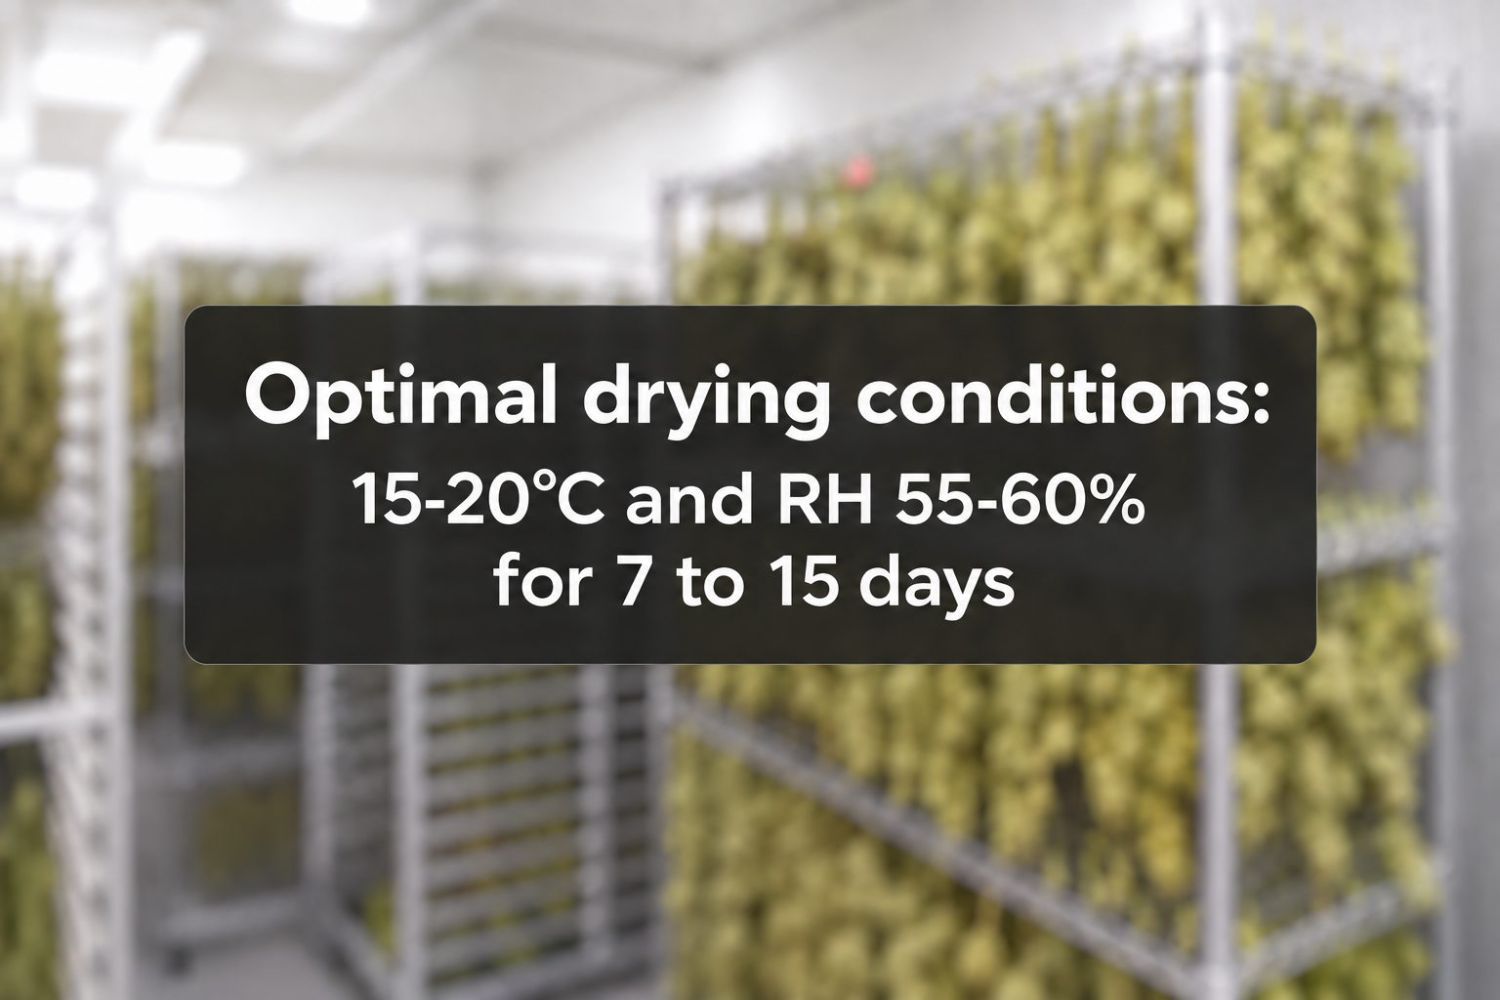
All you have to do is hang them upside down and keep the temperature between 15-20C and the relative humidity between 55-60%. The whole process should take anywhere from 7 to 15 days, depending on how you’ve trimmed your plants.
Curing Cannabis Buds
Once your flowers are dry and trimmed, it’s time to cure the flowers. For curing, you’ll need to store the flowers in glass containers to stop the loss of moisture and preserve the terpenes. Curing can take anywhere from 1 to 4 weeks or even longer, depending on your preference and strain. So all you have to do is place the buds in an airtight container with a small hygrometer, and ensure the relative humidity in the jars always stays between 58-62%. If it’s higher, it means that you need to burp the jar (open the lid for 30min or so).
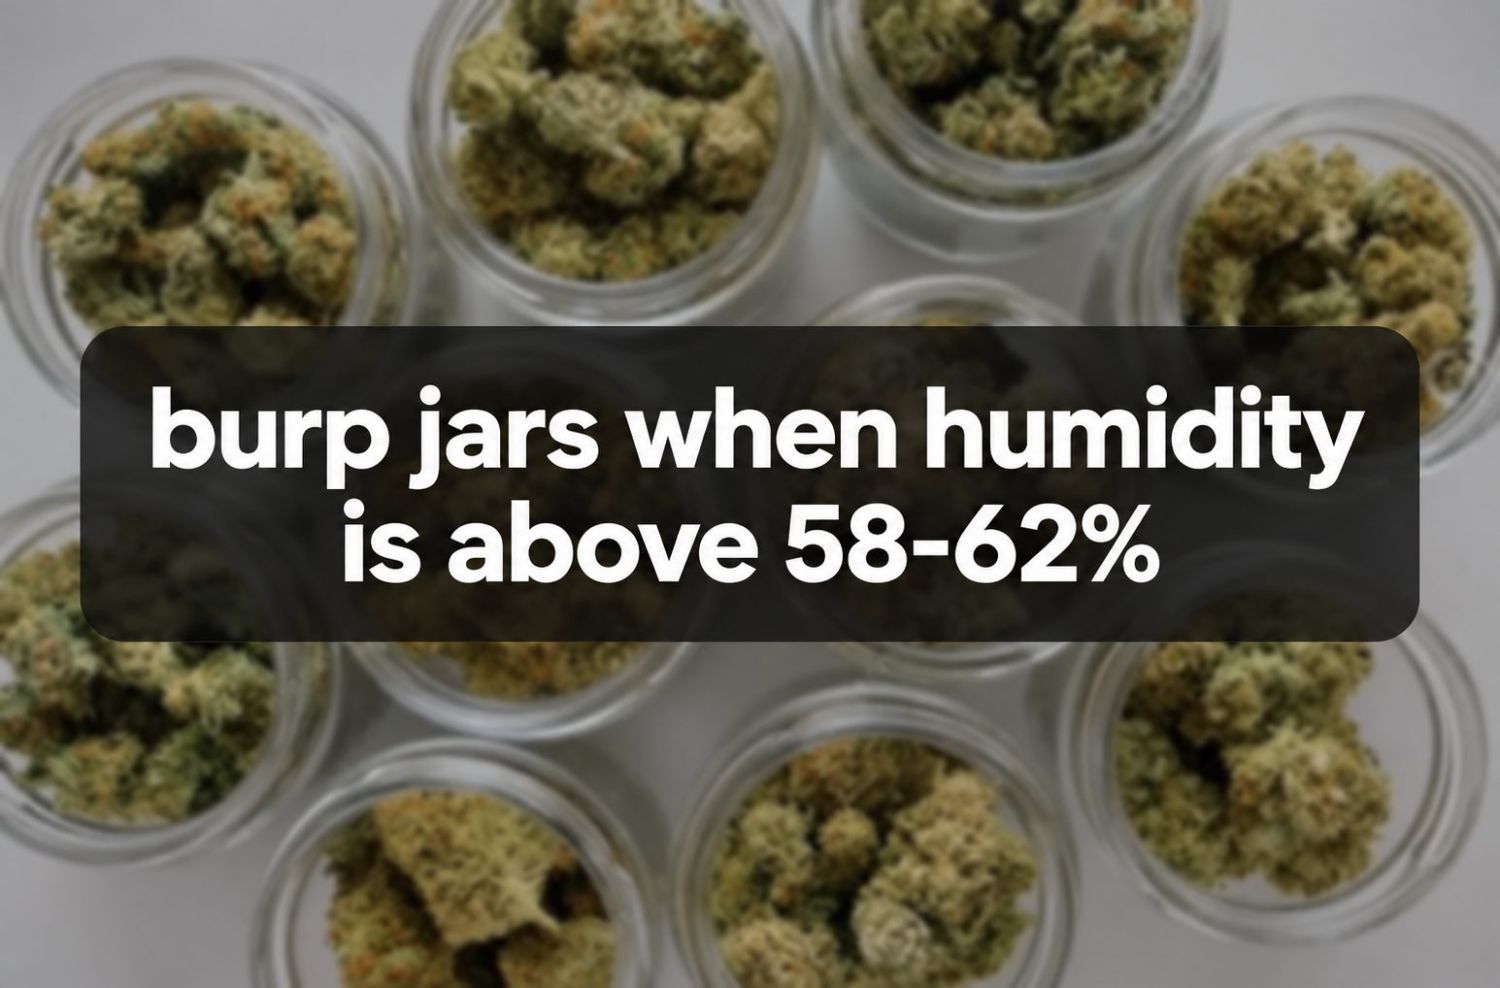
Once the relative humidity levels are back to 58-62%, you can put the lid back on. Repeat this process until the humidity in the jar stays at 58-62% after 1-3 days closed.
Cure and store your flowers correctly, and they will be good for up to 2 years or more.
Burping during Curing
As mentioned, during the first week of curing you will have to burp the jars to release excess moisture if the flowers have not been properly dried, so that covers curing. However, how to store your weed so that it stays fresh for as long as possible? Well, it’s quite simple; all you have to do is store your weed jars in the fridge. Why? Well, because the ideal conditions for storing cannabis are the same as drying: 15-20C and 55-65%, which is precisely what wine coolers and traditional fridges can maintain.
4. In Conclusion
The marijuana flowering stage is the final and most important of the marijuana growing stages. This is when we’ll see our precious buds developing. We’ll be able to see the buds taking form and feel that delicious smell we’ve been waiting to smell for so long. Remember that everything that happens in this stage will have a direct impact on the buds themselves, unlike in the vegetative stage. You have to be extra careful because the strong smell not only attracts bugs but also noisy neighbors.
Other than basic care, the weed flowering stage will be fairly simple to look after. Enjoy taking care of your cannabis plants. Keep them healthy, and you will enjoy even more when the time to smoke your flowers arrives. This article is brought to you by FastBuds, a seed breeding company with 10 years of experience in creating autoflowering strains. Our current collection ranges from auto versions of original classics to the most trending varieties of American dispensaries. We sell our seeds to both seed vendors and individual growers, providing unparalleled customer support.
FAQ
It all depends on the cultivation method and the strain you are growing. Photoperiod strains are sensitive to changes in light exposure, so they enter the flowering stage when daylight decreases to around 12 hours per 24-hour cycle. With an outdoor photoperiod crop, you can expect this transition to occur during the final weeks of summer or in early autumn.
When growing photoperiod plants indoors, you control when they begin flowering. They will remain in vegetative growth as long as they receive 18 hours of light and six hours of darkness each day. This allows you to determine how large the plants become before switching the light cycle to 12 hours of light and 12 hours of darkness.
Autoflowering strains work differently. Their built-in genetic timer causes them to transition from the vegetative stage to flowering after a predetermined period, regardless of the light schedule. This usually happens during the third or fourth week of growth.
Again, that is totally dependent on the strain you are growing. In most cases, it will last anywhere from 8 to 13 weeks for photoperiod strains, depending on the cultivar. Autoflowers are faster than their photoperiod kin, with most strains taking around 8 to 10 weeks from seed to harvest.
You will know that your plants are approaching harvest time when the buds begin to swell and become noticeably denser. The individual flowers, or calyxes, will also grow plumper, while the pistils—the small white hairs—may start turning red, orange, or brown.
For a more precise assessment of flower maturity, you will need to examine the trichomes. Their color is the most accurate indicator of a plant’s readiness for harvest, but trichomes are too small to inspect properly with the naked eye. A jeweler’s loupe can work well, but for the best results, we recommend using a handheld microscope that connects to a computer or smartphone. Choose one with a built-in light for clearer viewing.
The ideal temperature range during the flowering stage is 60–75°F (15–24°C). Temperatures above 82–84°F (28–29°C) can cause several flower-development issues. Buds may stop growing, become lighter and airier than expected, or show signs of severe heat stress. Excessive heat can also reduce terpene and cannabinoid levels. Conversely, temperatures below 60°F (15°C) may prevent the flowers from developing properly.
The ideal relative humidity range for flowering cannabis plants is 40–50%. Levels above 60% can encourage mold and bud rot to develop on the flowers. If the humidity falls below 30%, the plants may experience drought stress, which can cause numerous health and growth problems.
During the flowering stage, cannabis plants generally need more phosphorus and potassium and less nitrogen than they do during vegetative growth. If you use a premixed fertilizer, choose one formulated for flowering plants or with a higher proportion of phosphorus and potassium. Start with one-quarter to one-half of the manufacturer’s recommended dose, monitor the plants’ response, and increase the strength gradually if necessary.
If you prepare your own nutrient solution, keep nitrogen levels relatively low while providing sufficient phosphorus and potassium. Nutrient requirements can vary by strain, growing medium, and stage of development, so avoid relying on a fixed ratio without monitoring the plants.
Organic growers may not need to make significant adjustments, provided the soil contains a balanced supply of the necessary macronutrients and micronutrients. The plants and soil microorganisms can then access nutrients as needed.
An organic bloom amendment may also be used during flowering. Some growers add blackstrap molasses to their water to provide carbohydrates for beneficial soil microorganisms, along with small amounts of micronutrients. Use it sparingly to avoid upsetting the growing medium’s balance.
Again, this is totally dependent on how you want to run your grow. Some cultivators like to grow one single plant and let it veg for months upon months until it fills the entire grow space. If you live in a recreationally or medically legal state or country, you may be bound by certain rules and regulations that specify how many plants you are allowed to grow indoors at any one time. This can have an impact on how you want to run your grow. If you are free to do as you please, then do just that! If you are new to the world of cannabis cultivation, then we suggest trying a few different protocols and seeing which works best for you.
A flush is when you remove all nutrients from the soil, or growing medium, and replace it with plain water. This is done to help remove any residual nutrients that may have built up over time, as well as to help the plants prepare for harvest. If you are growing in a soil mix with organic products, flushing is optional. If you are growing in coco-coir, then a 3-4 day flush should work just fine. If you are running a pure hydro setup, then a single-day flush is good.
Comments