Cheese Auto Cannabis Strain Week-by-Week Guide

- 1. History
- 2. Specifications
- 3. Week-by-week guide
- 3. a. Week 1 - germination
- 3. b. Week 2 - vegetative stage
- 3. c. Week 3 - vegetative stage
- 3. d. Week 4 - vegetative stage
- 3. e. Week 5 - pre-flowering stage
- 3. f. Week 6 - flowering stage
- 3. g. Week 7 - flowering stage
- 3. h. Week 8 - flowering stage
- 3. i. Week 9 - harvesting
- 4. What to expect?
- 5. Drying, trimming, and curing your cheese auto harvest
- 6. In conclusion
1. History
This strain’s history is one of the most known and complete out there and dates back to 1988 in California. At that time, Sam (aka The Skunkman) who was a very successful breeder wanted to take his business to the next level without getting in trouble with the police, so due to the laws regarding cannabis in The Netherlands, he moved there and took Skunk #1 (his own strain) with him. He had developed this strain for a long time so it didn’t take long for his genetics to become famous all over Europe, and especially in Holland where the laws were less severe than in the rest of the world.
Skunk #1 was a truly unique strain but due to the super pungent smell, Sam wanted to develop his strain to make it easier to grow so he started breeding it to develop the same characteristics but with a weaker aroma, which resulted in a variety of phenotypes that quickly spread all over. As time went by, Sam started commercializing his genetics all throughout Europe, which helped spread his strain even more, and in 1995, a pack of his seeds reached the hands of a home grower in Exodus, a community just outside of South England. After harvesting a couple of plants, he realized that one of them had a truly unique smell and was like nothing he had seen before, unlike the other cannabis plants that he encountered, this one smelled like straight cheese and had much larger buds.
Because this was a small community, soon enough he started gifting clones and seeds of this specific phenotype and it was just a matter of time until it spread all over England, this gave the name to the Cheese strain, which got the name Exodus Cheese, referring to where it came from. Nowadays, almost 30 years after its discovery, Cheese’s smell is associated with a super potent effect and can be found on most seed banks around the world, even in autoflower form, and is present in most coffeeshops in Amsterdam.
2. Specifications
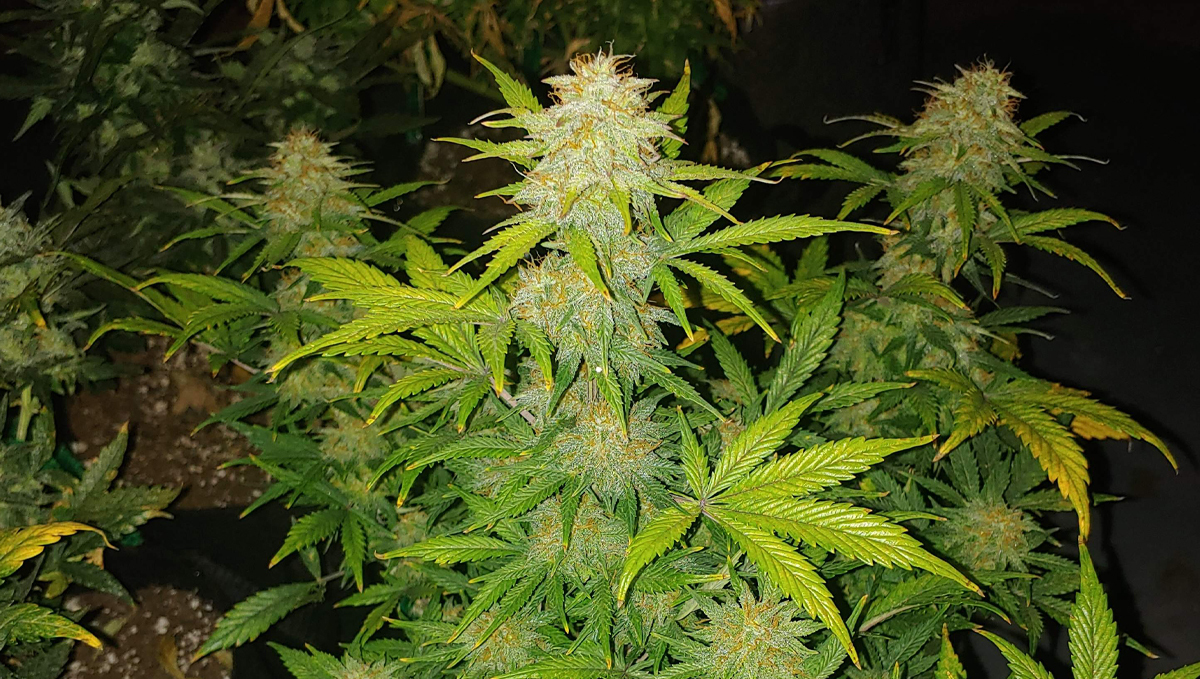
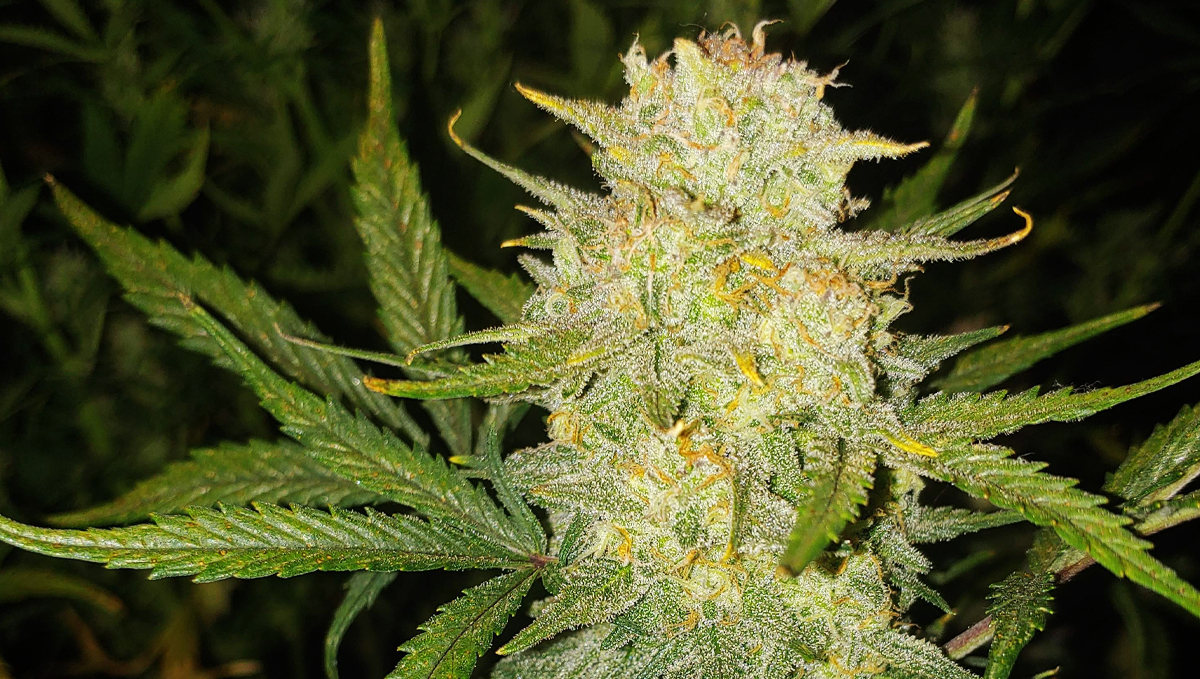
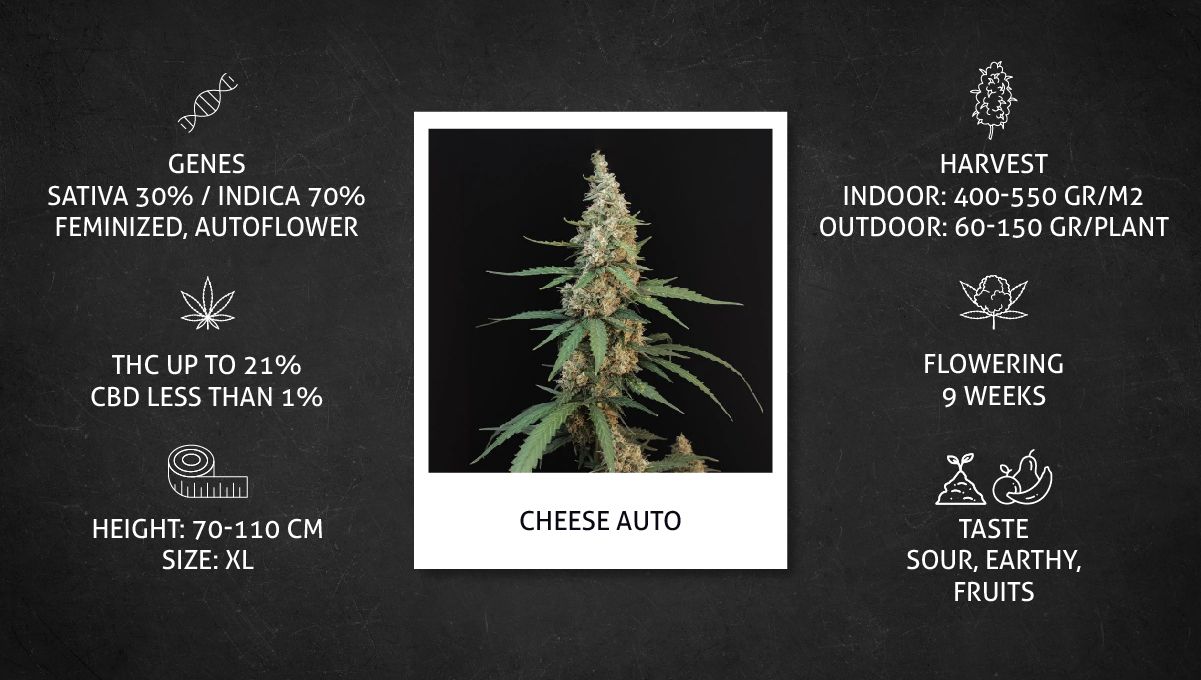
As said above, this strain is now present in most seed banks around the world and Fast Buds didn’t stay behind, our auto version of this world-renowned strain has been improved and resulted in a big yielding and highly potent terpene heavyweight with the same terpene profile that gave it its fame. This strain only takes 63 days from seed to harvest and is super easy to grow, making it ideal for every type of growers, including newbies who can expect up to 550gr/m2 (1.8oz/ft2) indoors or 150gr per plant (5oz/plant) while growing around 110cm and producing extremely dense buds.
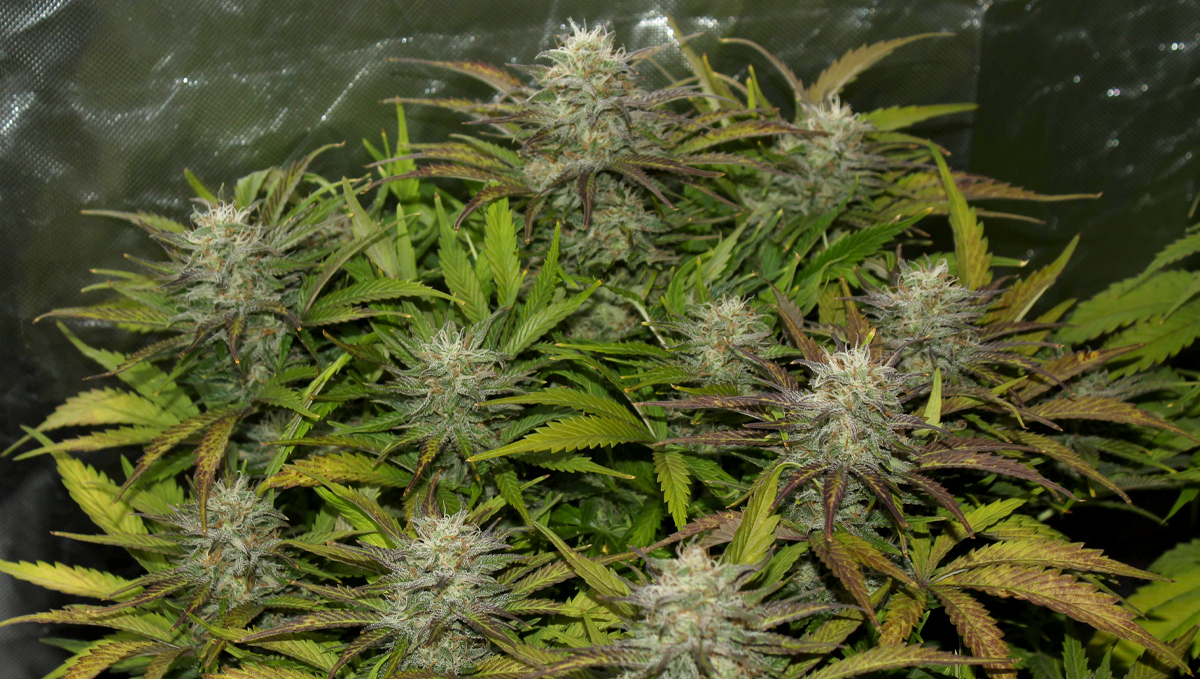
This is a truly potent strain that, thanks to the 21% THC, will leave you in a narcotic couch-lock state that will leave you melting on your couch, so definitely recommended for those with a high tolerance who prefer Indica-like effects. The powerful effect comes with an even more powerful taste, expect a sharp, sour, earthy, and tangy mix that makes it one of the most delicious on the market, producing the best strains for hash makers and extractors who are looking for unique genetics that will result in even more unique products.
Overall, Cheese Auto becomes the perfect companion whenever you want to drop everything and simply chill out. After taking several hits from a joint packed with these flowers, you’ll start to feel all of the weight lift from your shoulders; your worries will dissipate and you’ll feel a sense of peace fill your mind. So, what next? Well, we recommend playing some of your favorite music; the high will enable you to detect every single instrument and note. If you’re not in the mood for that, put on a film to get lost in another world. No matter what you choose to do while stoned, this strain will amplify the experience and make every second more fascinating.
3. Week-by-week guide
This article serves as a general guideline so growers know what to expect when growing this strain, here you can see the conditions kept throughout this grow report and the results obtained by several growers.
| Grow Specifications |
|---|
| Light Fixture: LED/HID |
| Light Cycle: 18/6 |
| Humidity: 45-70% |
| Temperature: 19-32°C |
| Grow Space: Indoor |
| Nutrients: Synthetic |
| PH level: 6.0-6.5 |
| Seed to Harvest: 9 weeks |
Have in mind that this timeline was made to help you, even though you’ll be able to grow your plants in most conditions, you should adjust your growing setup depending on the conditions.
Week 1 - Germination
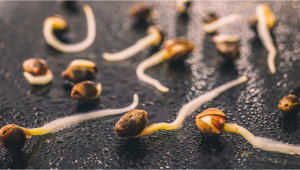
Week 1 is when this grow journal starts, as usual, the grower started by soaking a couple of Cheese seeds in a cup of water until they sank and left them for up to 48hs and as soon as the radicle appeared, planted them directly into the soil. Now, we usually recommend placing them in a paper towel but you can germinate them any way you want as long as you know what you’re doing.
| Height: 4cm |
|---|
| pH: 6.0 |
| Humidity: 65% |
| Temperature: 24°C |
| Watering: 100ml |
As you can see in the photos below, the seedling came out of the soil without a problem at all, maintaining the proper conditions ensures your plant comes out without any kind of problem, doesn’t matter if you’re growing in soil, perlite, coco fiber, hydroponics or any other substrate.
The whole germination process went very smooth! I just soaked... until they had sunk and then into their final home with the humidity domes on misting the soil under the dome as necessary...Humidity is lower in the tent than they would like so the domes will stay on as long as I can to try and keep it up. -L_BoB8817
You can not only germinate but have your whole plant cycle in any type of growing setup as long as you control and adjust the growing conditions, in this stage, you should keep the temperature between 18-25°C and the relative humidity around 70% for your seedling to grow how it should.
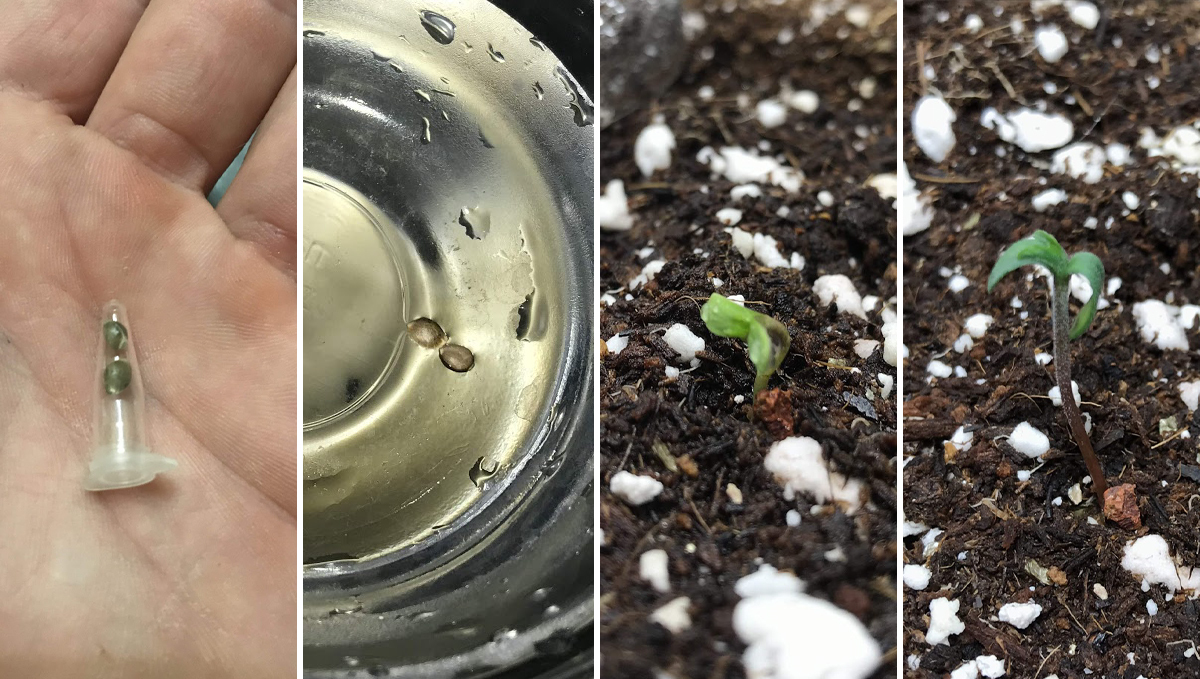
Have in mind that if you don’t have the appropriate tools to maintain the right conditions, there are ways to get around it, for example, this grower had a relative humidity of around 65% so by using a plastic dome (a plastic bottle in this case) he was able to maintain a high temperature, and as you can see, the seedling came out super healthy.
To keep things simple, there are three primary variables that you need to closely monitor to guarantee a successful seedling stage. Above everything else, you need to make sure that your seedlings are exposed to adequate light intensity the second that they start to break out of the soil. Run your lamp for 24 hours every day to maximize photosynthesis and avoid stretching and legginess. However, constant light alone isn’t enough. You’ll also need to determine that you’re providing the correct amount of light intensity. You can do this by either following manufacturing instructions when it comes to light distance, measuring lux using a lux meter, or measuring PAR using a PAR meter. Next, you need to go easy on the watering. Over-watering can easily kill seedlings by restricting oxygen uptake at the roots, and by creating anaerobic conditions that foster potentially lethal fungal pathogens.
Finally, don’t feed your seedlings! It might sound counterintuitive, but strong liquid feeds are toxic to small seedlings; For now, they’ll thrive off the nutrients already present within the growing medium that you sowed them in. Of course, unless you grow your weed hydroponically or in coco coir; then, you'll need to provide some nutrients right from week one, but start low and slow before increasing the dosages.
As a bonus, we suggest setting up a fan on the lowest setting and aiming it in the general direction of your seedling. Set it on too powerful a setting, and it’ll do some real damage. However, a gentle breeze will force your seedling to root down further into its container for security. It’ll also develop a more robust stem that will help it bear the weight of large branches and buds later on in the growing cycle.
Week 2 - Vegetative stage
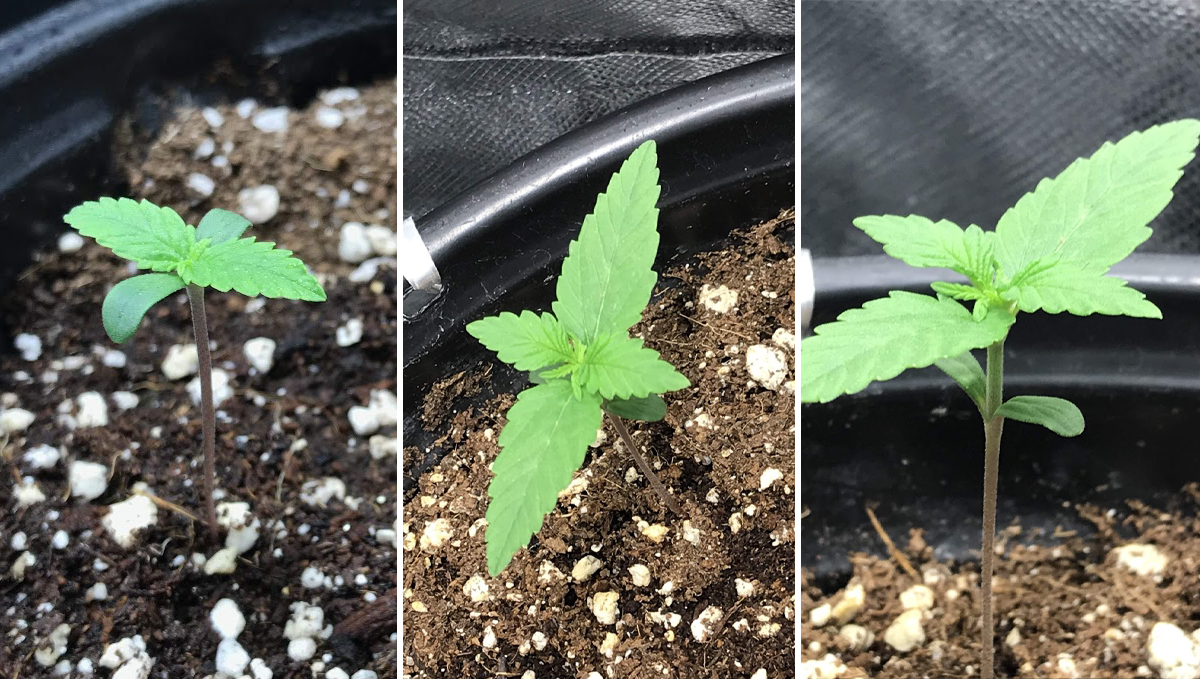
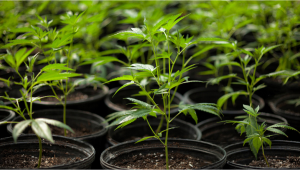
If everything goes as it should, this is when you’ll see your plant slowly start to develop leaves, the first one being a one-fingered leaf and the following will start to develop more fingers, starting with three and increasing as your plant grows.
| Height: 7.5cm |
|---|
| pH: 6.0 |
| Humidity: 65% |
| Temperature: 24°C |
| Watering: 150ml |
Now, every plant will grow at a slightly different rate, even if they’re the same strain so as soon as you see the second pair of true leaves (three-fingered leaves) completely formed, you can start feeding your baby plants a low dose of nutrients.
Great start on these... One took a little damage coming out of the seed. I have been alternating water, water, feed on them as the little ring dries out. Can’t wait for them to take off! -L_BoB8817
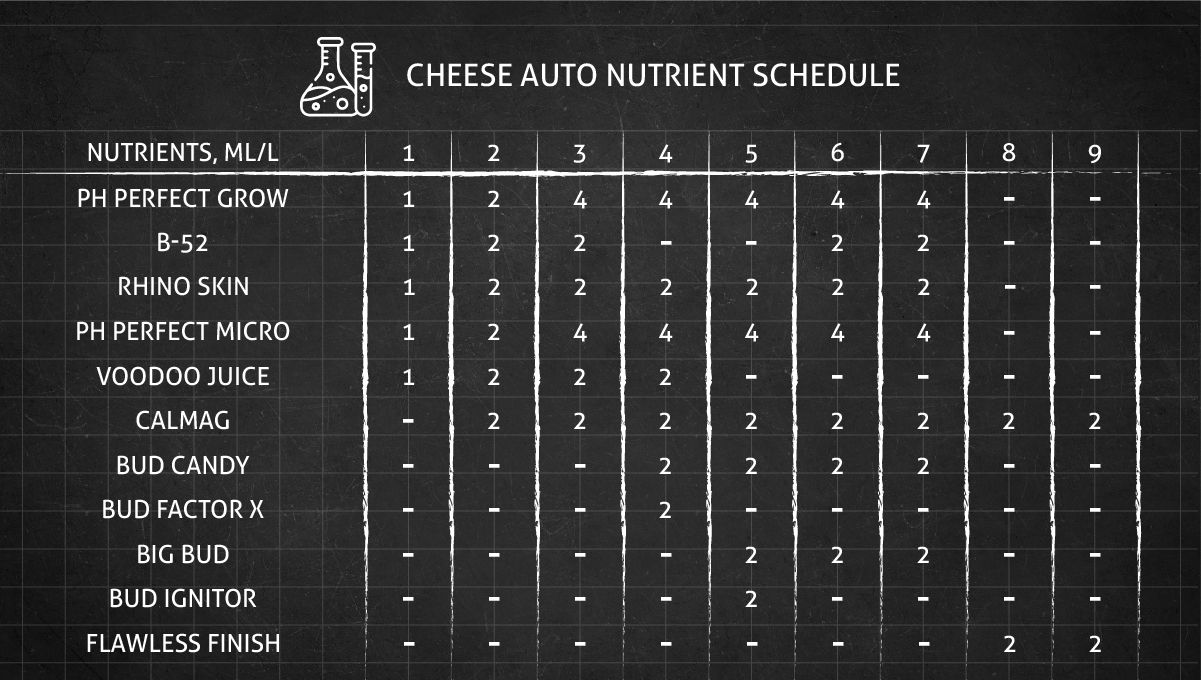
Cannabis plants need more Nitrogen to grow the leaves, branches, and stem so you should feed Grow nutrients in a 3-1-2 ratio but remember that seedlings are quite fragile so make sure to make a really light nutrient solution.
Also, depending on the medium and nutrients, you should try to control the pH and PPM because plants depend on specific pH levels (depending on the medium and nutrients) to be able to absorb nutrients properly. There are growers that don’t really control this but your plants will end up being healthier and maybe grow more if you are controlling every aspect of the growing conditions, which will result in better quality and higher yields.
Week 3 - Vegetative stage
In the third week from germination, your plant should have the roots well-established, this may take longer if you have transplanted or accidentally overwatered but if everything goes as it should, you will see your plant growing exponentially.
| Height: 10cm |
|---|
| pH: 6.0 |
| Humidity: 50% |
| Temperature: 28°C |
| Watering: 250ml |
As said above, if everything goes correctly you plant should have developed from 2-4 pairs of “true” leaves and if you’re planning on performing any type of plant training, now would be the right time.
These autos are just cruising along pretty well. They are in my veg tent just getting light nutrients. -SAC87
Plant training (either LST or HST) is recommended when at least 3 pairs of leaves, you can start before if you have experience growing autos and with plant training but usually it’s best to wait until your plant is a bit stronger. We usually recommend only LST on autos such as SCRoG, SoG, or tying down the branches but depending on your experience, you can have great results by topping or fimming.
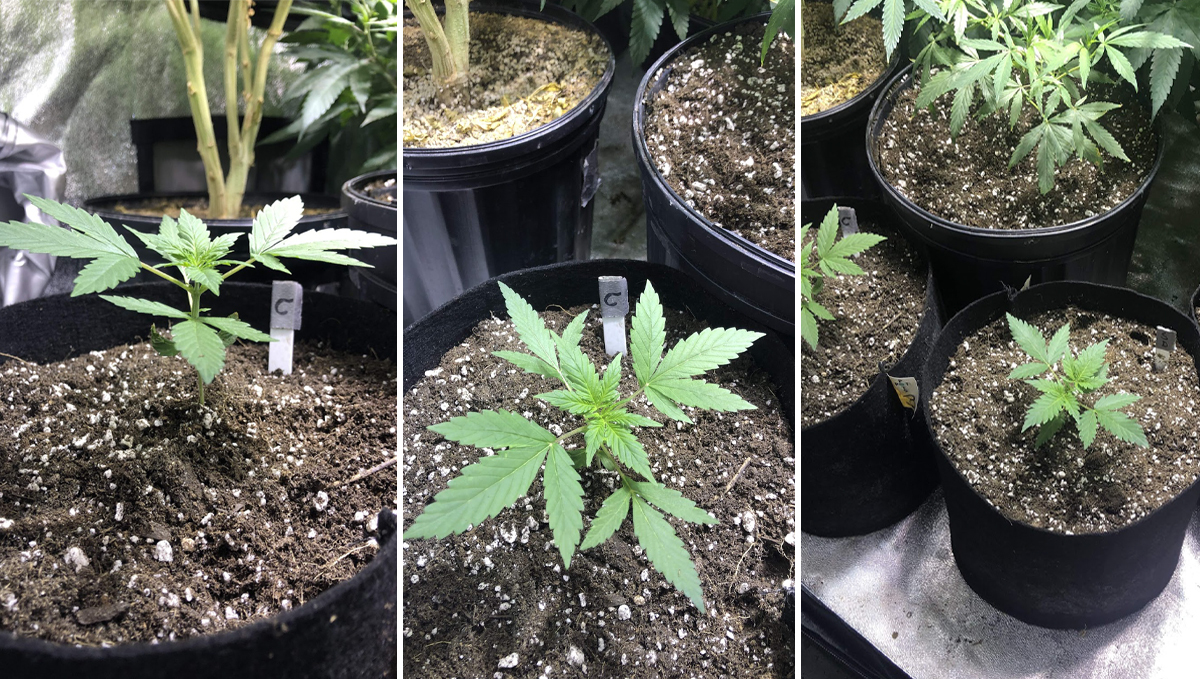
Have in mind that even though HST will stress your plants more, even LST can end up stressing your plants so have in mind that you should do it gradually and carefully, maintaining the best conditions possible to allow your plant to recover as fast as possible without affecting its growth.
Week 4 - Vegetative stage
If you’ve done everything properly, week 4 marks the week before the pre-flowering stage and throughout this week you’ll see the flowering sites slowly turning light green, just have in mind that if the leaves are turning light green it’s most likely a sign of nutrient deficiencies but if the only thing turning light green are the flowering sites, everything is as it should.
| Height: 20cm |
|---|
| pH: 6.2 |
| Humidity: 75% |
| Temperature: 32°C |
| Watering: 500ml |
By week 4 you should already be feeding a full dose of Grow nutrients, always keeping an eye on your plants to avoid overfeeding, also, if you’re not growing feminized seeds, keep an eye open for male plants because male plants usually mature 1-2 weeks before female plants and if the pollen sacs open up and release the pollen, it will pollinate all of your buds.
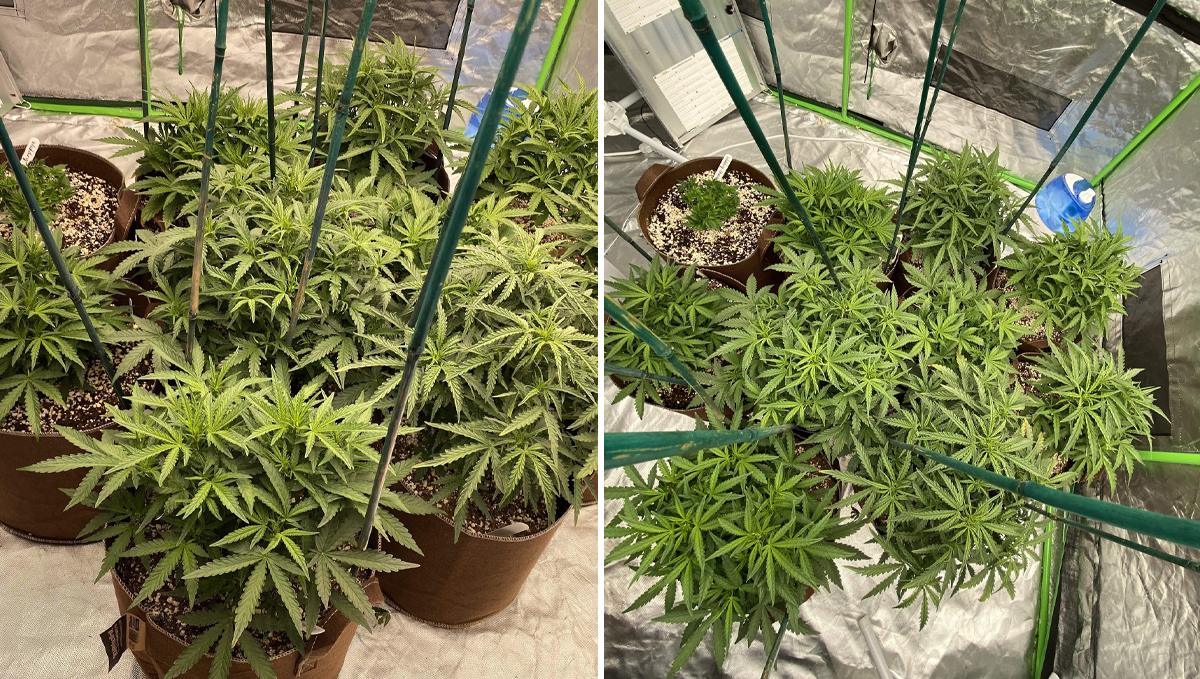
Obviously, in this case, all the seeds are feminized and will result in female flowers (buds) so there’s no need to worry about male plants but if you’re growing autoflowers and photoperiodic plants in the same grow tent, you should be very careful.
Week 5 - Pre-flowering stage
The fifth week from germination marks the beginning of the pre-flowering stage, as you will see in the photos below, the flowering sites have turned light green and even though there are no signs of stigmas yet, they will begin to appear in the following days. As soon as your plant enters the pre-flowering stage you should gradually start to lower the amount of Grow nutrients and slowly start feeding Bloom nutrients which are used throughout the whole flowering stage to produce buds.
| Height: 25cm |
|---|
| pH: 6.0 |
| Humidity: 50% |
| Temperature: 28°C |
| Watering: 1000ml |
Good quality Bloom nutrients should provide Phosphorus and Potassium while also delivering the micronutrients your plant needs, now, have in mind that you don’t always will need to provide micronutrients such as Calcium and Magnesium among others because, for example, some soils already contain the amount your plants need but if you’re growing in sterile mediums like coco fiber or perlite, you will have to provide them by yourself.
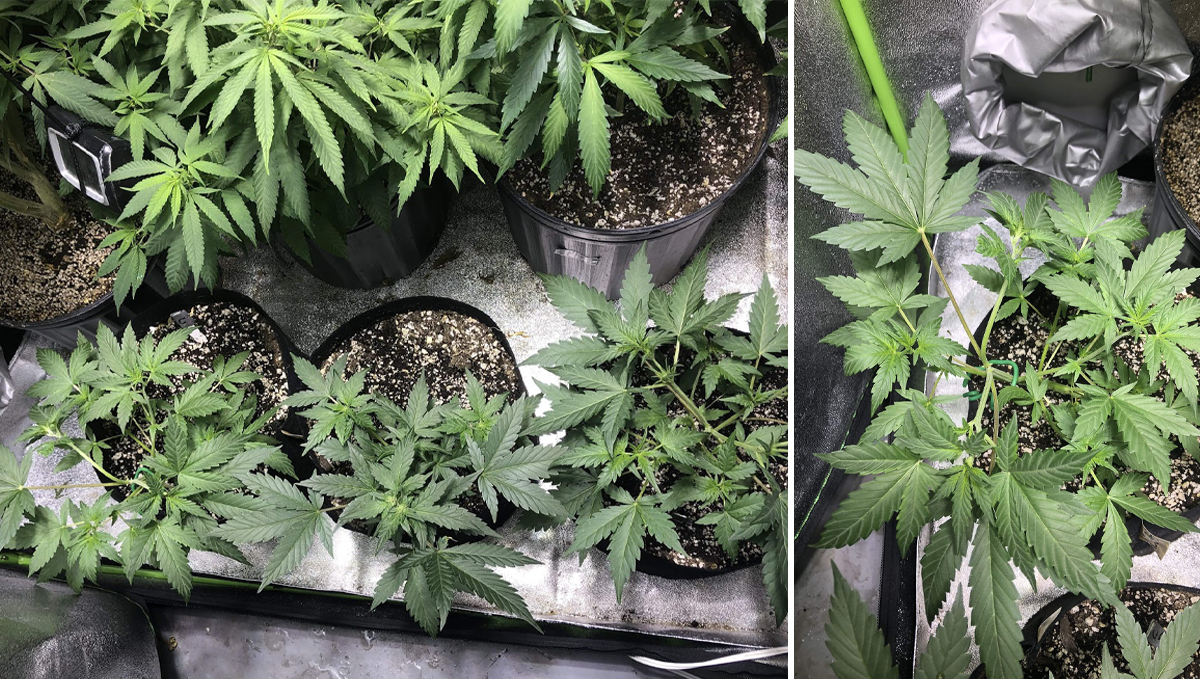
Remember that cannabis thrives in certain conditions so it’s essential to maintain these conditions, especially during the flowering stage, you should keep the relative humidity around 55% and the temperature between 18-25°C. Also, if you were doing any kind of plant training, you should stop now because your plant is getting ready to produce flowers, and stressing it now can end up affecting the quality and quantity produced.
Week 6 - Flowering stage
By week 6 your plant should be in full-flowering mode and you will see a growth explosion, as each day passes by you’ll see trichomes slowly appearing and the delicious cannabis smell starting to come through. If you still haven't installed a carbon filter, you should do it now because some plants can have a really pungent smell and that’s the case with this strain, the powerful terpene profile can be smelled from afar so make sure you have a way to eliminate or at least mask the smell.
| Height: 50cm |
|---|
| pH: 6.5 |
| Humidity: 45% |
| Temperature: 30°C |
| Watering: 1700ml |
When the buds start to form, they will start reeking of that classic cannabis smell and that can end up attracting bugs so it’s vital that you check for bugs and mold every day, remember that bugs can appear at any moment and in just a matter of days they can end up gravely affecting your plants so if you see any bugs wandering around, it’s better to take preventive measure before they start feeding on your plant.
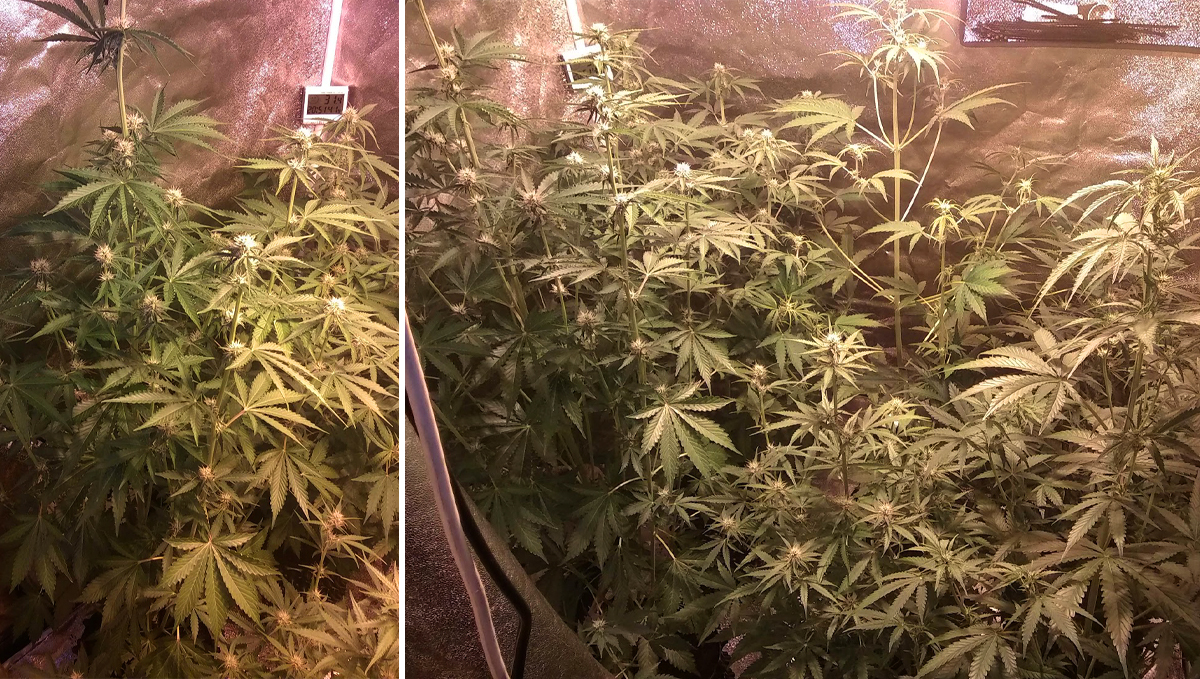
Some good ways to prevent bugs from reaching your plants is to have several yellow sticky traps in your grow tent, and if you’ve had problems with bugs before, spray a light mix of organic pesticide on your plants and all over your grow tent, although this is not recommended because it can end up affecting how your buds taste and smell, it’s better to do it than end up with no plants at all.
Week 7 - Flowering stage
Week 7 marks the second half of the flowering stage, these are the final weeks before your plant is ready for harvest, by now you should already be feeding a full dose of Bloom nutrients, always looking out for signs of deficiencies that can end up affecting the buds and you don’t what that to happen at this stage.
| Height: 70cm |
|---|
| pH: 6.5 |
| Humidity: 45% |
| Temperature: 30°C |
| Watering: 1800ml |
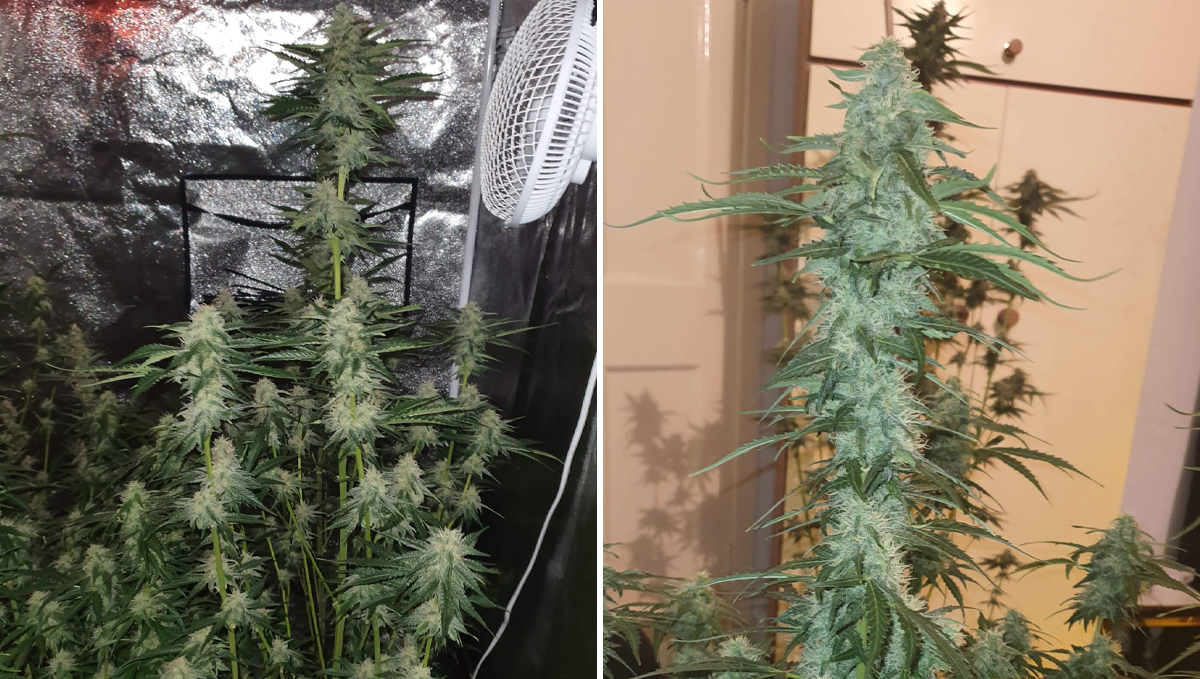
This strain can grow up to 110cm but the growing conditions may end up affecting how tall your plant grows, but that’s not the case with this one, this plant really stretched a lot and ended up being huge but that may not be the case for every grower. If your plants are not growing as big as you want to, make sure to check the humidity, temperature, nutrients and the amount of water you’re watering with, all these factors can end up affecting how your plant grows.
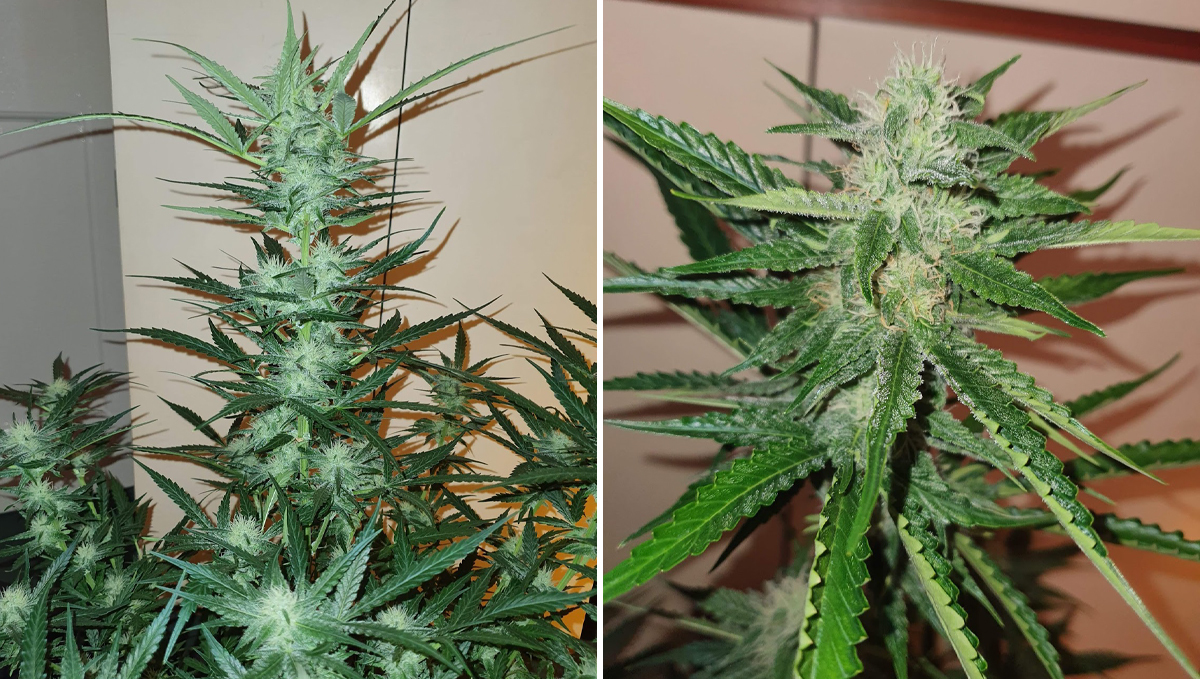
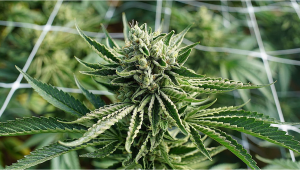
As you can see in the images above, the buds are almost fully formed but still need a couple of weeks to fatten up a bit more and for the trichomes to fully mature, so keep up the good job, it won’t take long until your plants are ready for harvest.
Week 8 - Flowering stage
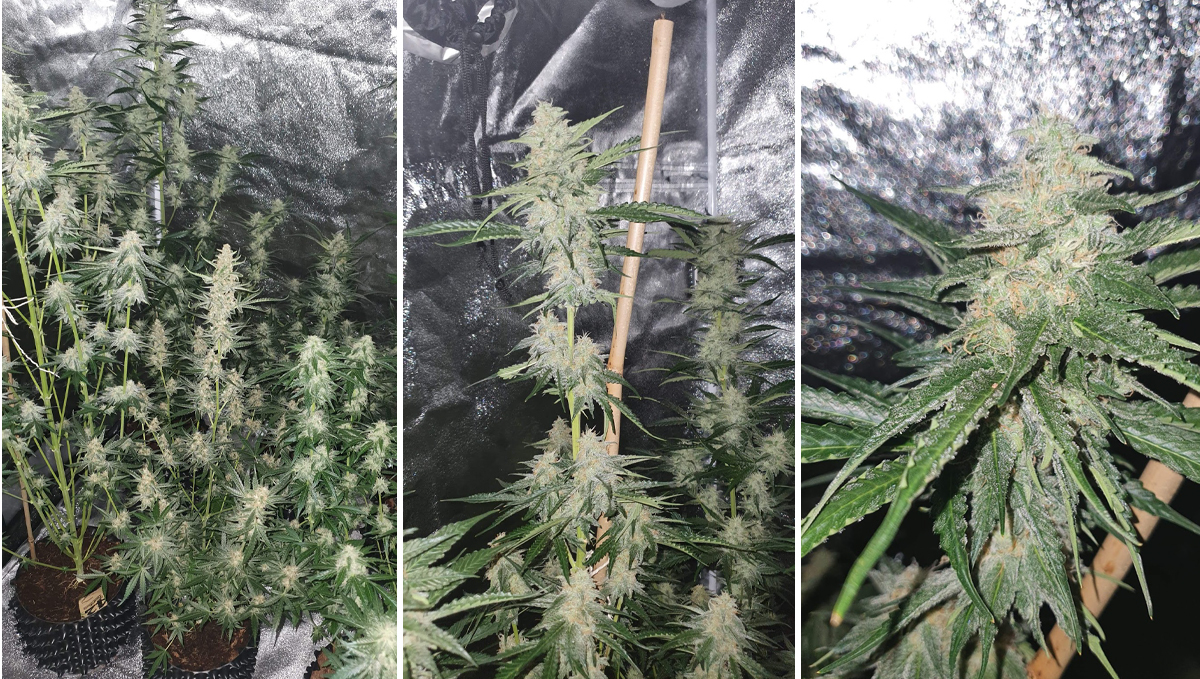
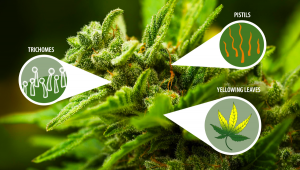
Week 8 marks the week before the last of this grow cycle, by now the smell should be super pungent and some stigmas should be starting to turn brown and wilt, remember that although stigmas are a way to know if your plants are ready to be chopped down, you should wait until the buds are as dense as they can be and look at the state of the trichomes, which is the standard practice to know exactly when to harvest.
| Height: 95cm |
|---|
| pH: 6.5 |
| Humidity: 45% |
| Temperature: 29°C |
| Watering: 1800ml |
To be able to see the trichomes clearly, you’ll need a jeweler’s loupe or a microscope, these tools are not obligatory but will help you know when to harvest exactly, also, depending on the type of nutrients you’re using, you should get ready to start flushing to wash the salt build-up from the roots and medium, this will enhance the flavor and aroma of your flowers.
Have in mind that when flushing, you should also check the pH and PPM because water can contain trace elements and you don’t want to feed your plants any more minerals when flushing, the goal is to wash off the excess nutrients and not feed more.
Week 9 - Harvesting
This is the last week of this grow cycle, in the next couple of days you’ll be harvesting your plants reap the rewards of your efforts, when flushing, you will see the leaves starting to turn yellow, this could be a problem in any other stage but when flushing it’s completely normal and it’s a sign that the plant is not absorbing minerals anymore, so you’ve flushed correctly.
| Height: 95cm |
|---|
| pH: 6.5 |
| Humidity: 45% |
| Temperature: 29°C |
| Watering: 1800ml |
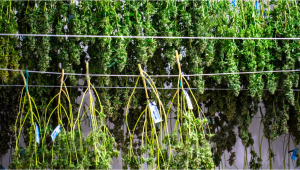
Remember than before smoking your flowers you still have to dry and cure them so you should start getting your drying room ready, it doesn’t matter if you’re drying in a cardboard box, grow tent or inside your closet, make sure you check the temperature and humidity and adjust everything so that your buds dry properly.
Start of week 9 I have stopped giving them ... pk 13/14...I Will feed them this ...week and... flush with just ph water. -Formedicalneeds
When drying your buds the smell will be as strong as the last weeks of flowering, so to avoid attracting unwanted attention, make sure to have a carbon filter or odor neutralizers to help you mask the smell.
4. What to expect?
Now that your plants are drying, you have to wait around 2 weeks before you can start the curing process, if you’re eager to know what your buds will taste like, here’s what our growers reported. You can expect a strong earthy, fruity, and sour tangy aroma that tastes just as it smells, an ideal strain for extractors and hash makers, this pungent terpene profile consists of the following main terpenes:
- Humulene
- Limonene
- Myrcene
- Caryophyllene
But the strong effect and flavor comes thanks to the mix of primary and secondary terpenes seen in the chart below.
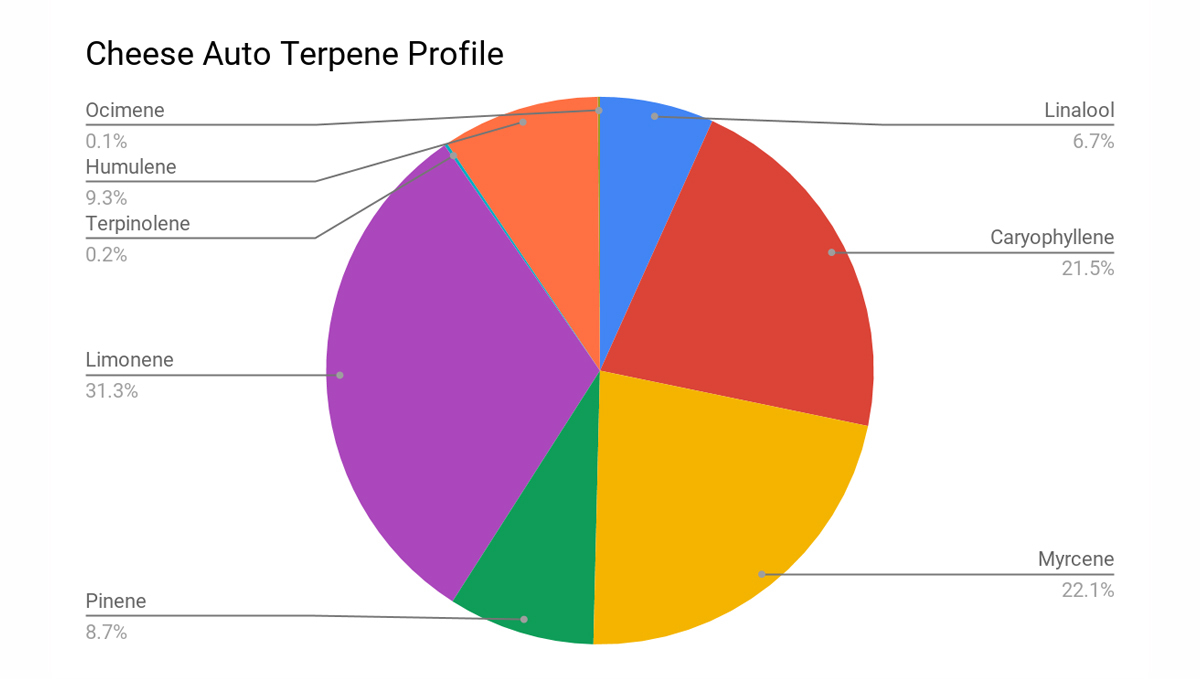
This terpene blend ends up smelling like straight cheese!
Extremely cheesy flavor and smell! True to its name and origin for sure! Fat dense buds! With ideal perfect structure! A definite recommendation and of premium quality! -416fireman
This unique terpene profile results in a 30% Sativa and 70% Indica effect that offers an extremely narcotic couch-lock effect that will have you melting in the nearest chair, a great strain for smoking after a long day of work.
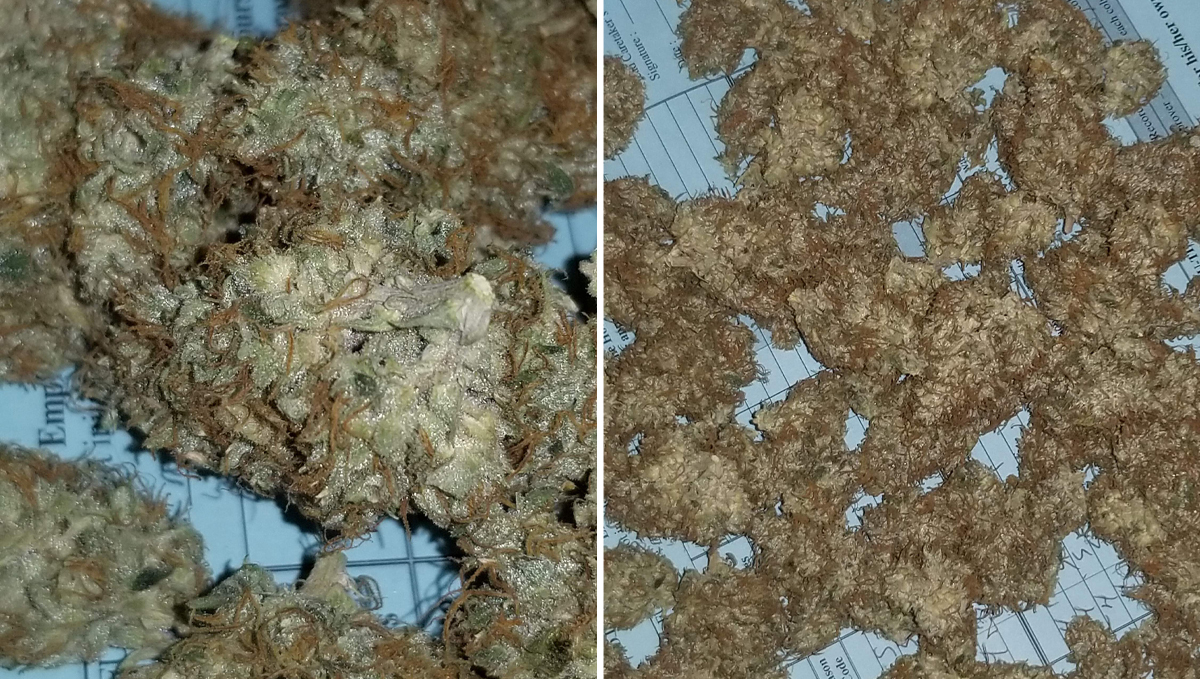
Growers haven’t reported any negative effects other than dry mouth which shouldn’t be a problem at all if you’re an avid cannabis consumer.
5. Drying, Trimming, and Curing Your Cheese Auto Harvest
Think all the hard work is over and done with? Hell no it ain't! Growing the weed is honestly just half the battle. How you treat the crop once harvested has a huge impact on the quality of the final product, and the importance of the drying, trimming, and curing process should not be overlooked or underestimated. Let’s have an in-depth look at exactly what steps need to be taken next to ensure you end up with the best possible final product.
Drying your harvested cannabis crop
A quick google search on the best way to dry weed will yield a wide range of results. It seems like everyone and their mom have differing ideas on the best way to dry weed, but if you follow our guide we can all but guarantee success. One thing that everyone agrees on is the need to control the environment in your dry room. When drying your crop, you want the process to be in the “Goldilocks zone” - not too hot and not too cold, just right. A slow and controlled drying process guarantees proper terpene and cannabinoid maturation which is exactly what we are looking for.
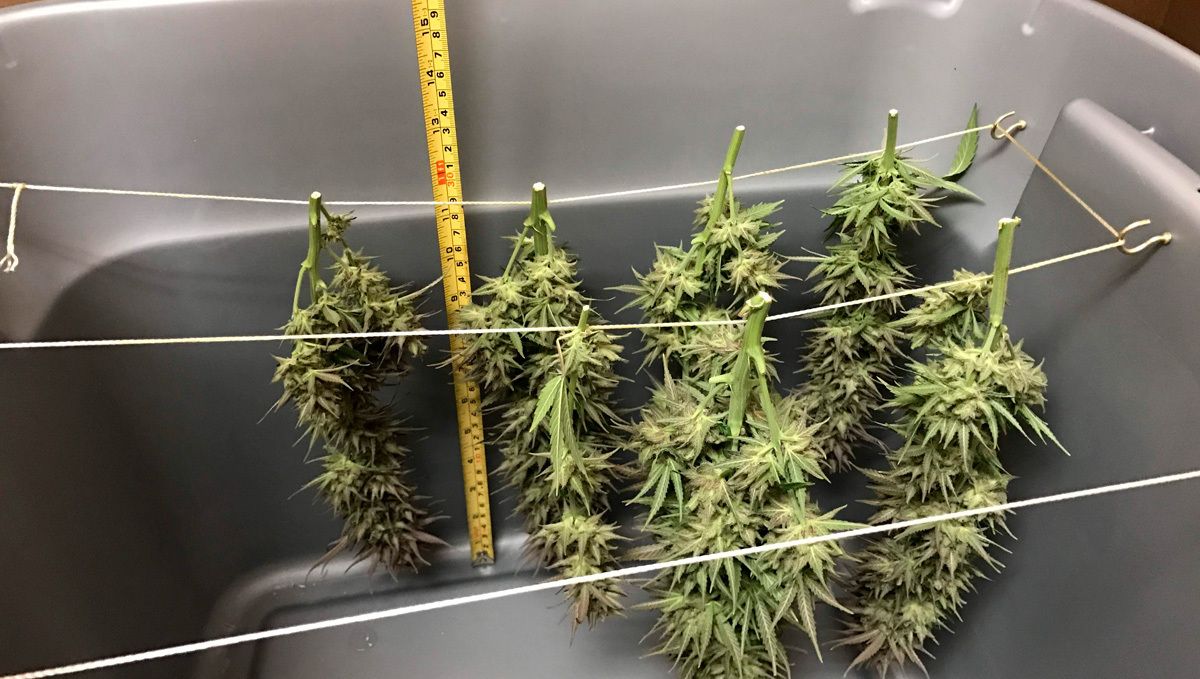
You want your dry room to sit in the 60 - 70°F (15 - 22°C) range. Any warmer than this and your crop will dry too quickly, resulting in terpene degradation. Any cooler and you run the risk of mold issues developing, especially if the humidity levels are too high. On the topic of humidity, you want to try and keep the drying room at a relative humidity of 55 - 65%. If you can keep these two environmental factors within these ranges you should find that the crop dries slowly over a period of 10 to 14 days, which is absolutely perfect.
Terps are probably the most talked-about aspect of the chemical makeup of cannabis right now. Why you ask? Well, the more research that is conducted, the more it seems that the old Sativa/Indica split seems to be going out the window. We are slowly coming to understand that it is the overall chemical makeup of a particular strain that gives it its unique high, and that includes how the terps interact with the cannabinoids. Sure, terpenes on their own are not psychoactive, but they do play an important role in how THC and other cannabinoids are processed. If you live in an area where the ambient conditions do not match up with the requirements for drying you may need to invest in a humidifier (or dehumidifier), an AC unit, and some fans. Most important is a hygrometer, but you should already have one of these for the grow room to keep tabs on humidity and temp levels.
When you are drying your plants, you have a few options to consider. First up you need to decide on wet or dry trimming. Both come with their own range of pros and cons, but for the most part, we recommend dry trimming. The only time we suggest wet trimming is if you live in an especially humid climate. Next up, are you going to dry the plant whole or break it down? We suggest trying a few different options and seeing what works best for you.
Ok, the buds have dried perfectly over a 10 to 14-day period. What's next?
Trimming time! This is, without a shadow of a doubt, the most labor-intensive part of cannabis cultivation, especially if you are dealing with a big harvest. When trimming buds you need to be really careful not to “shave”, but instead use a nice sharp pair of scissors to dig carefully into the buds and snip the base of the sugar leaves, leaving the calyxes and the rest of the flower structure untouched. Even if you only have an ounce or two to trim, go out and buy yourself a decent pair of trimming scissors and a dedicated trim tray.
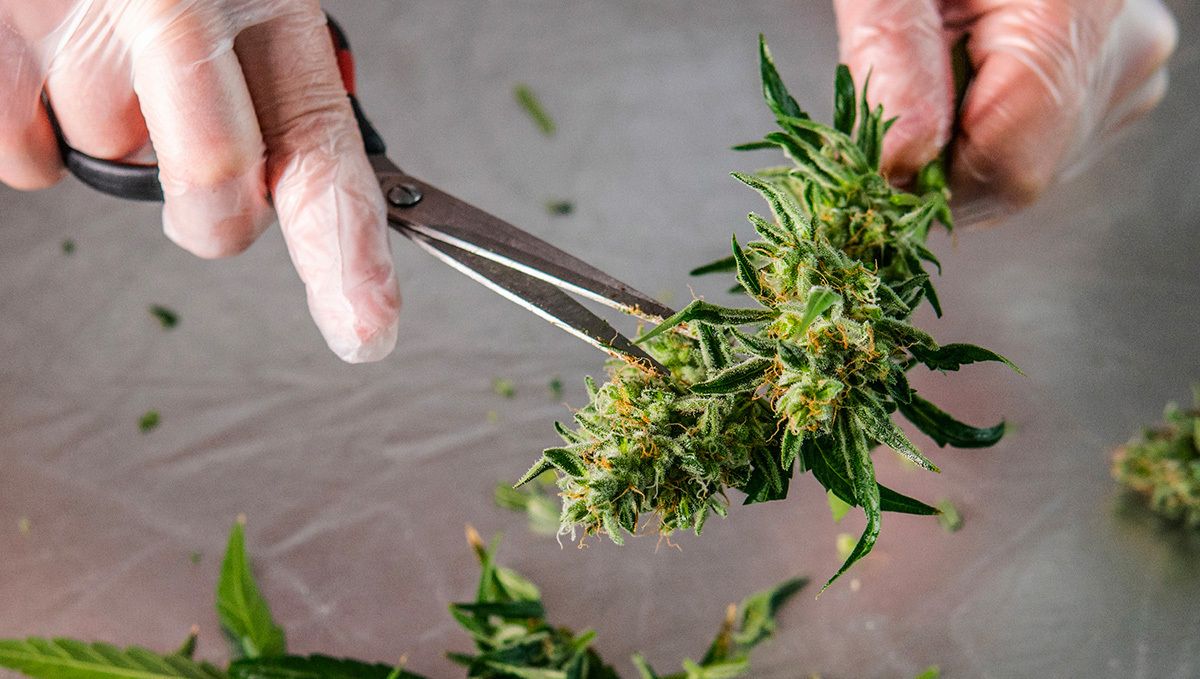
Your blunt old pair of school scissors are not the right tool for the job and will end up slowing the process down hugely. For a trim tray, you can’t go past the OG Trim Bin. Isopropyl alcohol is also great to have on hand to clean the scissors, as those resin-covered nuggets will clog up the cutting action pretty quickly.
Now comes time to cure the harvested weed
The more we research, the more we understand that curing weed is just as important as giving the plants the right conditions during the growing and flowering stage. Terpene and cannabinoid maturation is a slow process and required careful control of both the ambient temps and the relative humidity. For curing, you just need some airtight containers and a bunch of patience. Is curing absolutely vital? Yes and no. Sure, the weed you have in your hands now is fine to smoke. Great even. But if you want the best possible product then you need to let it sit and mature for at least 2 weeks, if not much longer. Just like drying, this is a heavily discussed topic among cultivators, but certain aspects are agreed upon.
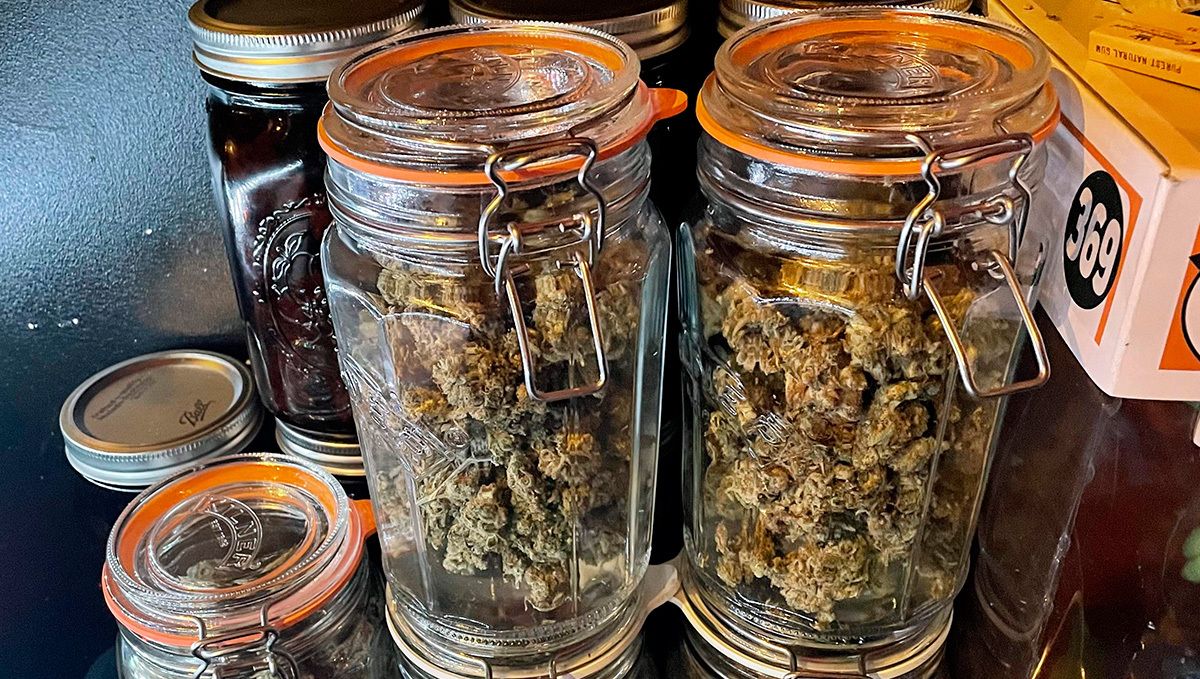
You want to carefully place your buds in your airtight containers and never fill past the 75% point. For the first 7 to 10 days you need to burp the containers morning and night. After the 10-day point, they only need burping twice a week. Store them in a dark place that sits around the 70°F (22°C) mark, and with a humidity level of about 60-65%. Depending on the strain, the curing process may be all finished after 2 weeks, but it may take a month or even 6 months.
It's an inexact science, so keep a close eye on the buds and see how it all goes. Weed is much like a fine wine or whiskey, it just gets better with age (to a certain point and if kept in controlled conditions). If you live in an area where weed is illegal, you may have never even seen properly cured weed. Trust us when we say it is a sight to behold and an absolute pleasure to smoke!
6. In conclusion
If you’re looking for an Indica-dominant strain that will help you sleep or relax your whole body, this is just for you! Our auto version of this classic is a must for everyone looking for a strain with medicinal properties or for those just looking to relax after a long day of hard work.
If you have grown this strain before and want to give fellow growers a couple of tips to improve their growing experience with this strain, please leave a comment in the comment section below!
External References
- Stomata and Trichome Development. - V, Vadivel,. (2020).
- Terpene Synthases and Terpene Variation in Cannabis sativa. Plant Physiology. - Booth, Judith & Yuen, Mack & Jancsik, Sharon & Madilao, Lina & Page, Jonathan & Bohlmann, Joerg. (2020).



Comments