Amnesia Haze Auto Cannabis Strain Week-by-Week Guide

- 1. History
- 2. Specifications
- 3. Week-by-week guide
- 4. Week 1 - germination
- 5. Week 2 - vegetative stage
- 6. Week 3 - vegetative stage
- 7. Week 4 - pre-flowering stage
- 8. Week 5 - flowering stage
- 9. Week 6 - flowering stage
- 10. Week 7 - flowering stage
- 11. Week 8 - flowering stage
- 12. Week 9 - flowering stage
- 13. Week 10 - harvest
- 14. What to expect?
- 15. Drying, trimming, and curing your amnesia haze auto harvest
- 16. In conclusion
1. History
Just like all other classics, Amnesia’s Haze exact origins are unknown up to this day, but it is said this gem has been created by an American cannabis breeder. David Paul Watson, an American grower, and breeder used to collect cannabis strains back in the ’90s, having a wide selection of strains, David decided to cross Thai, Jamaican, Hawaiian, and Afghani landraces, which were the strongest he had.
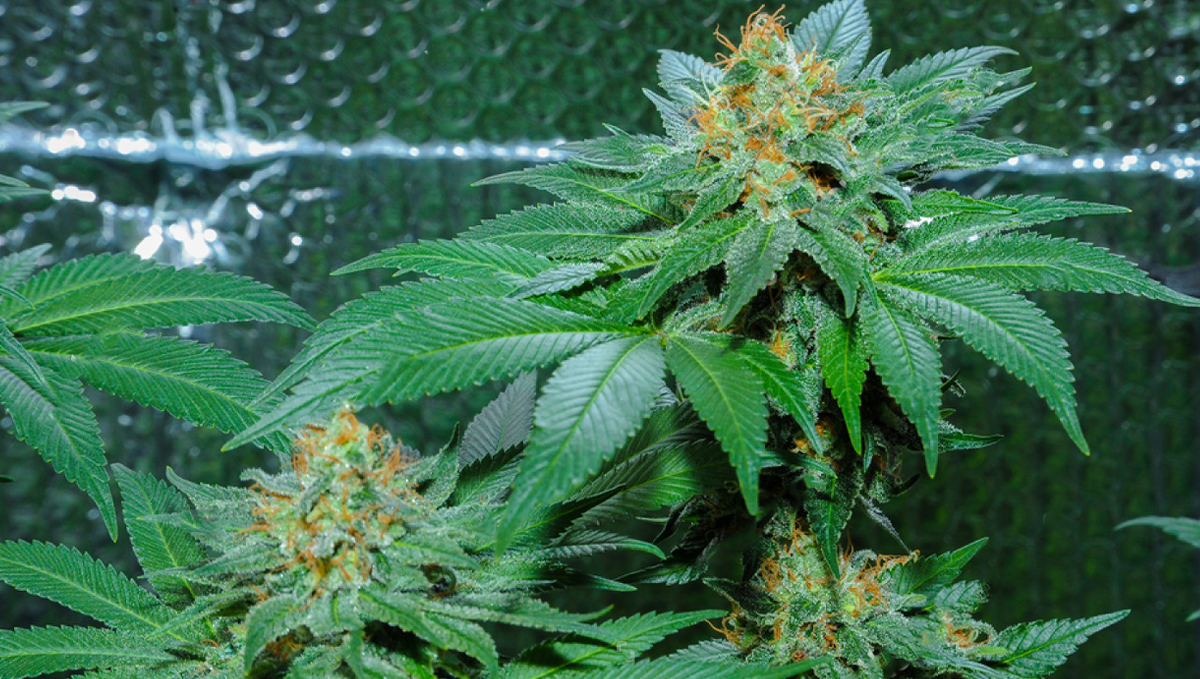
The result was a Sativa-dominant powerful with a really intense effect but because Cannabis was illegal, he didn’t get much credit for it at the time. Even though he didn’t get much credit, the still unknown Amnesia Haze was known by avid consumers for its potent effect, once a European grower got his hands on the genetics, he took them to Amsterdam where he developed the strain even further and started to get popular.
The story says that once this still unknown strain started to be sought after, Zwiep who was the owner of a big fertilizer company in The Netherlands was able to get seeds and crossed them with Nevil’s Haze, creating what we know today as Amnesia Haze.
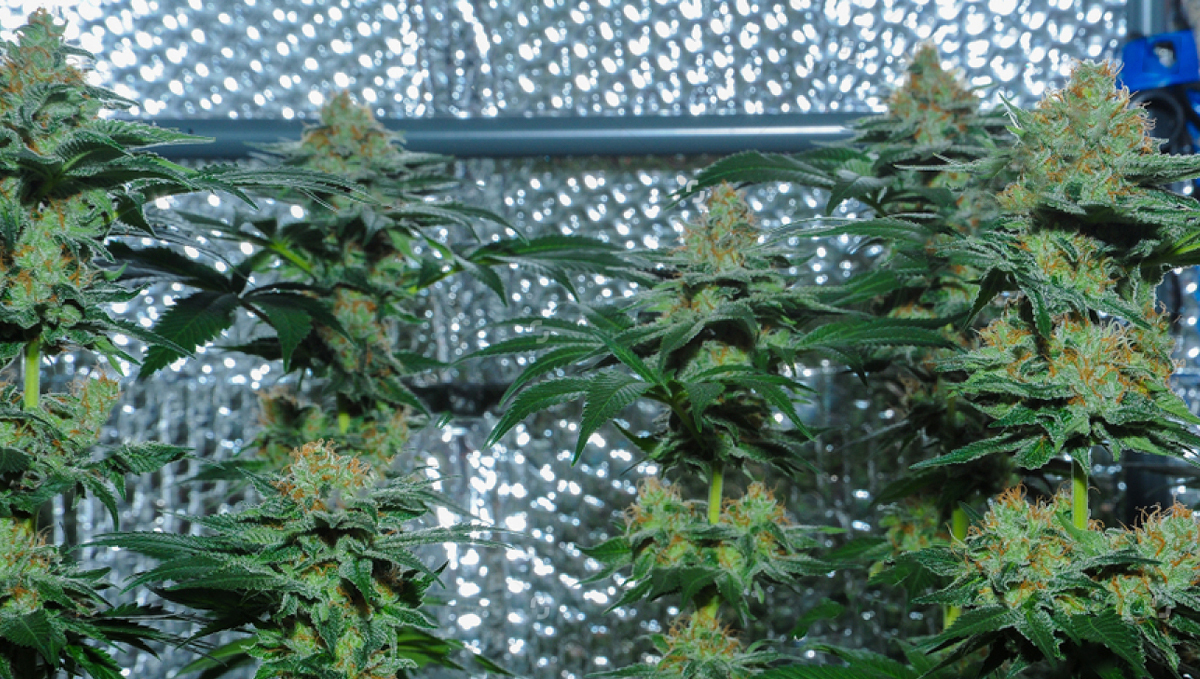
Because he knew how unique Amnesia Haze was, he only had clones available until he teamed up with a very popular seed bank from Spain to make regular and feminized seeds available to the public. As the genetics spread throughout the world, he started winning awards including 1st place in the 2004 and 2012 Cannabis Cups, and quickly came one of the most known strains all over the world, becoming present in almost all seedbanks and dispensaries worldwide.
2. Specifications
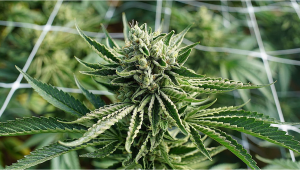
Fast Buds did a great job with the auto version of this old-school classic. You can expect 650gr/m2 of thick hard nugs completely capped in resin in 10 weeks from seed to harvest. Our version of this gem can grow up to 150cm, making her tall for an autoflower, she will develop large spaces between the internodes with a bushy foliage but still having the typical Sativa structure. With up to 22% THC, the buds end up denser than you would normally see with Haze varieties with rock-hard calyxes completely buried in trichomes with a truly special blend of orange citrus terpenes with floral undertones on the inhale that turns deeper on the exhale, tasting identical to the renowned Amnesia Haze.
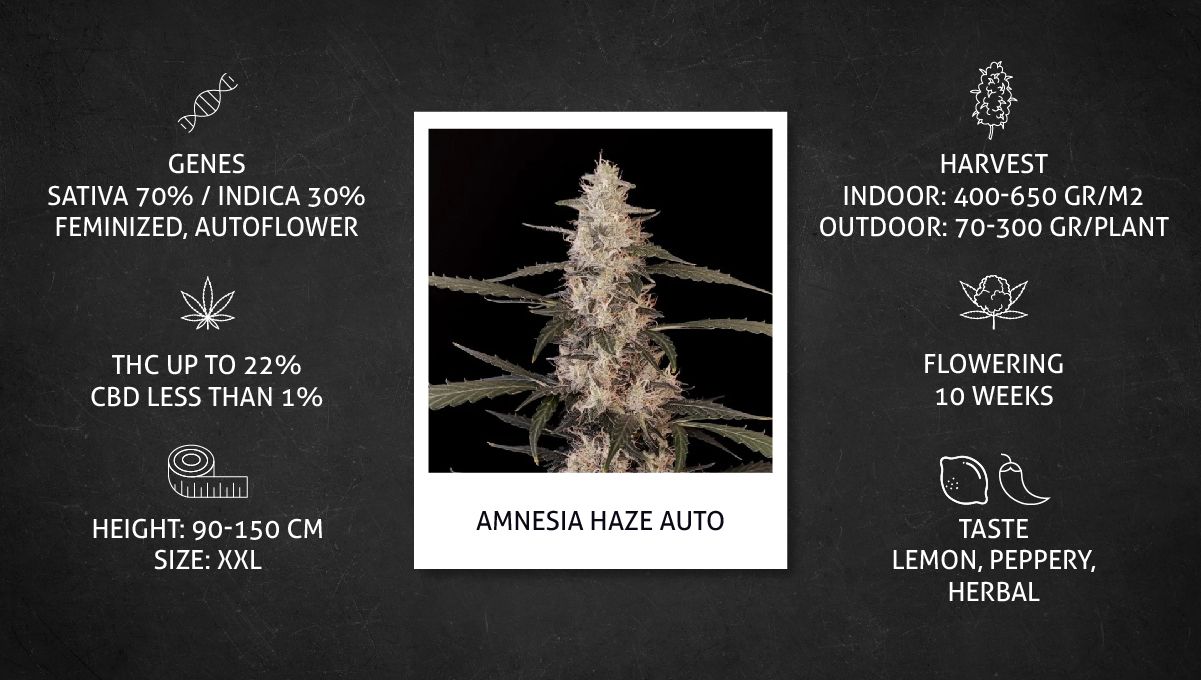
A combination of a Sativa-dominant genetic profile, huge quantities of THC, and a complex array of stimulating terpenes result in a euphoric, energising, and motivating high. Realistically, you can use these buds at any time of the day and expect a good time! However, this strain produces the best result during the daytime. Amnesia Haze Automatic serves as the ideal wake-and-bake strain. Roll a joint when you wake up, pour a fresh cup of coffee, and enjoy a seriously stimulating start to the day. You’ll find that this strain switches your mind on and allows creative thoughts to flow effortlessly. Furthermore, these buds also come in handy during the rest of the day. Hit a bowl while you’re ticking off your tasks for the day and you’ll enter a flow state and accomplish everything you need to get done with ease. Amnesia Haze Auto is also a much-loved variety among physically active weed users. Enjoy these buds before hitting the gym, going for a skate, or running forest trails to fully immerse yourself in the present moment and add an edge to your performance.
3. Week-by-week guide
This grow cycle started very well but suffered from some complications such as lower temperatures and high humidity, which resulted in bugs appearing in some plants, even though they were taken care of relatively quickly, the height was affected and ended up shorter than usual.
| Grow Specifications |
|---|
| Light Fixture: LED |
| Light Cycle: 18/6 |
| Humidity: 80% - 40% |
| Temperature: 20-26°C |
| Grow Space: Outdoor/Indoor |
| Nutrients: Organic |
| PH level: 5.7-6.2 |
| Seed to Harvest: 10 weeks |
In this table, you can find information on how the plants in this cycle were cultivated. This grow guide serves as a written timeline on how to properly take care of your plants and what to avoid in some cases.
4. Week 1 - Germination
This grow journal started by germinating one Amnesia Haze Auto seed directly in paper towels, although we strongly recommend soaking them in water for around 12hs before transferring them to the paper towels. Germinating your seeds like this won’t bring problems per se but by allowing them to hydrate for a bit before placing them in paper towels the shell can soften a bit, increasing the chance of germination.
| Height: | 1cm |
|---|---|
| pH: | 6.4 |
| Humidity: | 80% |
| Temperature: | 20-25°C |
| Watering: | 100ml |
In this case, after the taproot (aka radicle) appeared and reached around 2cm it was planted directly into a mix of super soil, perlite, and coco fiber, by doing this, you don’t need to add nutrients unless you see signs of deficiencies, remember that seedlings don’t need nutrients but because this super soil had a slow-release powdered amendment, it won’t start providing nutrients for 10 days.
After your seedling comes out from the medium you’ll be able to see two small rounded leaves which are named Cotyledons, they are what provide food for your seedling until the nutrients are widely available so it’s vital you make sure they’re not showing signs of deficiencies.
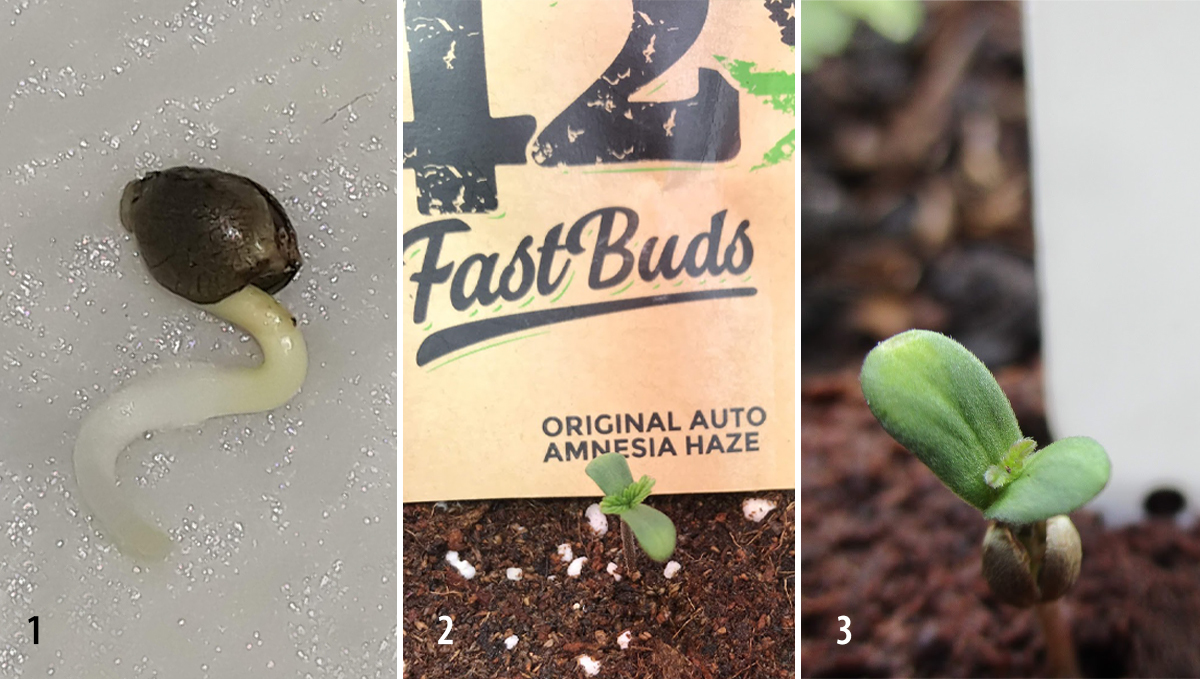
The environment also can affect your seedling so you need to keep a temperature of around 23°C, a high relative humidity of around 60-70%, and water with very little water, approximately 100ml. If your seedling hasn’t shown a pair of leaves on top of the cotyledons after 1-2 days, there’s definitely something wrong and you should check everything is ok, obviously this can depend from strain to strain but usually, the first pair of one-fingered leaves develop right after your seed has come out of the medium.
There are several factors you need to consider every time during the seedling stage to keep your plant healthy and growing correctly. Many beginners make the mistake of caring for their plants a little bit too much. This usually manifests as severe overwatering. Sure, seedlings rely on water in order to fulfill critical physiological functions and survive. However, too much water can wreak havoc on the soil. Overwatering floods the pores between soil particles, which pushes oxygen out of the soil and turns it anaerobic. This is a problem for two key reasons. Firstly, cannabis roots need oxygen in order to breathe; overwatering essentially suffocates them. Secondly, pathogenic microbes are often drawn to anaerobic conditions. These include pythium species that cause a plant disease known as damping off. These small life forms infect roots and cause great damage to the root cortex. This cuts off the water supply and causes seedlings to completely collapse and die. To get the best start possible during the seedling phase, only water your plant once the top several centimeters of soil completely dry out.
5. Week 2 - Vegetative stage
After successfully germinating your seeds, you’ll see the first true leaves appearing and are officially in the vegetative stage. This strain takes approximately 10 weeks, so you can expect your plant to take around 4-5 weeks from start to finish of the vegetative stage, we don’t recommend transplanting our autos but if you started in a smaller container you should transplant it to the final pot when your plant has around 2-3 pairs of true leaves, which are the first leaves with several “fingers”.
| Height: | 5cm |
|---|---|
| pH: | 7 |
| Humidity: | 65% |
| Temperature: | 20-25°C |
| Watering: | 100ml |
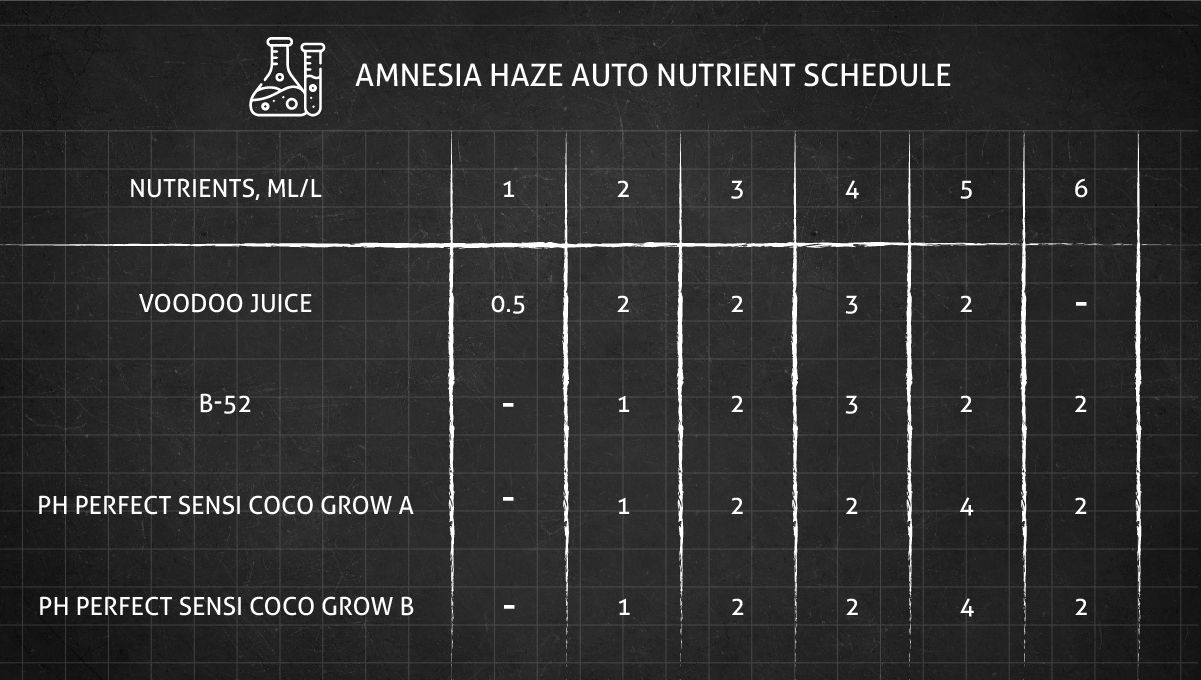
Remember that after transplanting it, your plants will need a couple of days to adapt so you may see the growth slowing down a bit but if you did everything correctly, your plant will come back to normal in a couple of days. Depending on the medium, you will have to start feeding with a small dose of nutrients, preferably organic to prevent nutrient lockout and burn.
The roots also need oxygen to thrive so make sure the soil is not compact to allow proper air exchange and the water to be absorbed.
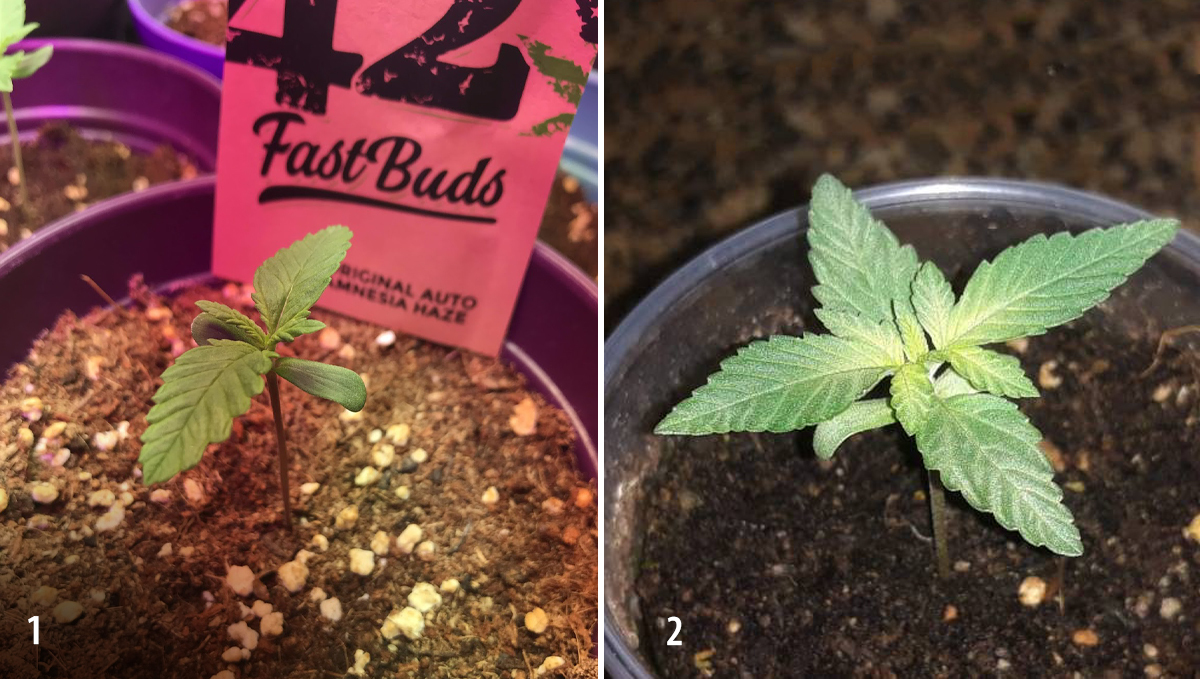
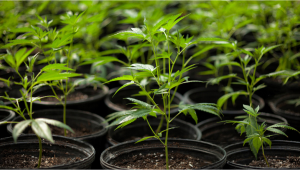
As you see in the photos, the super soil was mixed with perlite and coco fiber, perlite allows more oxygen in the medium while coco fiber makes it fluffier and hols water better so if you need to improve your soil these two are great ways to make it better.
“The first week has passed for my little Auto Amnesia Haze and she is growing vigorously...she is healthy and popping out new leaves...I keep misting her soil with plain water, no nutes yet.” - BipolarHellas
Remember that cannabis plants depend on the environment to grow properly so make sure you maintain a relative humidity of 60% and a temperature between 18-25°C and remember to slowly decrease the humidity, you should reach around 50% when your plants reach the pre-flowering stage.
6. Week 3 - Vegetative stage
If you germinated your seed in the final container, the roots should have established by now but if you transplanted it may take a little longer, either way, in the third week from germination your plant should have at least 3-4 pairs of leaves and is now ready to start LST if you wish to.
| Height: | 10cm |
|---|---|
| pH: | 6.3 |
| Humidity: | 55% |
| Temperature: | 22°C |
| Watering: | 250ml |
Sometimes it can be hard to start plant training (such as SoG or SCRoG) at this stage because depending on the strain, the internodes can be short but with this one grows with a long internodal spacing thanks to it’s Sativa heritage so you shouldn’t have a problem at all.
“At day 19 LST was performed on the main stem...everyday top and leaves were pulled to sides...there are no notable deficiencies or any kind of symptoms.” - Satori_Hanso
If you are planning on training your plants, make sure you do it gently, even though they already are in the third week they’re still fragile so it’s extremely important you do it with care and take your time.
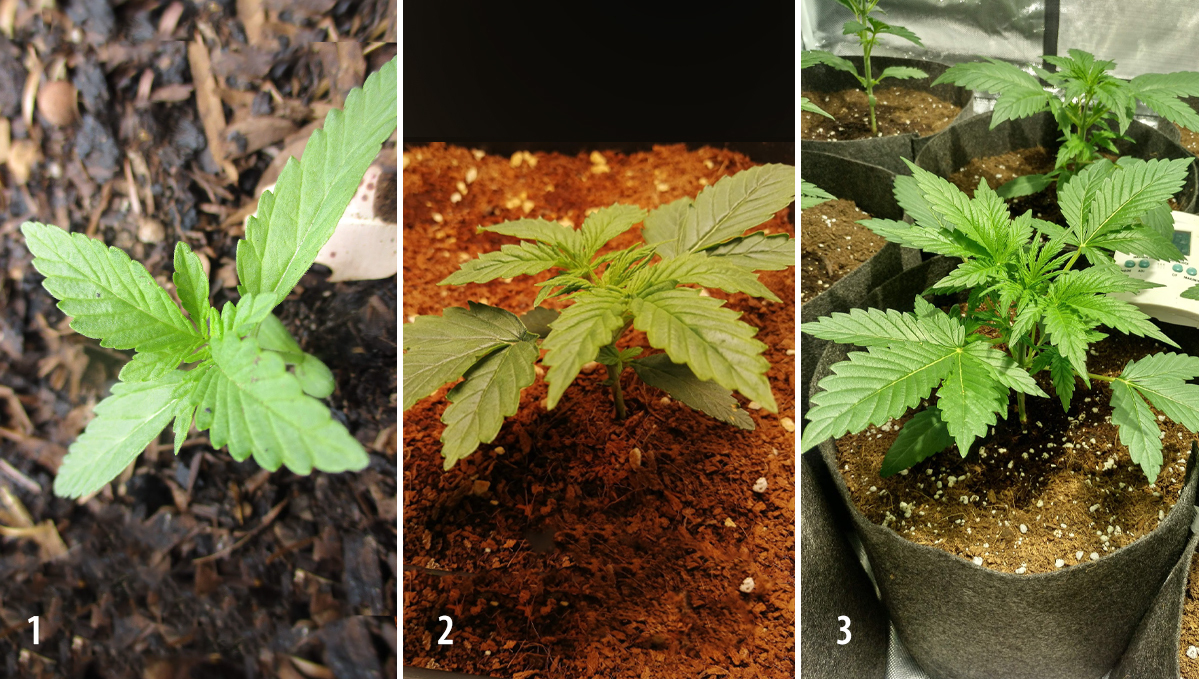
You’ll notice your plants are growing really fast, you will clearly see a big difference from one day to another so you need to start feeding your veg nutrients in an approximate ratio of 3-1-2 if you’re not growing in an amended medium.
7. Week 4 - Pre-flowering stage
Starting week 4 you will see the bud sites starting to turn light green, this means your plant is almost ready to start showing stigmas and entering the flowering stage, it will only take a couple of days more.
After 2-4 days have passed, your auto will start to develop white hairs named stigmas, when this happens it means that she is sexually mature and is ready to start the long-awaited process of flowering.
| Height: | 15cm |
|---|---|
| pH: | 6.2 |
| Humidity: | 50% |
| Temperature: | 20°C |
| Watering: | 600ml |
If you’re not growing in super soil, you should make a gradual transition from vegetative to flowering nutrients, blooming nutrients should be used in a ratio of 1-2-3 so when transitioning, you should slowly decrease the amount of nitrogen and increase the amount of phosphorus and potassium, which are the macronutrients a cannabis plant needs to produce buds.
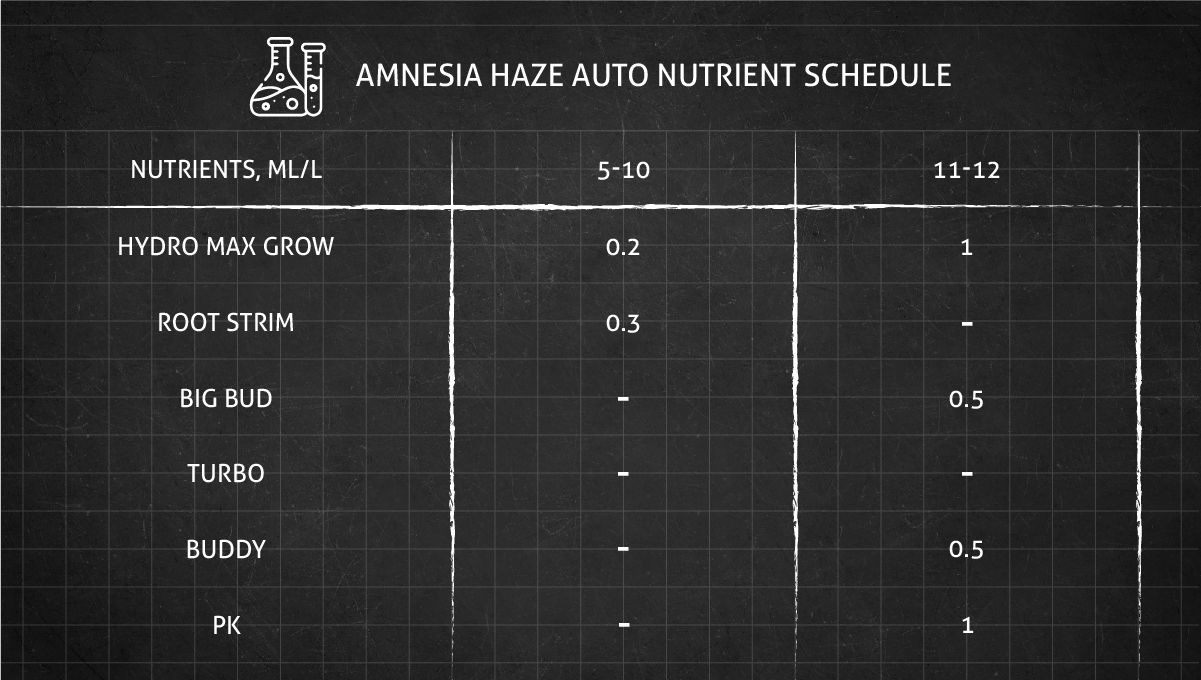
Also, if you are using a sterile medium such as coco fiber it’s essential you provide the micronutrients needed for optimal growth such as calcium and magnesium among others.
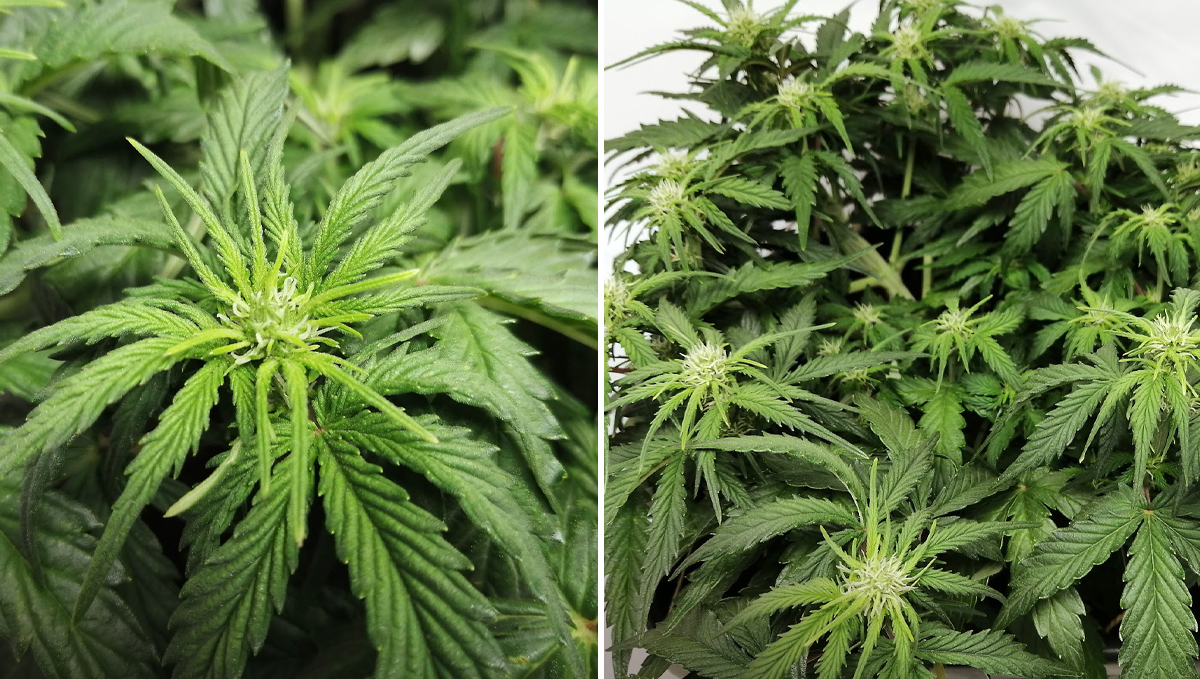
The pre-flowering stage is when your plant will start producing trichomes so if you’re growing indoors, it’s essential you have a way to mask the smell, even though it may not be too strong now, it will become more pungent as the flowers develop. As said before, the environment is super important when growing cannabis so make sure you check and adjust it every day if necessary, you should slowly start decreasing the relative humidity from 60-50% in the vegetative stage to around 40-45% in the end of flowering.
8. Week 5 - Flowering stage
In the fifth week from seed, your Amnesia Haze Auto is officially in the flowering stage so make sure you’re already feeding only blooming nutrients because your plants need the mineral to fatten up the buds, you should also check the environment closely, failing to check and adjust the temperature and especially the humidity can result in bugs or mold so make sure you maintain it at an appropriate level.
| Height: | 20cm |
|---|---|
| pH: | 6.5 |
| Humidity: | 55% |
| Temperature: | 23-25°C |
| Watering: | 700ml |
In this grow report the humidity levels oscillated a bit during day and night so the growers reported the appearance of bugs which were promptly eliminated so it didn’t have a serious impact at all other than having to remove a couple of dead bugs from the plant. When your plants start flowering, you will see what growers call the “flowering stretch” where plants can double their size, depending on the genetics.
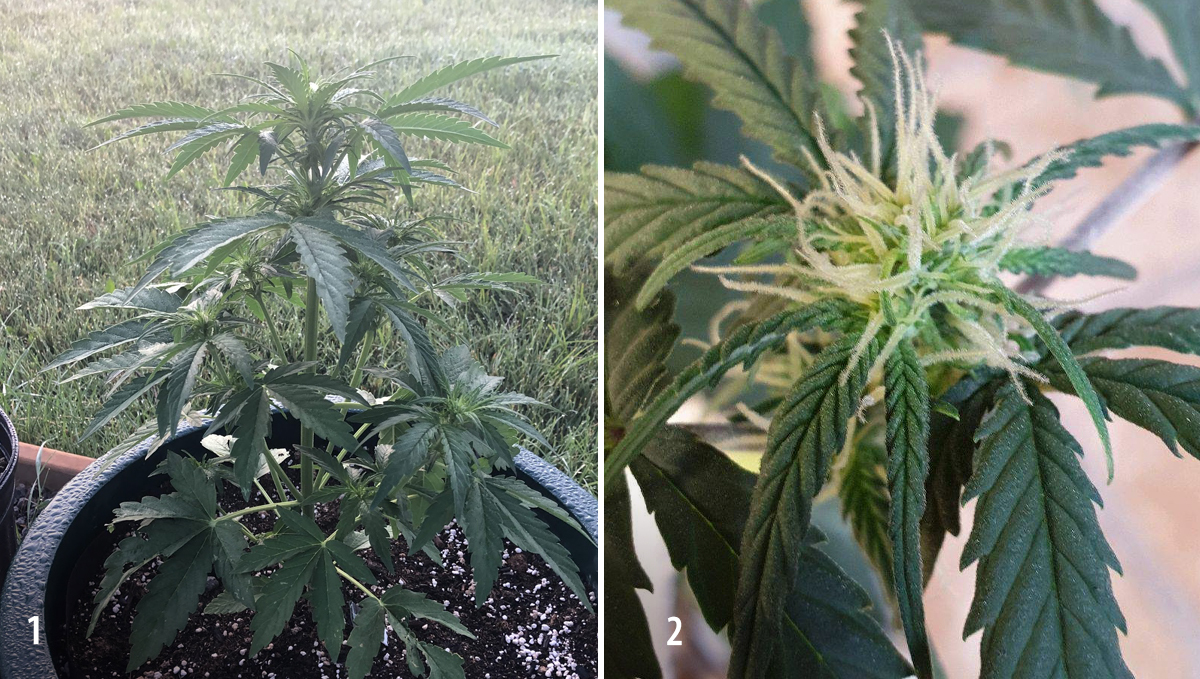
Our Amnesia Haze Auto can grow up to 150cm but because the height was controlled and suffered from bugs, you won’t be able to see a big stretch although it definitely grew a lot taller than what it was before.
“I was at the lake last week and left these plants to do their thing...Our weather has finally changed last week and it’s sunny and hot days and warm nights. They’re loving it!!...I removed a large fan blocking bud sites and found an aphid, so tonight I’ll spray with end-all and again in a week. If anybody has any repellents for those bastards I’d love to hear. Either way, they’re cruising along with little issues...” - SAC87
Also, leaving the ties until harvest can really stress your plants so it’s essential you remove them now, even though you will see your plant still growing a bit, it will keep the structure you gave it when training.
9. Week 6 - Flowering stage
In the sixth week from germination, you’ll gradually start to see the stigmas getting longer and longer, with an increased production of trichomes, and with trichomes come the terpenes, so if you haven’t had a problem with the smell you will probably have by now so it’s a good time to install a carbon filter.
| Height: | 35cm |
|---|---|
| pH: | 6.1 |
| Humidity: | 50% |
| Temperature: | 22-28°C |
| Watering: | 1000ml |
Also, by now you should already be feeding a full dose of blooming nutrients, always make sure to check for signs of deficiencies. Signs like yellowing or droopy leaves indicate an excess of nutrients or water but always make sure your plants are properly fed.
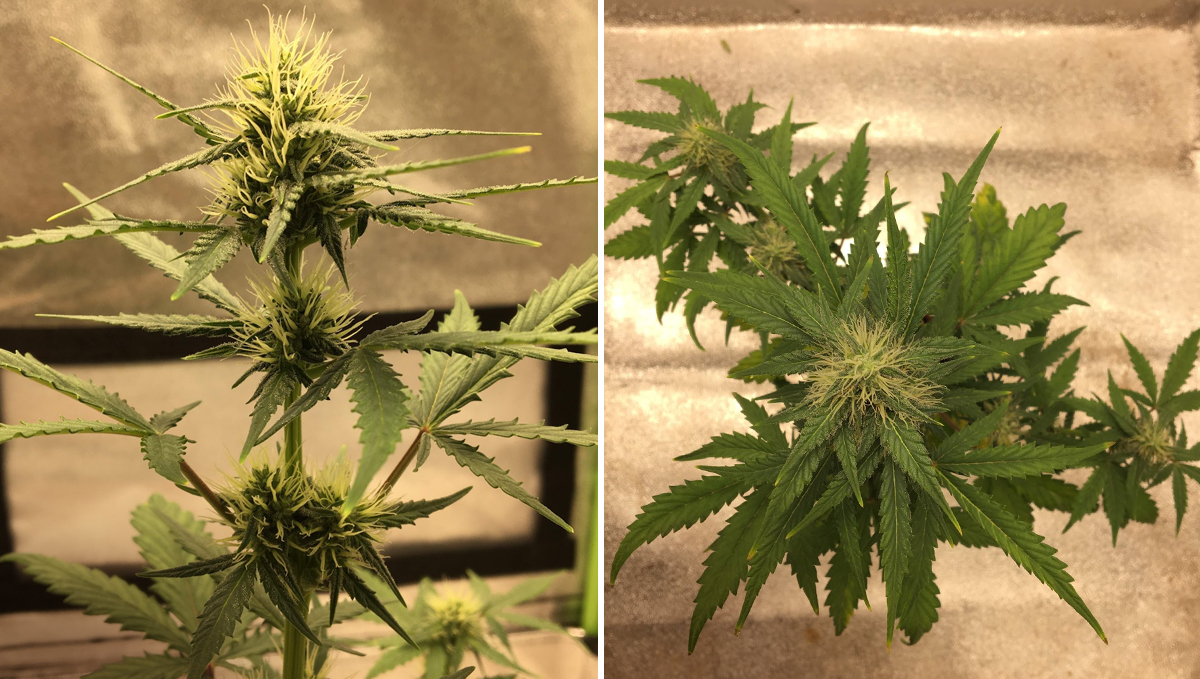
By this stage, you’ll notice your plants are drinking a lot of water, this is an indication that they’re in full flowering mode and are growing without a problem, just make sure you're feeding what your plant needs and not a drop more, watering in excess can lead to overwatering which can bring problems, also, watering too much can increase the humidity in your growing tent which can ultimately attract mold or bugs.
10. Week 7 - Flowering stage
When growing our Amnesia Haze Auto, you’ll see it takes a couple of days more than Indica-dominant strains, this is because Amnesia Haze is a Sativa-dominant hybrid but don’t worry, if you don’t see signs of deficiencies you’re not doing anything wrong, Sativa species take longer to mature, that’s why they usually grow taller and yield more.
| Height: | 45cm |
|---|---|
| pH: | 6.5 |
| Humidity: | 45% |
| Temperature: | 25°C |
| Watering: | 1200ml |
Although it takes up to a week more than some of our varieties, those extra 7 days make it possible to harvest up to 650gr/m2 so be patient.
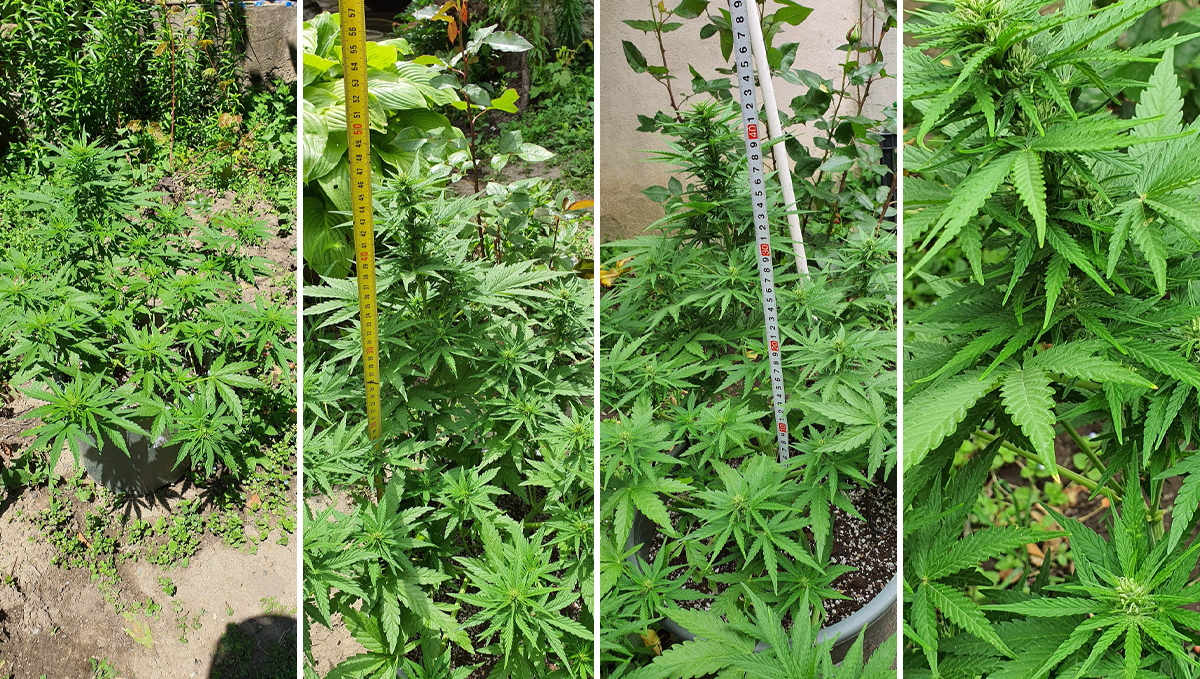
If you’re doing everything correctly, week 7 will pass really fast, there’s nothing else to do other than feeding your plants and maintaining a good environment for them to thrive, remember to check the temperature and humidity every day and adjust if necessary.
11. Week 8 - Flowering Stage
In week 8 you’ll start to see the buds properly taking form and an abundance of trichomes not only on the buds but also on the foliage around them so they’ll be smelling amazing, now this isn’t a bad thing but if you haven’t come up with a way to eliminate that delicious cannabis smell you will be obligated to do it by now.
| Height: | 66cm |
|---|---|
| pH: | 6.5 |
| Humidity: | 45% |
| Temperature: | 25-26°C |
| Watering: | 1400ml |
“...I can smell them from 125 ft away with the right wind. I removed 2 leaves from the middle of each plant to let more light in and tucked half a dozen more.” -SAC87
If you think your light isn’t strong enough, you can slightly defoliate to allow the buds at the bottom to fatten up properly, just make sure you don’t overdo it, especially now that you’re in the flowering stage.
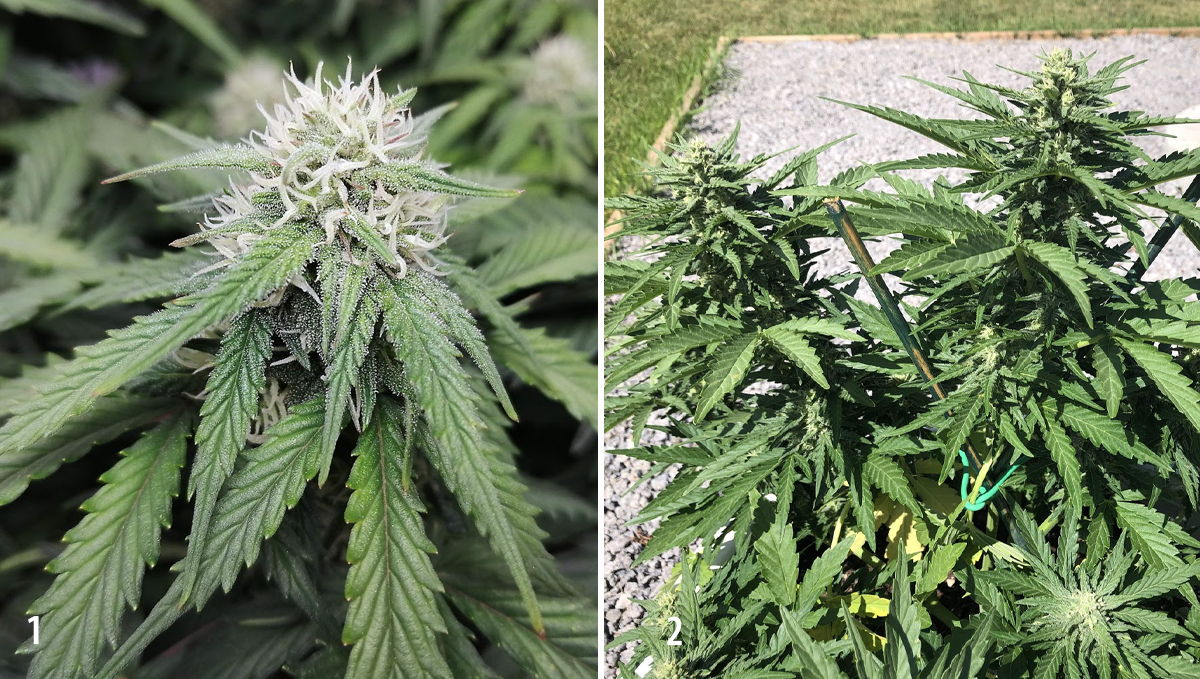
“...I fed today with 640 ppm nutrients and Green planet Rezin which is t in the list. They’re nicely trichome covered and fun not when close up. I’m just keeping an eye on them, waiting to see darkening trichomes. Our nights have been quite cool and underfed, which I think is slowing them down some...”
When the buds start really fattening up, sometimes the soil can run out of nutrients or the amount it has it’s not enough for your plant at this stage, so if you see some leaves starting to yellow you should re-amend the soil and brew a tea for your plant to get the nutrients she need quickly, this is exactly what happened to our grower.
12. Week 9 - Flowering Stage
Week 9 marks the last two weeks before harvesting, if you really want to enhance the flavor and aroma of your buds (which is highly recommended) you should start flushing now with plain pH’d water which should have the same pH you were using throughout the whole grow cycle, this applies even if you’re growing in hydroponics.
| Height: | 70cm |
|---|---|
| pH: | 6.5 |
| Humidity: | 40% |
| Temperature: | 20-24°C |
| Watering: | 1200ml |
“Everything is going good this week...The smell coming off them is pungent and powerful, mostly skunky funk as of right now but we’ll see what progresses.”
In this case, our growers were using super soil which is a type of organic feeding that makes the nutrients available in the soil so the plant only absorbs what they need, usually, there’s no need to flush when using 100% organic nutrients but it won’t hurt your plants so if you want to try it, go ahead.
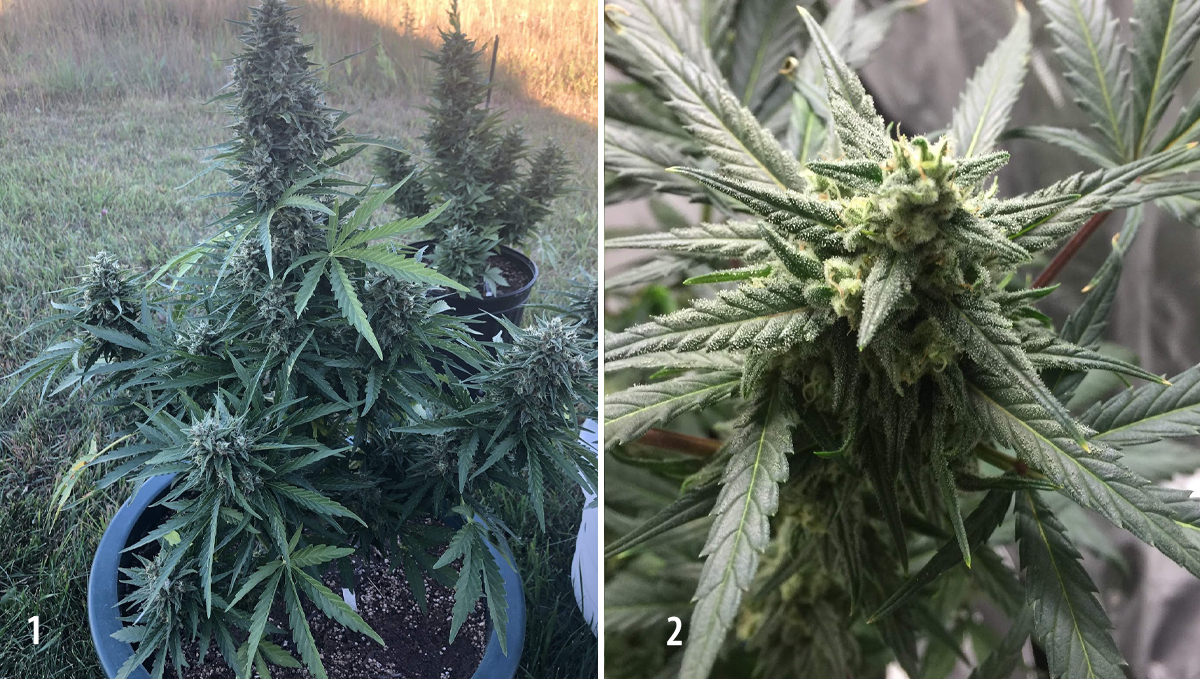
At this stage, you should be on the lookout every day for bugs and especially mold because your plants are absorbing a lot of water and the buds are quite dense so if you fail to check, your buds can get botrytis, which causes bud rot.
13. Week 10 - Harvest
Finally, the last week has arrived! Week 10 is the last week of your Amnesia Haze’s Auto life cycle.
Don’t forget to continue flushing, at this point the buds should be almost completely mature so it’s essential you keep an eye of them so you harvest at the right time, remember that you shouldn’t harvest when most of the trichomes are clear because they’re not fully developed yet but once you see cloudy or amber trichomes you can, depending on the effect you desire.
| Height: | 80cm |
|---|---|
| pH: | 6.5 |
| Humidity: | 45% |
| Temperature: | 21-26°C |
| Watering: | 1500ml |
“These plants are almost done, a week I’m thinking. They’ve been getting only water for a while now, some fading is starting...Just checking trichomes and they’ll be chopped...They smell so good, skunky earthy. The buds are dense, I have high hopes for a good yield. There are trichomes crusting the buds. I like these FastBuds. They’re solid genetics.”
Cloudy trichomes mean they’re at their full potential and will provide a complete effect while amber trichomes means the THC has degraded into CBN and will have a more corporal effect.
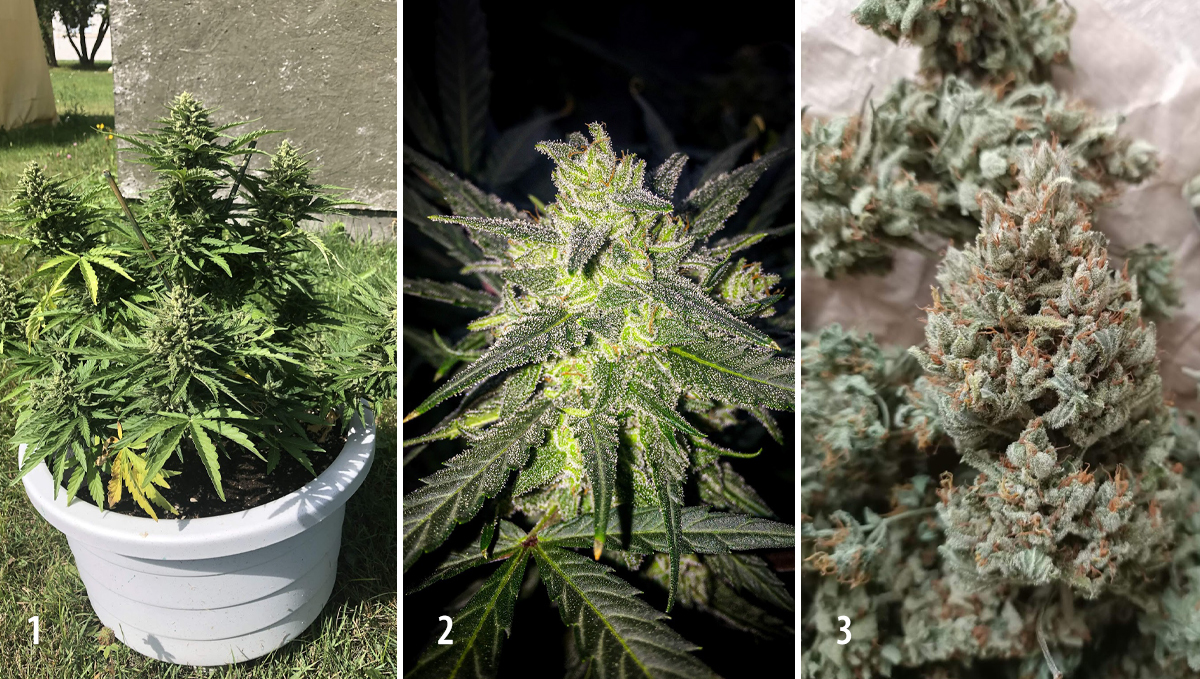
As you can see in the comment above, when flushing the leaves may start to show different colors, this can be a problem if you were in another stage but when flushing it’s completely normal and is a sign that you’re flushing your plants correctly.
14. What to expect?
After curing, you’ll be rewarded with delicious tasting flowers, we had several reports come in and you can expect a mouth-watering mix of citrusy orange and floral terpenes that taste as good as they smell.
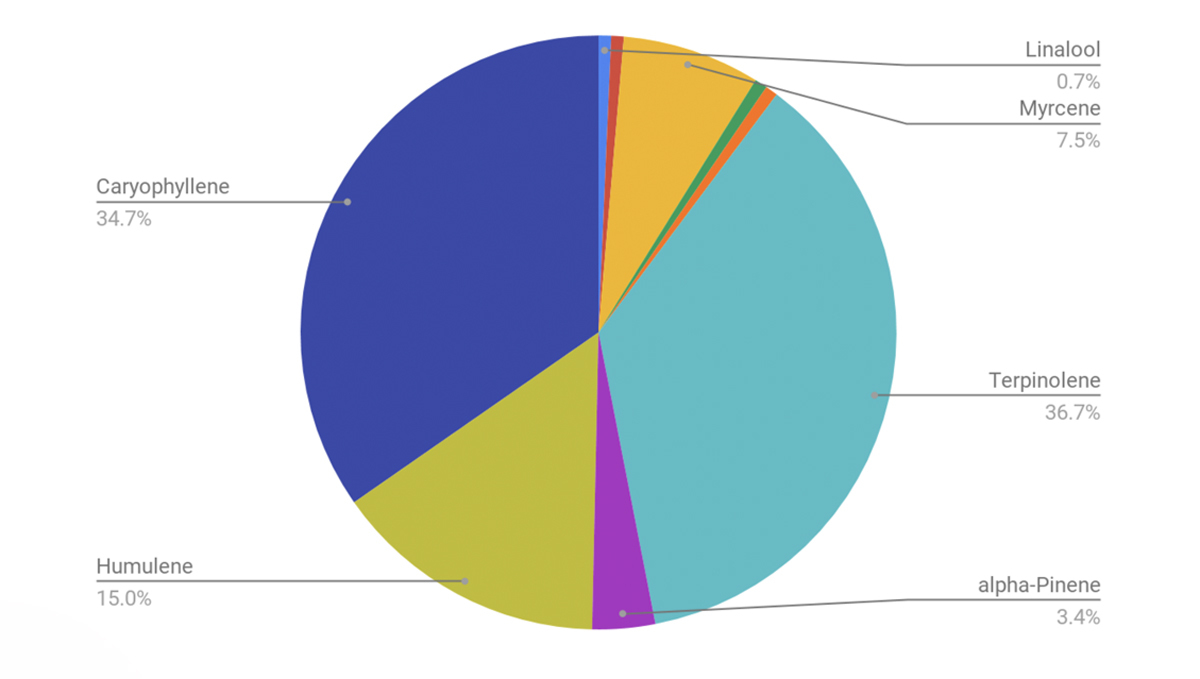
This fresh combination of aromas results in an almost 100% Sativa type of effect, being approximately 80% Sativa and 20% Indica.
Thanks to the unique terpene profile consumers will experience a cerebral rollercoaster that will leave you highly motivated and focused and slowly transform into a more relaxed and lethargic effect, perfect for chilling with friends, writing, or playing music.
15. Drying, Trimming, and Curing Your Amnesia Haze Auto Harvest
We have mentioned the drying and curing process in passing above, but this part of cannabis cultivation is often overlooked and much more important to the end product than many give it credit for. It can take weeks or even months of curing before the full terpene profile matures, so let’s break it down simply so you know exactly how to dry, trim, and cure your hard-earned harvest.
Wet or dry trimming… what’s the difference, and which style should you choose?
Wet trimming is when you remove the majority of the unwanted plant matter as soon as you cut the crop down, and dry trimming is the term used to describe trimming after the plant has been through the drying process. There are pros and cons associated with both trimming styles, but for the most part we recommend dry trimming.
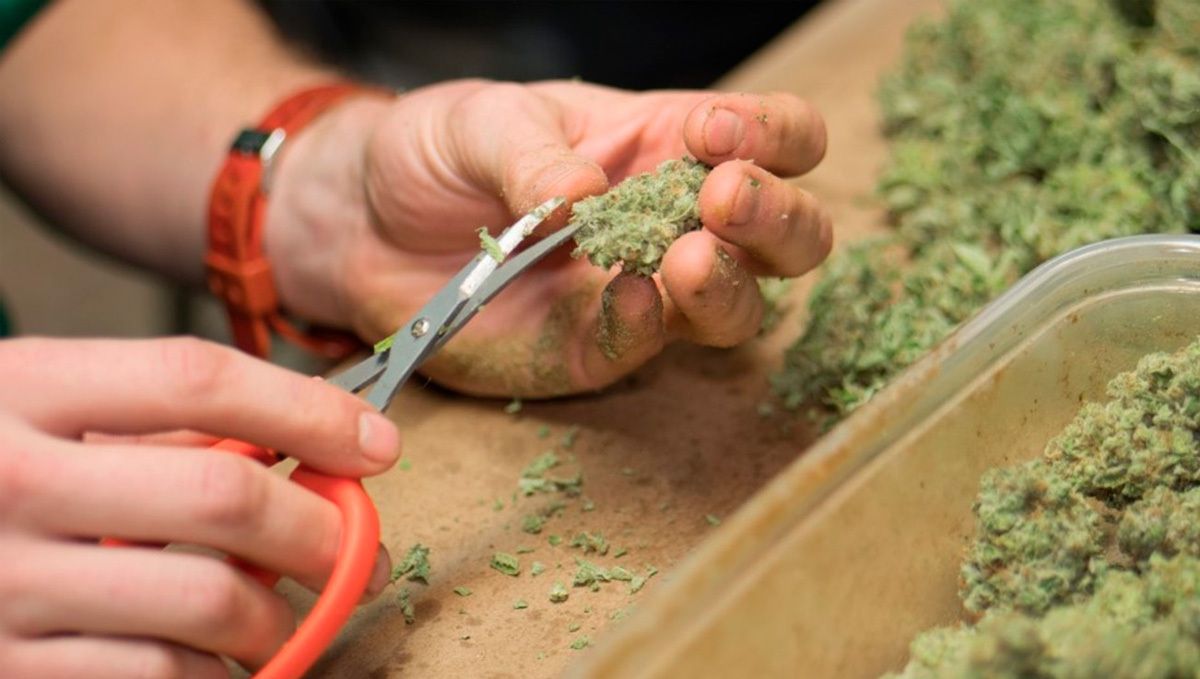
Why? A few reasons, actually. The more plant matter you have drying, the more control you have over the speed that the plant dries, which in most cases leads to a better quality end product. It’s also much easier to trim plants that have had some time to dry as the buds are less “sticky”, and the whole process is just less messy. The only time we recommend wet trimming is when you cannot control the humidity levels in your dry room and the plants are taking way too long to dry. From here on we will assume you are going to dry trim.
How long should you leave the buds to dry?
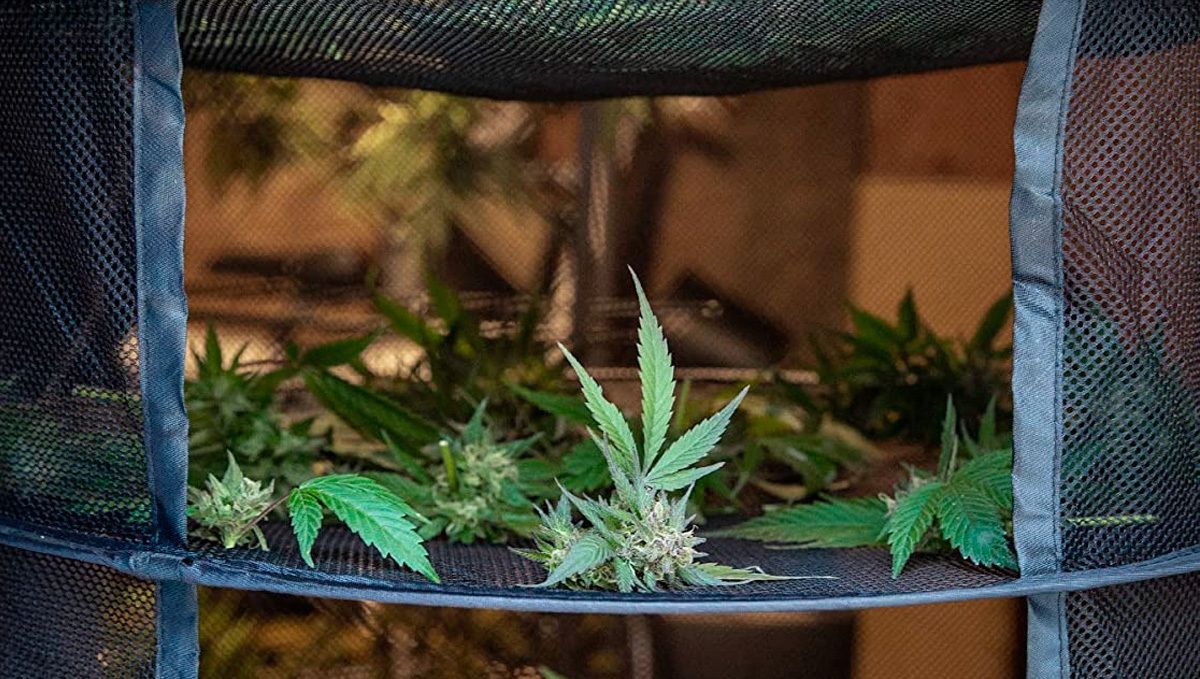
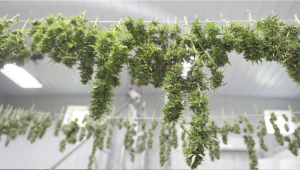
Well, that really depends on who you ask. Cannabis growers are a fickle bunch, and everyone seems to have their own answer to that question. But one thing that every single cultivator agrees upon is that you need to be able to control the ambient temps and relative humidity in your grow space. The length of the dry period is also strain-dependent, but as a general guide, you should aim for anywhere between 8 to 14 days. To reach this drying time you need to keep the temps in a range between 60-70°F (that’s 15-22°C) with a relative humidity level of 55-65%.
You may be a lucky SOB and just happen to live in an area that matches these environmental conditions, but for most of us, there is a need to use some specific equipment to take control of the environment. You should already own a hygrometer or two that you have been using to keep tabs on the grow room environment, but they may still be needed in the growing area. You should grab another if so. You may also need a dehumidifier (or a humidifier), an AC unit, a heater, a few oscillating fans, and a good quality carbon filter and extraction fan (if you want to keep things discreet). Its hugely important to give the plants enough space to breathe during the drying process, and to not crowd them. You also should never have the AC, heater, or fans blowing directly onto the buds. You want free movement of air through the plants as they dry, but without the use of directed air movement at the buds themselves.
2 weeks have passed and the buds are nice and dry… what is the next step?
Time to grab those scissors and get trimming! But not any old pair of beat-up, blunt, useless scissors that everyone has floating about the 4th drawer in the kitchen. No way. What you really need is a set (or a couple of sets) of these or these. Both those sets of scissors have been specifically designed to trim weed, and trust when we say they really are invaluable - especially if you have a large quantity of weed to trim. You should also consider investing in a trim tray. These are specially designed to catch any and all kief that drops while you are trimming, and if you have snow-covered buds then this will be a considerable amount. Our favorite is the original Trim Bin.
When trimming, it’s highly important not to “shave” the buds, but to use the tips of the scissor to carefully dig into the buds and snip the leaves at the base without damaging the rest of the bud structure. Sounds a little complicated, we know, but it’s actually a pretty easy and straightforward process that you should get the hang of in no time. Check out this comprehensive trimming guide for all of the tips and tricks.
Now finally, it is time to blaze up, right?
Nope, not yet. There is still the curing to go, and this is not the quickest process. For sure, you can start to smoke your harvest from this point onwards but it will be an inferior product when compared to how tastes and smokes after the curing have finished. To cure your nuggets properly you are going to need a few things. First up, some glass mason jars that can be sealed. You should also grab a few more hygrometers with wire probes that can be placed in with the bud as the temps and humidity levels are pretty important to control. The perfect readings are around 70°F (22°C) with a relative humidity level of 60-65%. Remember to never overpack the mason jars. You want room for your buds to breathe in the jars, so never fill them past the 75% mark.
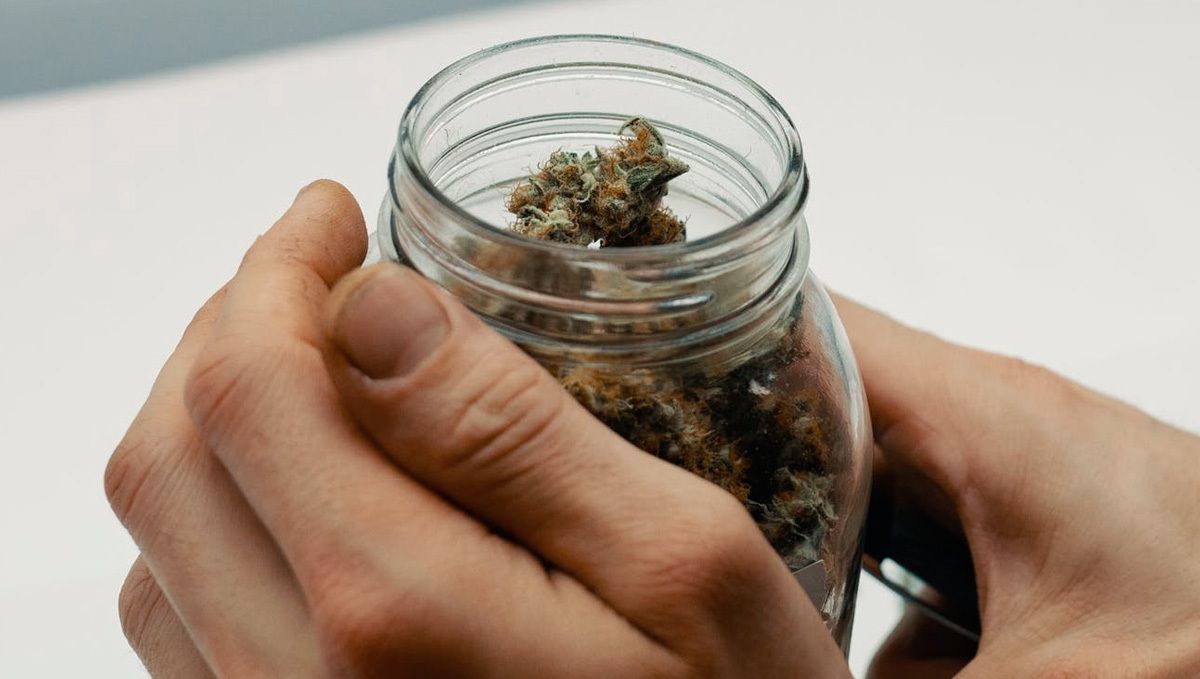
Now, if you feel like the buds are actually a little moister in the first 2 to 4 days of curing don’t worry, as this is actually a good sign. There will usually be a little bit of moisture trapped inside the flowers after the drying period has finished. This is just that moisture rehydrating the external layers of the buds. If you think the buds are too dry, or the relative humidity levels are too low then grab a couple of cannabis rehydration packs. These ensure the correct humidity levels for curing. Our favs are from Integra or Boveda. If the buds are too wet, then just crack the lids on the mason jars for a day or two.
Remember to burp the jars at least once a day for the first 10 days, and then twice or three times a week for any remaining curing time. Some strains will be ready after two weeks, some may take up to six months. We like to cure most of our flowers for a minimum of 1 month, and then start to enjoy the fruits of our labor. That is all there is to it!
Expert Opinion by Jorge Cervantes - co-author
The Amnesia Haze Auto strain is a fascinating example of the advancements in cannabis genetics and cultivation. As a seasoned cultivator and author, I've always found the development of cannabis strains intriguing, and Amnesia Haze Auto is a prime example of this development.
This strain's unique growth pattern, characterized by its rapid development and substantial yield potential, is a topic of great interest to growers. The week-by-week guide, co-authored with Enzo Schillaci, thoroughly explains what to expect at each plant's life cycle stage. Every detail is crucial for optimizing the plant's healthy yield, from the initial germination to the flowering phase.
One of Amnesia Haze Auto's most striking features is its robust trichome production, which contributes to the strain's potent effects and alluring aroma and flavor profile. The guide offers insights into nurturing these qualities, ensuring that growers can fully realize the potential of this exceptional strain.
In conclusion, cultivating Amnesia Haze Auto is an enriching experience that combines the art of gardening with the science of genetics. This guide provides a comprehensive roadmap for growers to navigate the cultivation process, ensuring a rewarding and successful harvest. Remember, each plant has its own unique characteristics, and understanding these nuances is vital to unlocking the full potential of your cannabis cultivation journey.
16. In conclusion
Amnesia Haze Auto is a must for those looking for a Sativa-dominant classic, you can expect a really pleasant cerebral high and an insane trichome production in 10 weeks. If you're planning on growing it or have grown it before, feel free to share you're experience or doubts in the comment section below.
External References:
- New insights on flowering of Cannabis sativa. Acta Horticulturae - Duchin, S. & Nirit, Bernstein & Kamenetsky, Rina & Spitzer-Rimon, B. (2020).
- Understanding Cannabis. The Journal for Nurse Practitioners - Hunt, Debra & Keefe, Joanne & Whitehead, Tammy & Littlefield, Amber. (2020).






Comments