Main-lining Technique To Increase Your Cannabis Yields
- 1. What is main-lining and its benefits
- 2. Main-lining step-by-step
- 2. a. Step 1 -wait until your plant has around 6 nodes
- 2. b. Step 2 -cut your plant down to the third node
- 2. c. Step 2.1 - remove everything below the third node
- 2. d. Step 2.2 - tie down the two remaining branches
- 2. e. Step 3 - give your plants time to recover and top again
- 2. f. Step 3.1 - remove growth below
- 2. g. Step 4 - continue topping until you have the desired number of bud sites
- 2. h. Step 5 - remove what you used to tie the branches
- 3. Can you mainline autoflower cannabis plants?
- 4. Mainlining vs other hst techniques
- 5. The best plant training methods for autoflowering strains
- 6. In conclusion
Main-lining is a well-known technique that combines LST and HST methods to achieve an efficient energy distribution to all the colas and an even canopy, resulting in more yields and denser flowers when growing cannabis seeds.
Main-lining is a way to train your plant to develop more colas, resulting in bigger yields and is a great technique to combine with Scrog and lollipopping. This technique results in an even branch growth and an even canopy, facilitating plant training, allowing you to increase yields and control plant growth if you have limited space.
1. What is main-lining and its benefits
Main-lining consists of a combination of the tie-down method and topping to achieve an even canopy where each branch starts from the main stem and has the same number of branches on each side, and in the same place. By doing this, each cola is at the same distance from the roots and will grow to the same size and height.
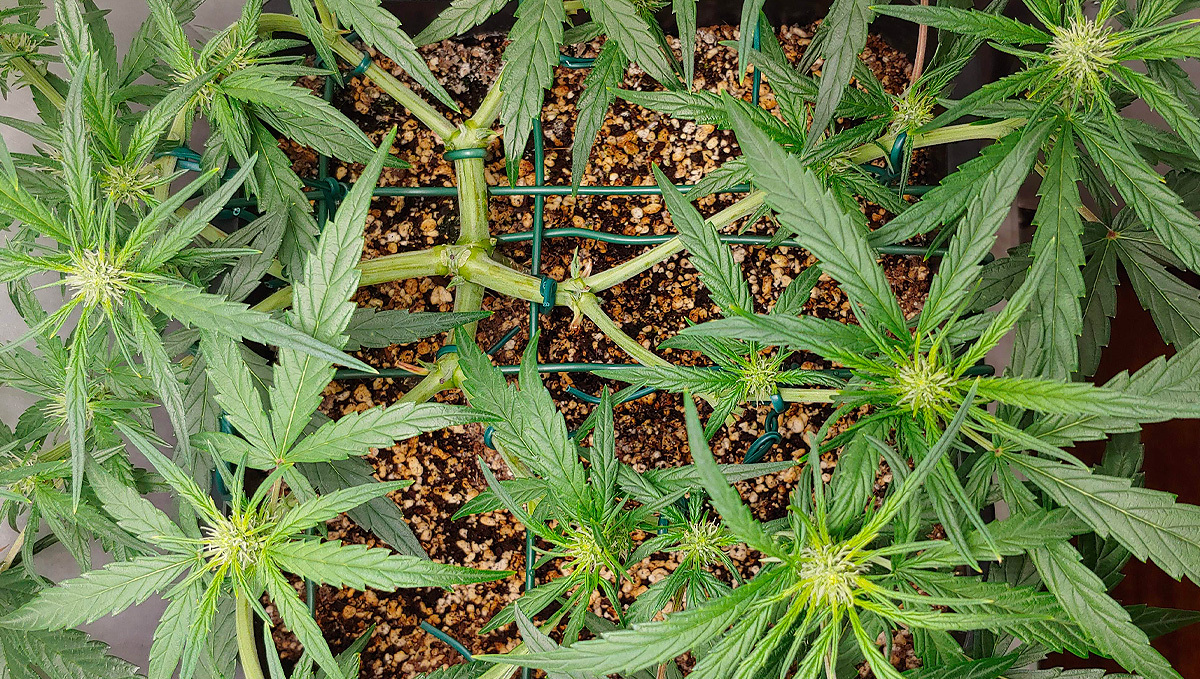
Main-lining is an incredible technique to have complete control over the size, height, and yields of your plants, the main advantage is that unlike other training methods, you do most of the work in the first week of the plant’s life and just relax until you harvest the results.
Benefits:
- Control plant growth
- Bigger yields
- Denser buds
2. Main-lining step-by-step
Step 1 - Wait until your plant has around 6 nodes
We recommend to start doing this method when your plants have developed around 5-6 nodes and (obviously) it’s in the vegetative stage, you can start when your plant has more but you’ll have to cut more plant material and lose time, have in mind you should never top a plant in the flowering stage.
Note: If you are starting from a clone, you should let the roots develop well before topping it, this may result in having to wait longer and your plant may grow more than 6 nodes before it is ready to be topped.
Step 2 - Cut your plant down to the third node
When your plant has around 5-6 nodes, you’ll have to top it (cut it) down to the third node, this means you have to cut the stem slightly above the third pair of leaves.
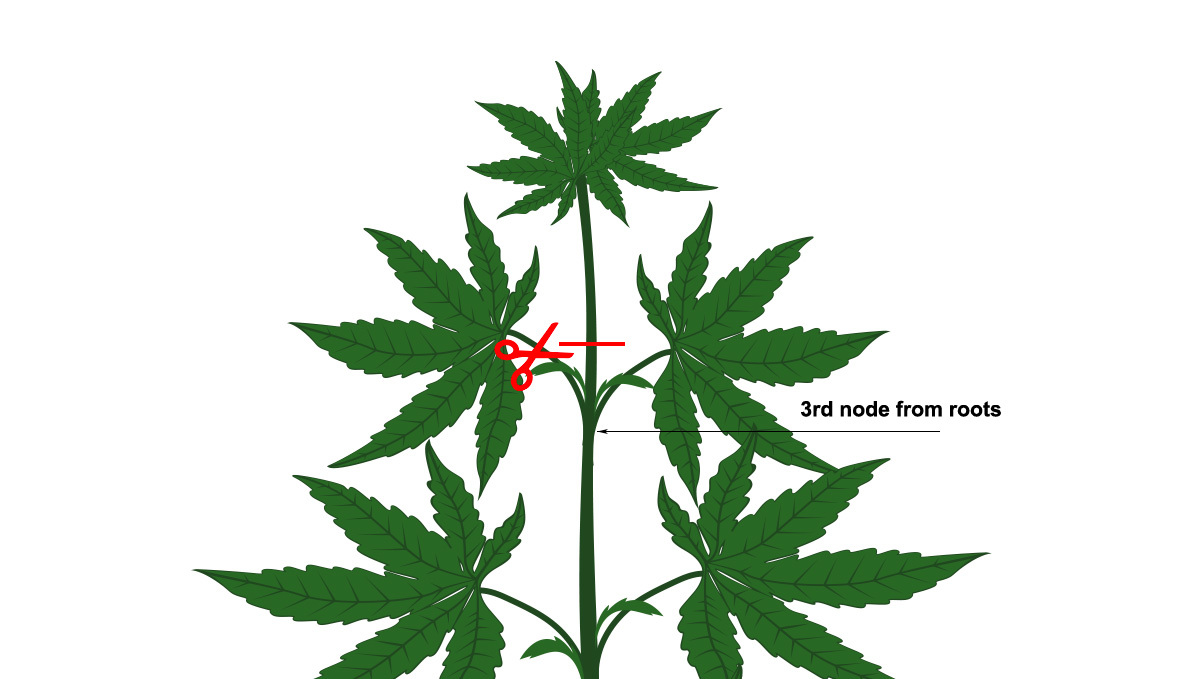
You can plant the part of the plant you’ve just cut out and it will grow just like a clone would, after cutting out properly, your plant should only have 3 nodes (3 pairs of leaves).
Step 2.1 - Remove everything below the third node
After you’ve topped your plants, you have to remove all the plant growth below it, this will give your plant a signal that it needs to focus all energy on developing the pair of branches that were left.
Remember that fan leaves are responsible for the absorption of light, it’s essential that you leave the leaves in the pair of branches left after topping, this way your plant will be able to produce the sugars it needs to continue growing.
Step 2.2 - Tie down the two remaining branches
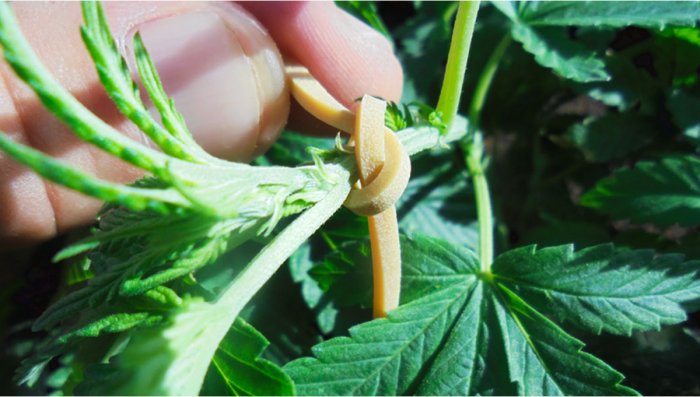
Tie down the branches as you would tie them down in other LST techniques, just make sure they're as close to a 90-degree angle as possible, remember your goal is to have a uniform plant.
If the branches are too small to be tied down, wait a couple of days until you can tie them down and remember to do it gently, without damaging them.
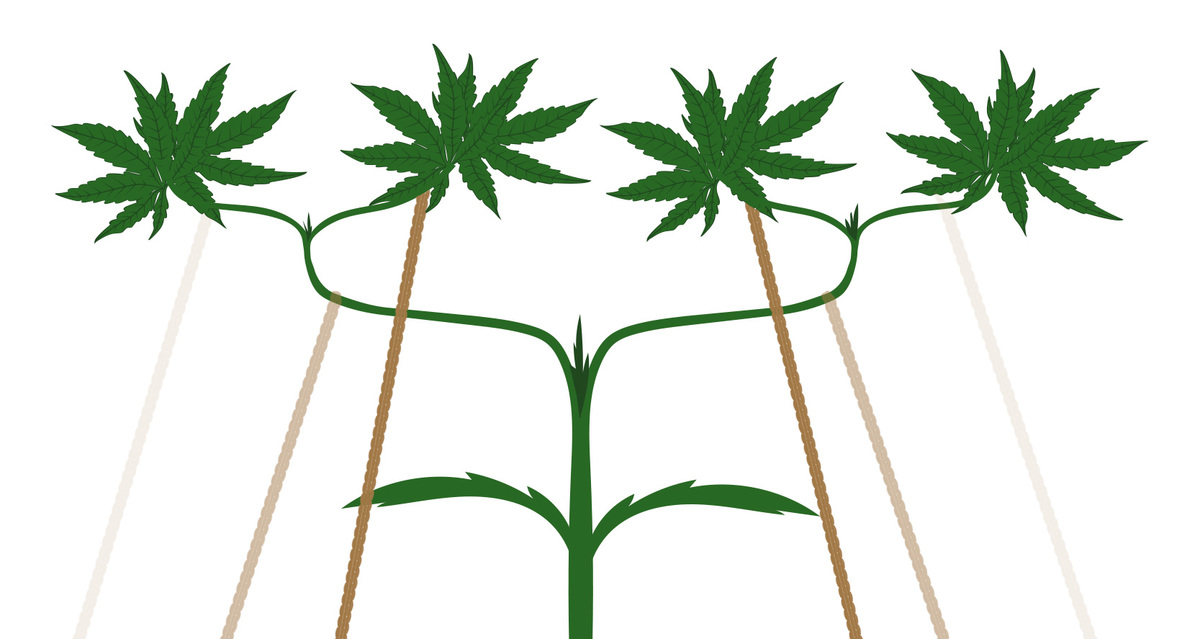
You also need to have in mind that some plants may need more time to recover from pruning and training so you should only continue training them when she has recovered completely, it is crucial you give them a good growing environment to grow in because if your temperatures or humidity levels are not good, they will take too long to recover.
Note: Make sure the ties are not too tight and are not cutting the branches, you should also check this often throughout the growing cycle.
Step 3 - Give your plants time to recover and top again
When you start to see your plants growing fast and healthy, it is time to top one more time.
On each branch, choose nodes that are symmetrical and opposite from each other, when you decide on the correct ones to cut, you will have to top them again.
Note: Each time you top your plant, she will develop 2 branches so by doing this you are increasing the number of bud sites.
Step 3.1 - Remove growth below
This step can be done right after step 3, in this step you have to remove all the growth below where you just topped your plant, just make sure you leave the leaves that are attached to your new main colas.
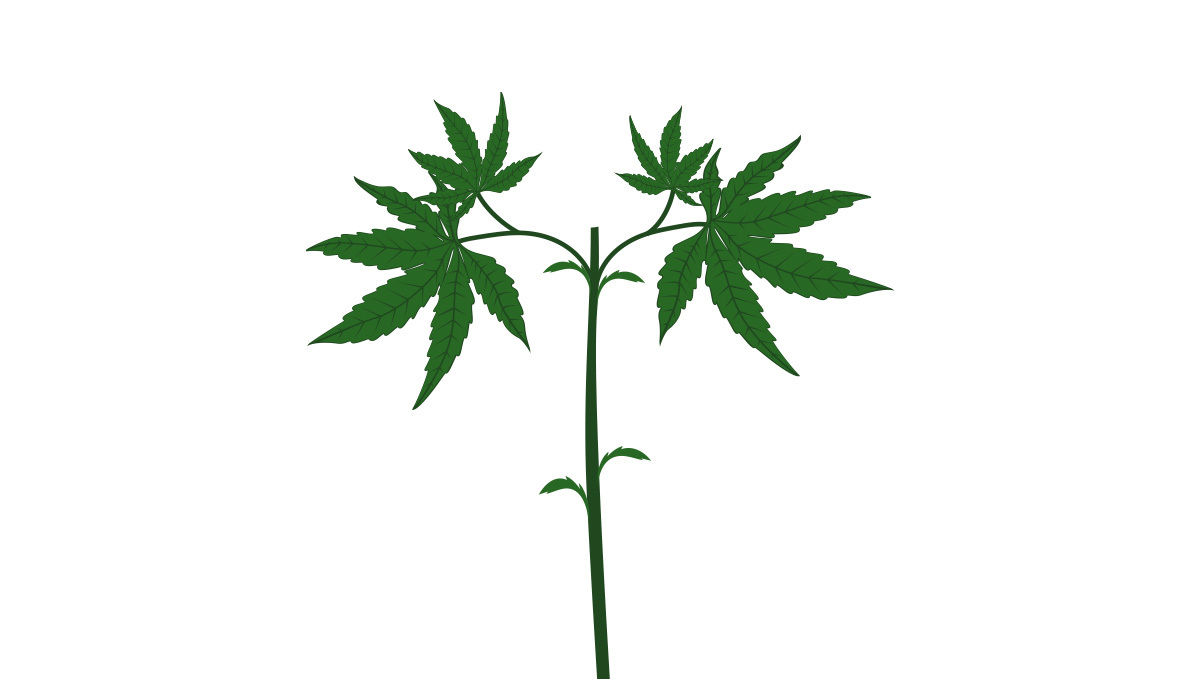
Remember to remove all other plant growth so your plant focuses on developing the branches left after topping.
Step 4 - Continue topping until you have the desired number of bud sites
As said above, each time you top your plants you will double the number of colas, have this in mind because you can easily run out of space if you top more than twice.
| Number of Toppings | Number of Colas |
|---|---|
| 1 | 2 |
| 2 | 4 |
| 3 | 8 |
| 4 | 16 |
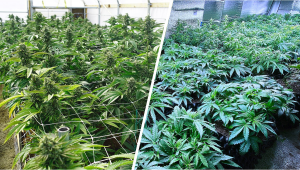
We recommend topping between 2-3 times when growing indoors (depending on your experience and space), if you are growing outdoors you can top as many times as you wish to, this is a good technique to combine with a Scrog because the trellis will support the buds and allow light to reach deeper.
Step 5 - Remove what you used to tie the branches
When you’re satisfied with the result and your plant has developed well, it’s time to remove the ties to start flowering.
Once you’re ready to start flowering you shouldn’t top or tie your plant anymore because this can affect the development of the buds, at this stage your plant should already have the structure you were aiming for and be ready for flowering.
4. Can You Mainline Autoflower Cannabis Plants?
Unfortunately, no. Autoflowering cannabis varieties have a limited vegetative growth period, which means they really are not suited to any high-stress training techniques. Why? Simple really. As auto-flowering cannabis plants have the genetic markers to automatically start the flowering stage after between 4 - 7 weeks of veg growth (depending on which auto strain you are growing), they just do not have the time to recover before flowering begins. Every time you top a plant it takes at least a few days for it to recover and resume normal growth (this can actually take up to a week and a half, depending on what technique you use, how healthy the plant is, and how careful you are). This is perfectly fine with photoperiod plants, as you can just add the recovery days to the veg growth time. But with the limited veg period of autos, it's best to use only low-stress training techniques so that you don't limit the time for growth. So best to keep the scissors or scalpel well away from your auto babies. With where genetics are these days, there's really no need to top autos anyway!
5. Mainlining vs Other HST Techniques
It is not uncommon for cannabis cultivators to combine multiple low and high-stress training techniques during the vegetative growth stage on small and large cannabis farms, but with mainlining this really is not necessary. Mainlining is an all-in-one technique that borrows the best parts from multiple training techniques and combines them all together.
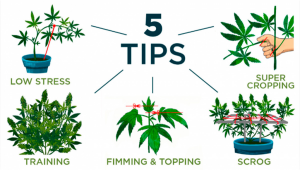
Super cropping is another favorite among growers, but it is much more labor-intensive than mainlining and takes a bit of practice to get right. Mainlining is a much simpler and quicker process and can be mastered in your first try. It also requires much less aftercare. LST is a technique almost all growers have tried at some point in their journey. All that is required for LST is to gently tie down your plants to open up the canopy for more light penetration. Mainlining incorporates this technique, but if you are a total newbie to cannabis cultivation we advise trying LST out before you move on to more advanced styles of growth manipulation.
6. The Best Plant Training Methods for Autoflowering Strains
So, although you can't really use main-lining for autos, that doesn't mean there aren't a bunch of plant training techniques that cant be employed to help you boost that final yield weight. We have briefly mentioned LST training above, but since low-stress training methods are the suggested path forward with autos, let's dive in a little deeper.
Low-Stress Training Techniques Explained
There are two main LST methods that we usually suggest for beginner cultivators. Both work on the same principles and can be implemented in tandem. They are:
- The Tie-Down Method
- The SCRoG Method
Do you need to do both or anything at all? No, of course not. Cannabis, autoflowering or not, has evolved to grow in an Apical formation for a reason, but that reason doesn't lend itself to maximizing the final yield. Apical growth is simply the easiest route for the plant to take.
By manipulating the environment of your grow space and gently coaxing it in directions that will help you maximize yields, you can achieve much bigger numbers when you finally harvest. It's this manipulation of the plant structure itself that leads to bigger harvests. When you force a plant to grow horizontally outwards, you essentially trick the plant into thinking that the main cola has been chopped off. This offers a few key benefits -
- Firstly, the spreading of the canopy allows for much higher levels of light penetration and airflow throughout the entire canopy. This not only gives each and every budding site more light exposure, but it also severely decreases the chance of any mold or pest infestations from cropping up.
- Secondly, it tricks the plant into more evenly spreading the nutrients, energy, and growth hormone between all of the buds, instead of focusing a large portion of the resources on the main cola. This helps to even out the development of all of the buds, leading to a bigger final yield.
So, how do we do this? Tie-down Training is exactly what it sounds like; We tie down branches and stems with twisty ties or soft twine to the grow medium or holes that we drill into the rim of the pot. This encourages lateral growth, thus allowing for more nodes and colas to develop along the way. The Scrog technique is a little different in that we don't tie anything down; We build up a mesh netting above our plants and allow them to grow into it as they get bigger. The Scrog technique is a great method for those that don't want to manipulate the plant structure with ties or clips, and instead prefer a slightly more hands-off approach. You may still need to use twine to tie the branches to the net and help promote the spreading action, but this also may not be necessary.
It's important to note that both techniques should be used hand in hand, and to great effect; You will get far better results from using both together than you would if you decided to go with one technique exclusively. So, if you're looking to boost your autoflowering yields and really maximize the potential of those genetics, then you can't go wrong with either the Tie-down or Scrog techniques!
7. In conclusion
Main-lining is a great way to control your plant in every aspect and to gain experience in plant training, although you need some time to get the hang of it.
Combining two different methods of plant training can be really stressful to your plants so we recommend taking it easy and always pay attention to the signs your plants give you.
This post was most recently updated on April 19, 2022.




Comments