Jack Herer Auto Cannabis Strain Week-by-Week Guide

- 1. History
- 2. Specifications
- 3. Week-by-week guide
- 3. a. Week 1 - germination
- 3. b. Week 2 - vegetative stage
- 3. c. Week 3 - vegetative stage
- 3. d. Week 4 - vegetative stage
- 3. e. Week 5 - pre-flowering stage
- 3. f. Week 6 - flowering stage
- 3. g. Week 7 - flowering stage
- 3. h. Week 8 - flowering stage
- 3. i. Week 9 - harvesting
- 4. What to expect?
- 5. Drying, trimming and curing your jack herer harvest
- 6. Jack herer auto grow guide - faqs
- 7. In conclusion
1. History
Jack Herer was one of the most active cannabis activist, he became famous all over the world for his deeds in the cannabis world. Back in the ‘90s, there was a rumor a Dutch seed bank was working on new genetics. The strain was kept hidden until 1990 when it was released in honor of Jack Herer, having the same name as the activist. Until today nobody knows the exact crosses of this strain is, but it’s speculated that this hybrid comes from a cross between Skunk #1, Northern Lights #5, and Haze. Although people weren't expecting it, Jack Herer became an instant classic.
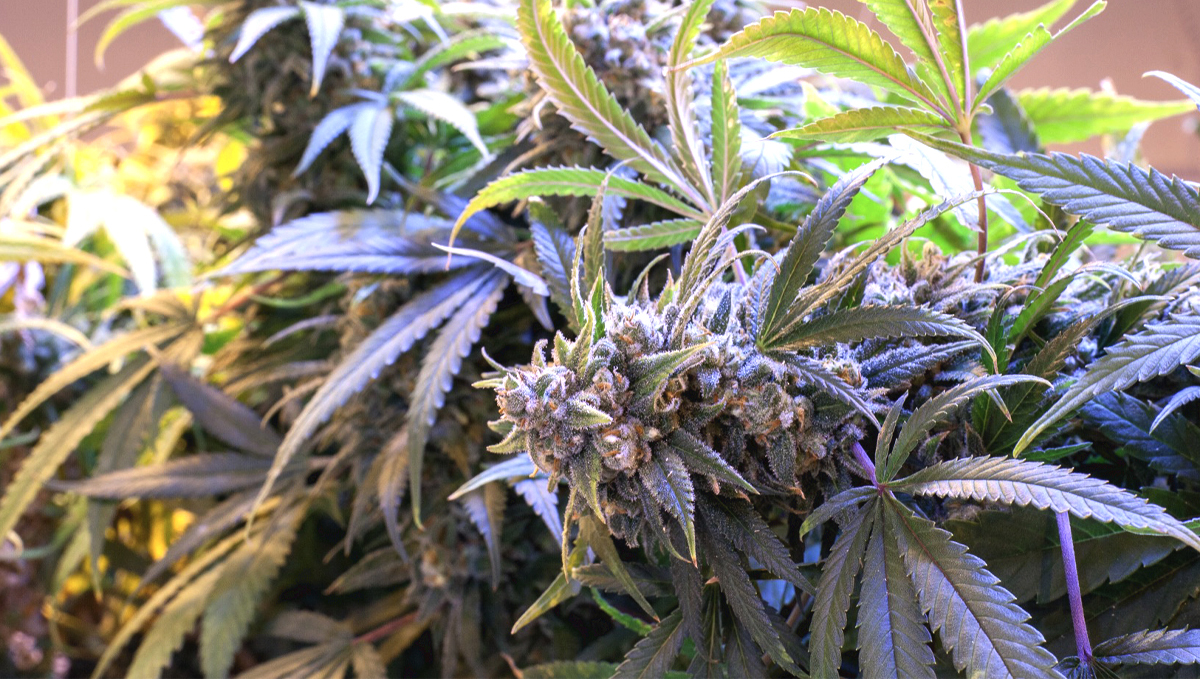
This strain became to be available in Dutch pharmacies in the 1990s and started winning awards worldwide, not only for its medicinal properties but especially for its unique aroma Jack Herer is the only genetics that has won more than 10 Cannabis Cups, it was found everywhere back at the time and is available in most coffeeshops in Amsterdam and it’s widely found in California. Without a doubt, this is the most legendary strain since the ‘90s deserving a place in the cannabis Hall of Fame.
2. Specifications
At Fast Buds, we developed this multiple award-winner to automatic perfection. Our Original Auto Jack Herer is a medium-sized strain that will grow around 90cm despite her Sativa heritage. Even though it doesn’t grow as tall as other Sativas it can yield exceptionally. This lady will be completely mature in 9 weeks and will grow multiple side branches that will fill out from top to bottom producing up to 500gr/m2 of buds. Her flowers are long and fat with a huge amount of pistils all throughout the bud, which is also flooded in trichomes. It literally looks like resin is oozing from all around the buds, a truly impressive strain.
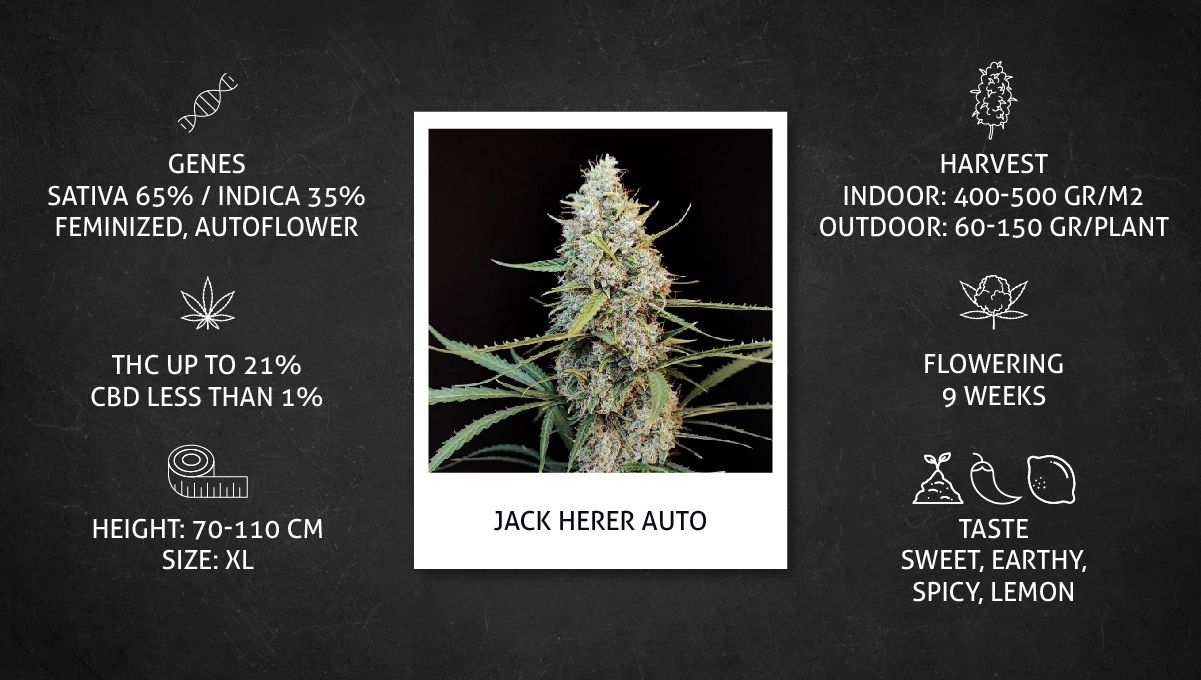
Original Auto Jack Herer has a very savory-sweet flavor that expresses the full spectrum of floral and fruit terpenes. A mix of sweet, peppery, fruity, and spicy that enhance the very pleasant high. The effects of this hybrid are very enjoyable and allow you to quickly relax while staying focused, she is a fine balance of Indica and Sativa, perfect for smokers with a low tolerance or new smokers. A perfect strain for smoking in the morning to get through the day with a clear head and stress-free also great for gaming and listening to music or movies.
3. Week-by-week guide
This article serves as a guideline so growers know what to expect when growing this classic in auto version, here you can see the conditions kept throughout this grow report and the results obtained by several growers.
| Grow Specifications |
|---|
| Light Fixture: LED/HID |
| Light Cycle: 18/6 |
| Humidity: 45-70% |
| Temperature: 19-29°C |
| Grow Space: Indoor |
| Nutrients: Synthetic |
| PH level: 6.0-6.5 |
| Seed to Harvest: 9 weeks |
Have in mind that this written timeline was made to help you, even though you’ll be able to grow your plants in most conditions, you should adjust your growing setup depending on the conditions and the specific strain.
Week 1 - Germination
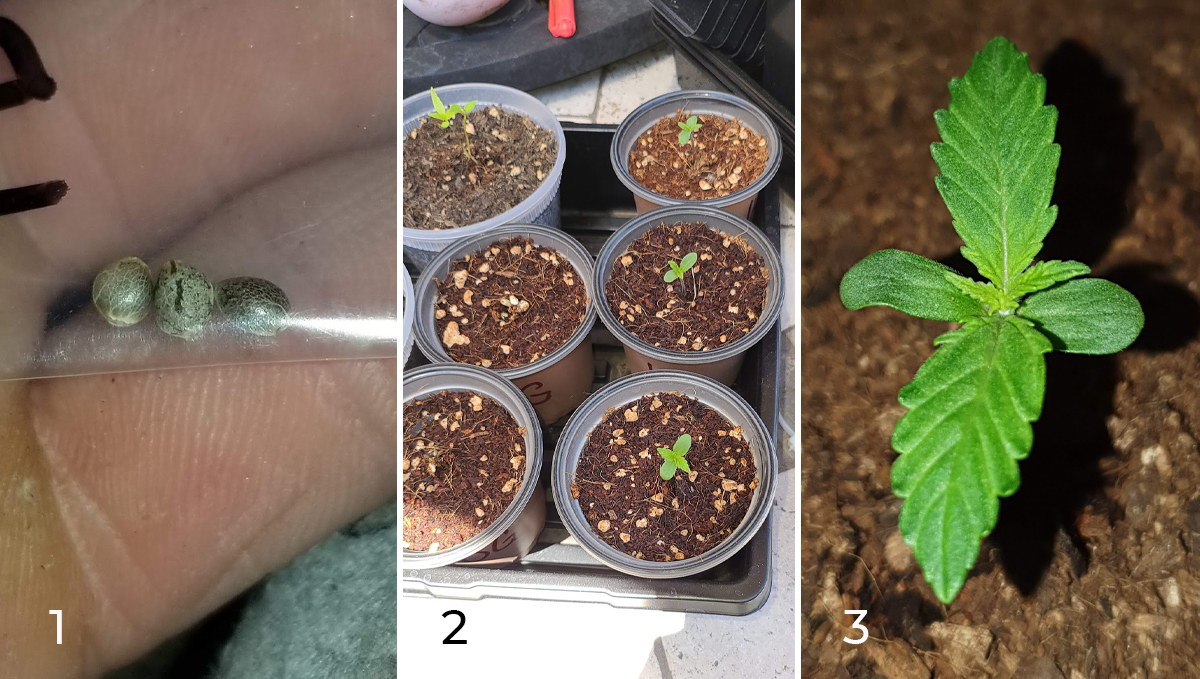
As usual, week 1 is where this journal starts, the growers started by germinating the seeds directly into the medium, we usually recommend soaking them in water for up to 48hs and them placing them in a paper towel, but you can germinate them any way you want as long as you’ve done it before and know your method will work.
| Height: 3cm |
|---|
| pH: 6.2 |
| Humidity: 67% |
| Temperature: 24°C |
| Watering: 150ml |
As you can see, the baby plant came out of the soil without a problem and is boasting a rich-green color, remember that keeping proper conditions is the best way to ensure your plant comes out without a problem, independent of the type of medium.
So these ladies were a new addition to the fast buds room after 4 days of germination time. Even their beans are popping fast!...over 100% germination rate in 4 days with the bio root! -416fireman
As you may know, if you’ve grown any kind of plant before, you can have your whole grow cycle in any type of medium and grow setup as long as you maintain proper conditions.
In this stage, you should check and adjust the relative humidity to be around 70% and the temperature between 18-25°C for your seedling to grow properly.
Remember that if it’s hard to control the humidity at this stage, you can use a store-bought (or make one with a plastic bottle) dome to help maintain a high temperature, now, have in mind that this may help you but you will need to control the conditions throughout the whole grow cycle and it can get hard to control it by improvising.
Week 2 - Vegetative stage
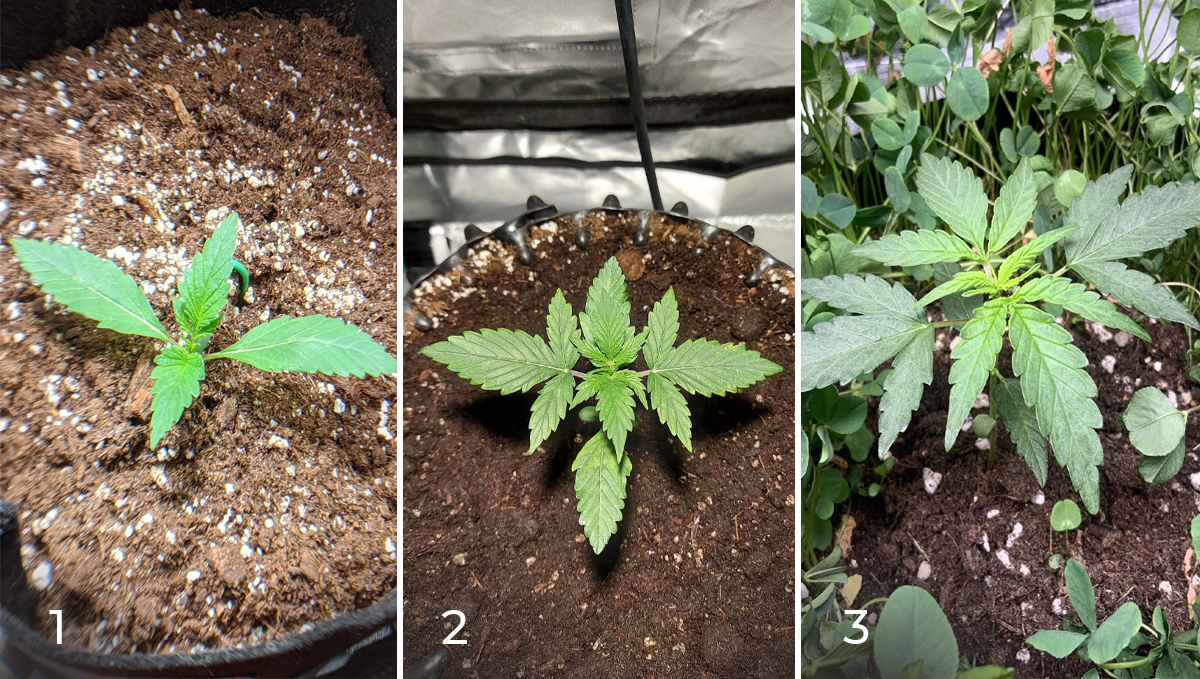
If you’ve done everything correctly, your plant will slowly start to develop more and more leaves, the first one having one apex and the following developing more until it reaches the maximum the specific strain can develop, this is just a characteristic and won’t affect anything other than how your plant looks.
| Height: 8cm |
|---|
| pH: 6.4 |
| Humidity: 60% |
| Temperature: 23°C |
| Watering: 200ml |
As soon as you see the third pair of true leaves, you can start plant training (if you wish to), just have in mind that because this plant is ready to be trained in the second week, it doesn’t mean all will too.
Also, when you see the first three-fingered leaves, you can start feeding a lower dose of Grow nutrients in a 3-1-2 ratio, even though plants need Nitrogen to develop the leaves and branches, they’re still quite fragile so make sure you mix a light nutrient solution.
Depending on the medium and nutrients, it’s essential you measure the pH and PPM because depending on the pH level, your plant will not be able to absorb certain nutrients that are essential for plant growth, now, this is not obligatory and you will be able to grow cannabis without doing it but doing it will take your harvest to the next level, so it’s highly recommended.
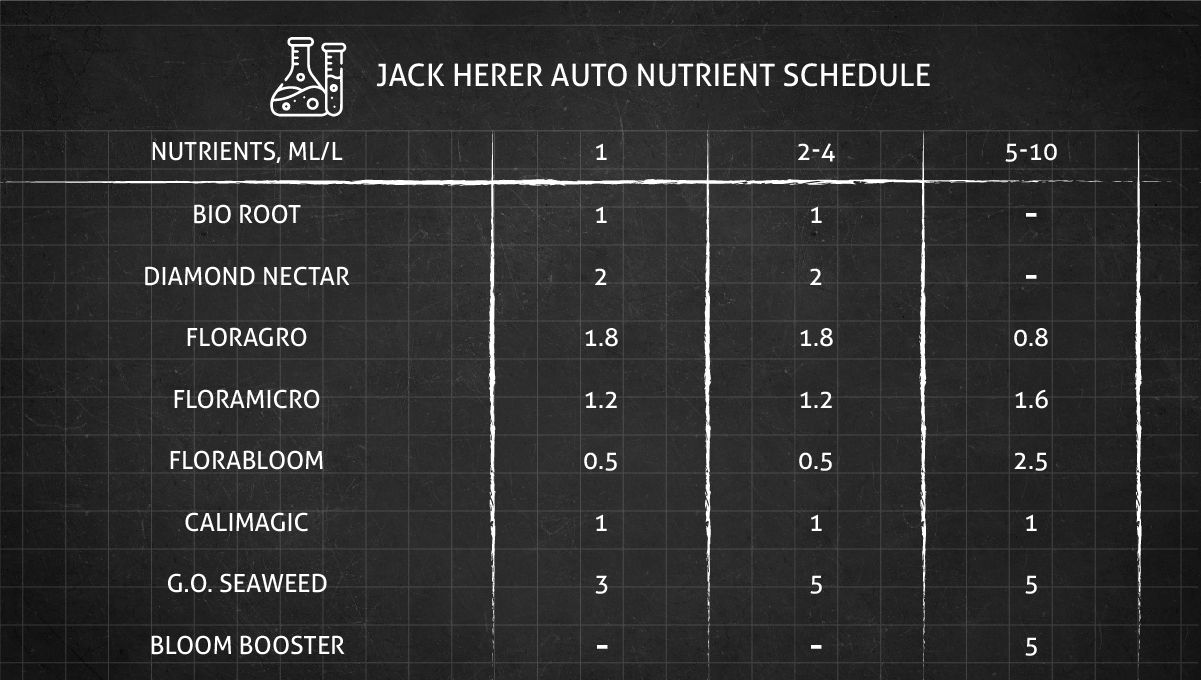
In the graphic below, you can look at a sample nutrient schedule chosen by an experienced grower for his Jack Herer Auto. In addition to the three staple products of GHE Flora series, it contains just a handful of other organic amendments and boosters and is safe to replicate even by beginners due to its simplicity.
Week 3 - Vegetative stage
In week 3 the roots should have established and when this happens, you’ll see an explosion in growth; In this case, our Jack Herer Auto really grows during the flowering stretch but you will see your plant grow a lot once it enters the pre-flowering stage.
| Height: 18cm |
|---|
| pH: 6.5 |
| Humidity: 65% |
| Temperature: 24°C |
| Watering: 300ml |
In the first days of the fourth week, you should see your plants really growing a lot, if you’re planning to perform some plant training, now is the time to do it; By now your plants should have developed 2-4 pairs of leaves and developed a good internodal space for you to tie down the branches, for example.
It’s recommended you start with either LST or HST once you have at least 3 pairs of leaves, you can start whenever you want but letting your plant develop a bit is better than to start training as soon as your plant comes out.
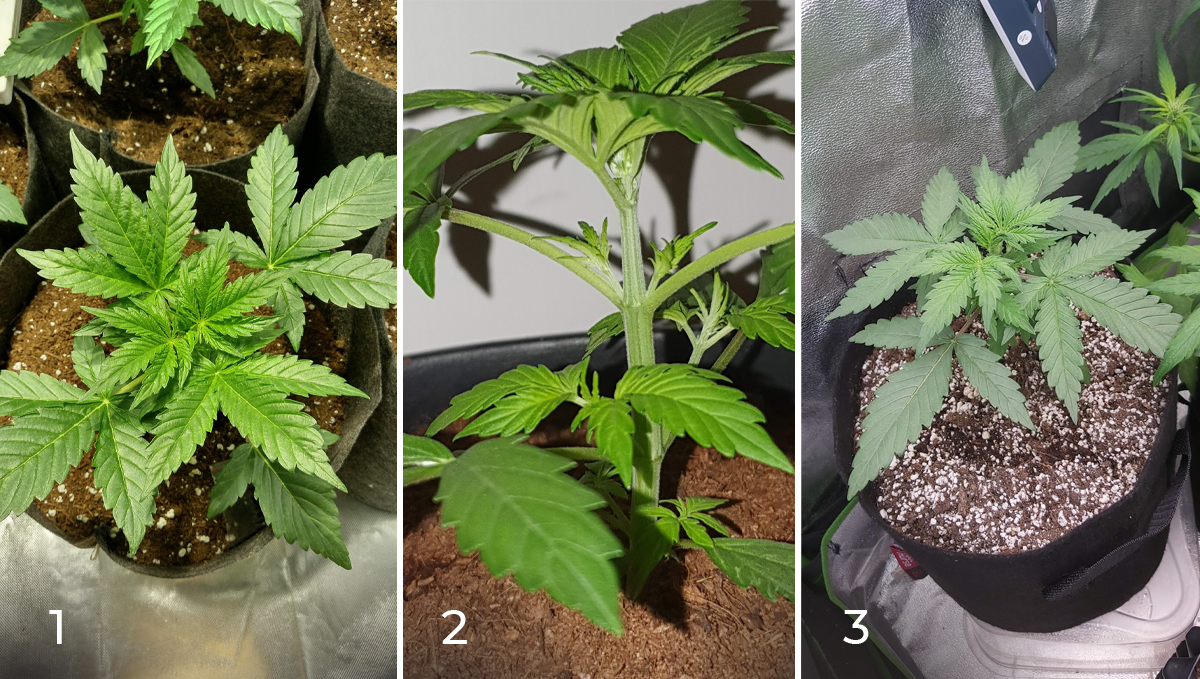
Remember that we don’t usually recommend HST on autos, you can have the same results by performing LST techniques such as SCRoG, SoG, or tying down the branches but depending on your experience you can get great results by using HST methods such as toping or fimming.
Also, HST means High-Stress Training so naturally, your plants can get more stressed when doing it so we recommend doing it carefully and gradually, always checking and adjusting the conditions so your plants can recover and continue growing as fast as possible.
Week 4 - Vegetative stage
If everything goes as it should, this week marks the week before the pre-flowering stage and you should see the flowering sites slowly turning light green, there’s no need to worry if the flowering sites are the only things turning light green but if you see the leaves also changing color, it may be a sign of nutrient deficiencies.
| Height: 35cm |
|---|
| pH: 6.5 |
| Humidity: 55% |
| Temperature: 27°C |
| Watering: 600ml |
By now you should already be feeding a full dose of Grow nutrients and if you’re growing regular seeds, keep an eye out for male plants which usually mature 1-2 weeks before female plants.
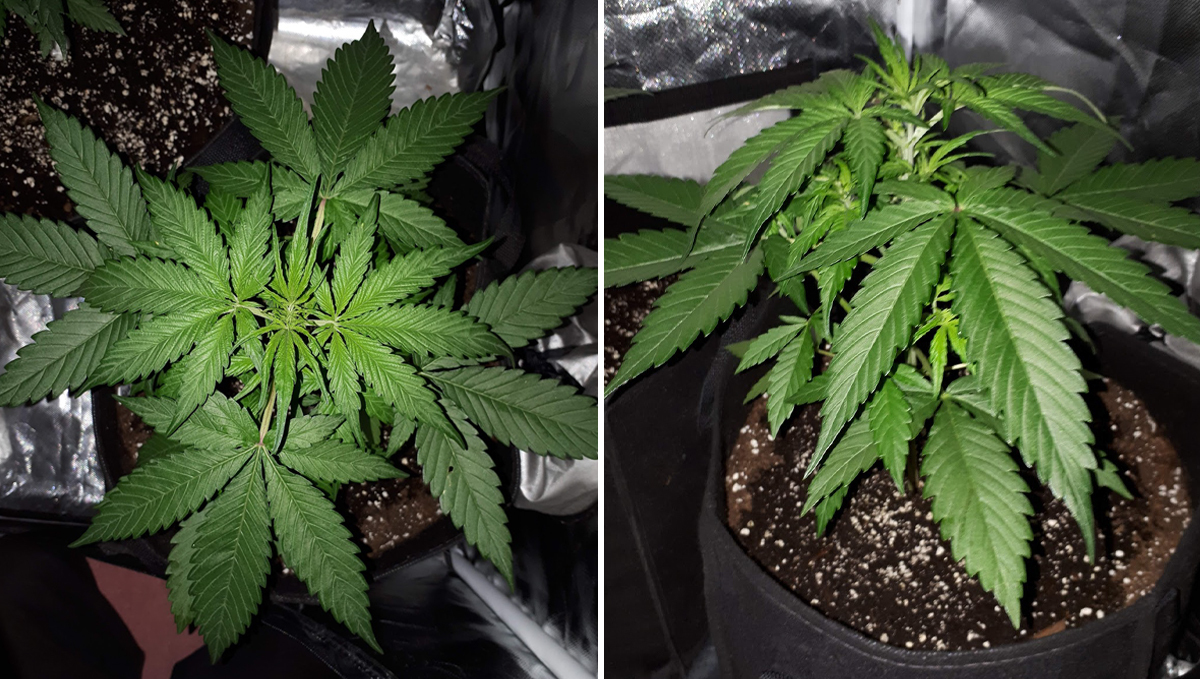
In this case, the cultivators are growing feminized autoflowers so there’s no need to worry about that, just remember that if male plants can end up pollinating the buds produced by female plants so it’s essential you keep check your grow space every day.
Week 5 - Pre-flowering stage
Week 5 marks the beginning of the pre-flowering stage and as you can see in the photos below, your plants will start to show signs of female flowers such as trichomes and stigmas, even though the smell won’t be as apparent now, they will start smelling quite strong so watch out.
When you see the first signs of flowers, you should start gradually lowering the amount of Grow nutrients and slowly start feeding Bloom nutrients which help your plant in the production of buds, trichomes, and stigmas.
| Height: 60cm |
|---|
| pH: 6.5 |
| Humidity: 55% |
| Temperature: 27°C |
| Watering: 1000ml |
To help your plant get ready for when she’s in full-flowering mode, you should provide Phosphorus and Potassium which are the macronutrients plants need when flowering, also, depending on the type of medium you’re using, you should provide Calcium and Magnesium among others because sterile mediums don’t provide these micronutrients.
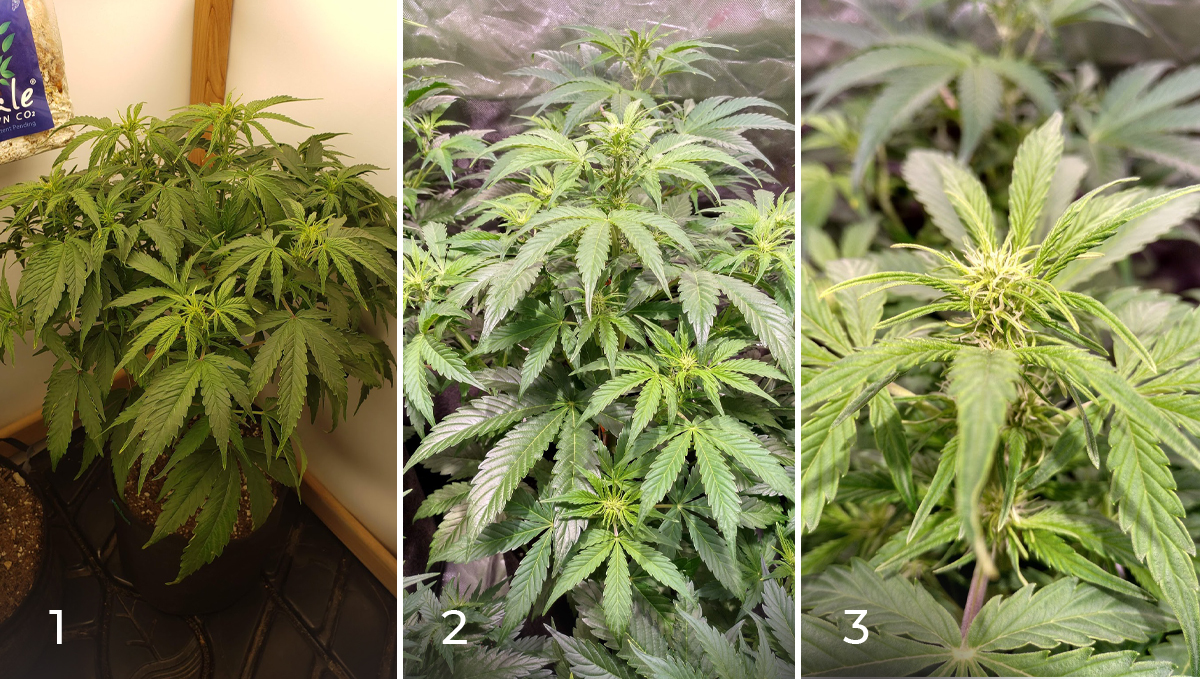
Have in mind that cannabis thrives in certain conditions and it’s essential you adjust them to the stage your plants is in, during the pre-flowering stage, you should maintain the relative humidity around 55-60% and the temperature between 18-25°C. Also, if you were performing any kind of plant training, you should stop now because stressing your plants now can have a very negative effect on the quantity and quality of the harvest, obviously, if you are growing in a SCRoG net you don’t have to remove it but if you were tying the branches or topping, you should not continue doing it.
Week 6 - Flowering stage
This week marks the first half of the flowering stage and by now your plants should be in full-flowering mode, throughout this week and the last one you should have seen your plants growing exponentially and that mouth-watering cannabis smell coming through. Depending on where you’re growing, the weed smell can be quite overwhelming so make sure you have a carbon filter installed and ready to go or, if you’re growing outdoors, it’s a good idea to have several aromatic plants such as peppermint and lavender to help mask the strong smell.
| Height: 70cm |
|---|
| pH: 6.4 |
| Humidity: 50% |
| Temperature: 29°C |
| Watering: 1500ml |
After the buds have started developing they will start smelling quite strong and that sweet smell can attract bugs which can end up killing your plant so remember to check your plants every day for signs of bugs or mold. Also, most beginner growers end up losing their harvests due to powdery mildew or bud rot so make sure you keep the humidity controlled and always check for white spots or brown spots on the buds which are signs that mold has reached your plants.
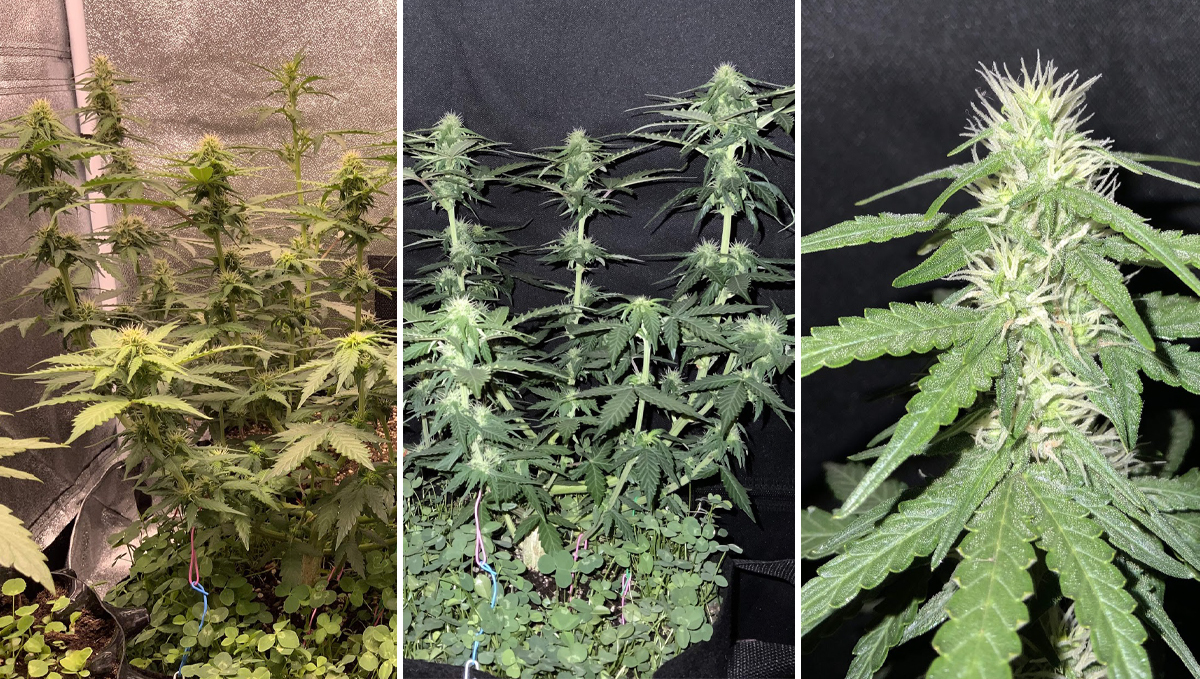
If you’ve had problems with bugs before or if you just want to prevent them, a good way is to place several yellow sticky traps that will not only catch them but also let you know if bugs are getting into your grow tent, you can also spray a light mix of organic pesticide all over the inside and outside of your grow tent, just make sure you don’t spray your plants because it may end up affecting their smell and flavor.
Week 7 - Flowering stage
Week 7 from germination marks the beginning of the second half of the flowering stage, these last weeks is when you will truly see your plant fattening up the buds so by now you should already be feeding a full dose of nutrients but without overfeeding because it can end up having the opposite effect and end up lowering the yields.
| Height: 80cm |
|---|
| pH: 6.4 |
| Humidity: 50% |
| Temperature: 29°C |
| Watering: 1700ml |
Have in mind that even though this strain usually grows up to 110cm, it may end up higher or lower, depending on the conditions provided and the training method performed, if you think your plants are growing less than they should, you should check everything, humidity, temperature, the amount of nutrients and your light fixture to make sure your plants are getting what they need.
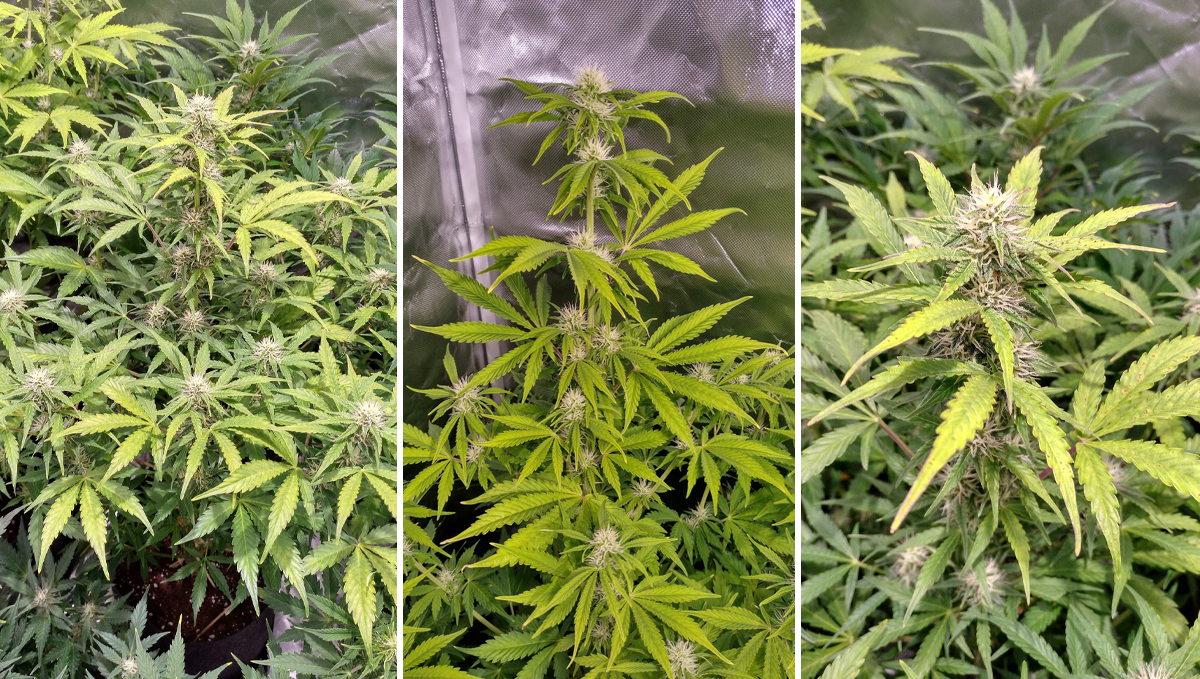
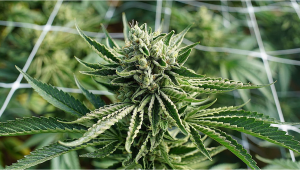
As you can see in the photo above, you can see that from afar the buds look like they’re fully formed but when looking closer, the buds still need to fatten up a bit more and more trichomes are yet to develop so keep up the good job and be patient, you only need to wait two more weeks.
Week 8 - Flowering stage
Week 8 from seed marks the week before harvesting, by now the smell should be super pungent and some of the stigmas should start to brown and wilt, now, remember that stigmas are a way to know if your plants are ready for harvest but you should wait until the trichomes are completely mature and around 60-70% of the trichomes are cloudy.
| Height: 85cm |
|---|
| pH: 6.5 |
| Humidity: 45% |
| Temperature: 27°C |
| Watering: 1800ml |
To see the trichomes clearly, you will need a tool to be able to zoom in and know exactly when to harvest, usually, growers use a jeweler’s loupe but you can also use a microscope or anything that will let you see them clearly.
Romping through flowering!! Still mega bushy!!!...Looking good so far! -Dunk_Junk
Also, depending on the type of nutrients you should start flushing to remove the salt build-up in the roots and soil, this will help you enhance the aroma and flavor, and will result in an overall better tasting harvest.
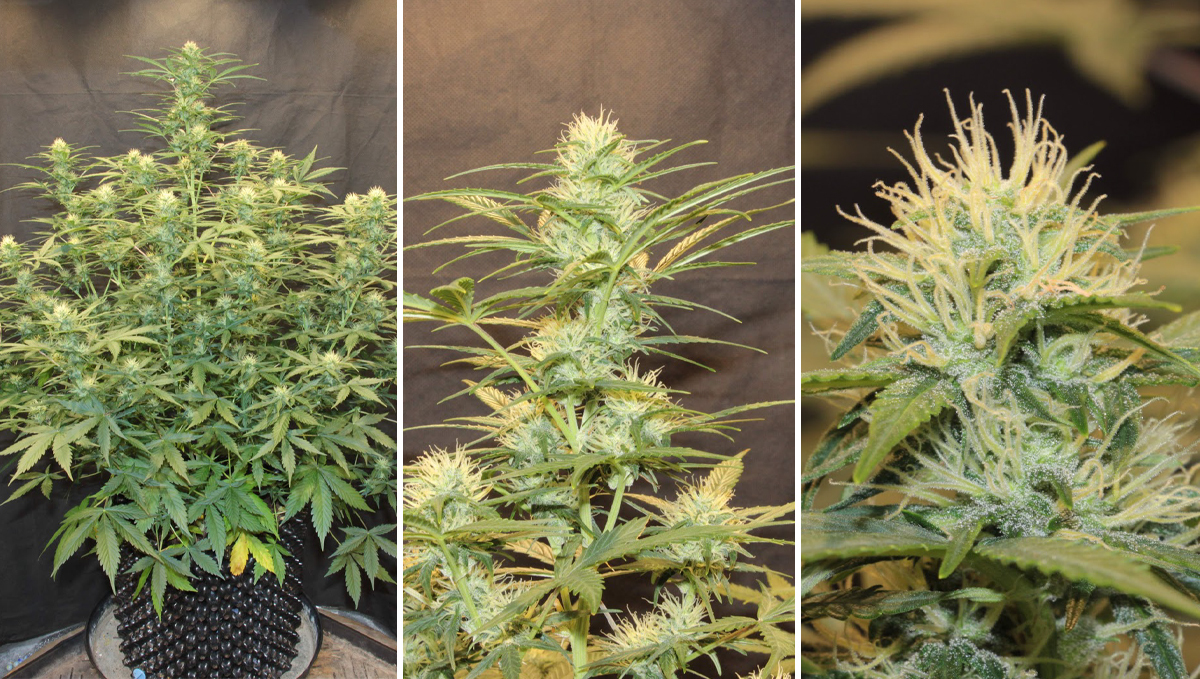
Have in mind that depending on the medium, you should also check the PPM and pH of the water you’re using to flush your plants because water can contain trace elements and may end up providing more minerals instead of washing the minerals off the roots and medium.
Week 9 - Harvesting
Week 9 marks the last week of this grow cycle and is the week when you’ll be harvesting your Jack Herer Auto, if you’ve started flushing, you’ll see the fan leaves starting to yellow which is a sign that you’re doing it properly. Now, this could be a problem in any other stage of a cannabis plant’s growth cycle but if it’s during flushing, everything should be fine.
| Height: 90cm |
|---|
| pH: 6.5 |
| Humidity: 45% |
| Temperature: 27°C |
| Watering: 1800ml |
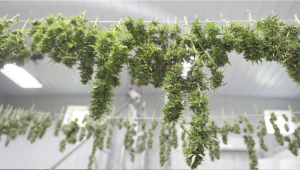
Have in mind that before being able to consume your flowers, you’ll still have to dry and cure them so before chopping down your plants, make sure you have your drying room ready so you can hang them upside down as soon as you cut the branches and trim the bigger leaves.
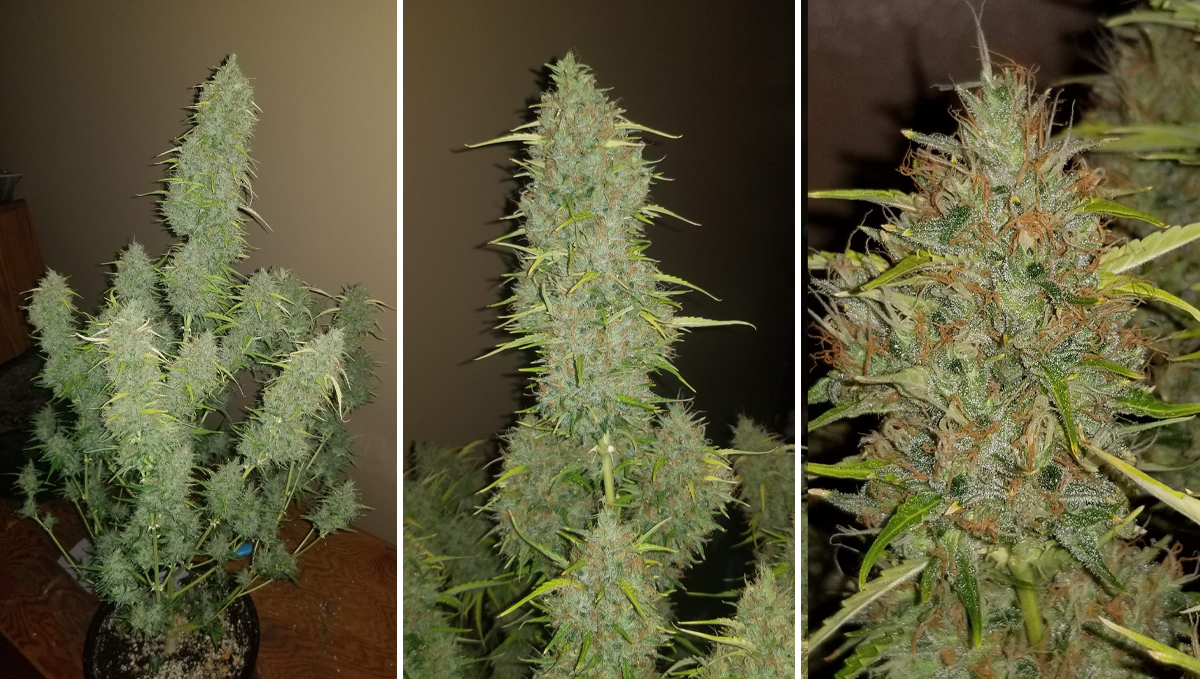
Also, keep in mind that the strong cannabis smell will perdure even during the drying stage so you should have a way to eliminate or mask the smell; You can use odor neutralizers or a carbon filter with an exhaust fan dimmed down to avoid having problems with your neighbors.
4. What to expect?
Now that your plants are hanged down and already drying, you have to wait around 2 weeks before you can start the curing process which lasts a minimum of 2 weeks so if you’re eager to know what to expect, here’s what our growers have reported. You can expect a unique blend of earthy and sweet aromas with a spicy and peppery citrus edge that offers the full spectrum of floral and fruit terpenes and consists of the following main terpenes:
- Terpinolene
- Caryophyllene
- Humulene
- Limonene
The primary terpenes in combination with the secondary terpenes that you will see in the chart below provide a very pleasant high that allows you to relax while keeping alert and focused.
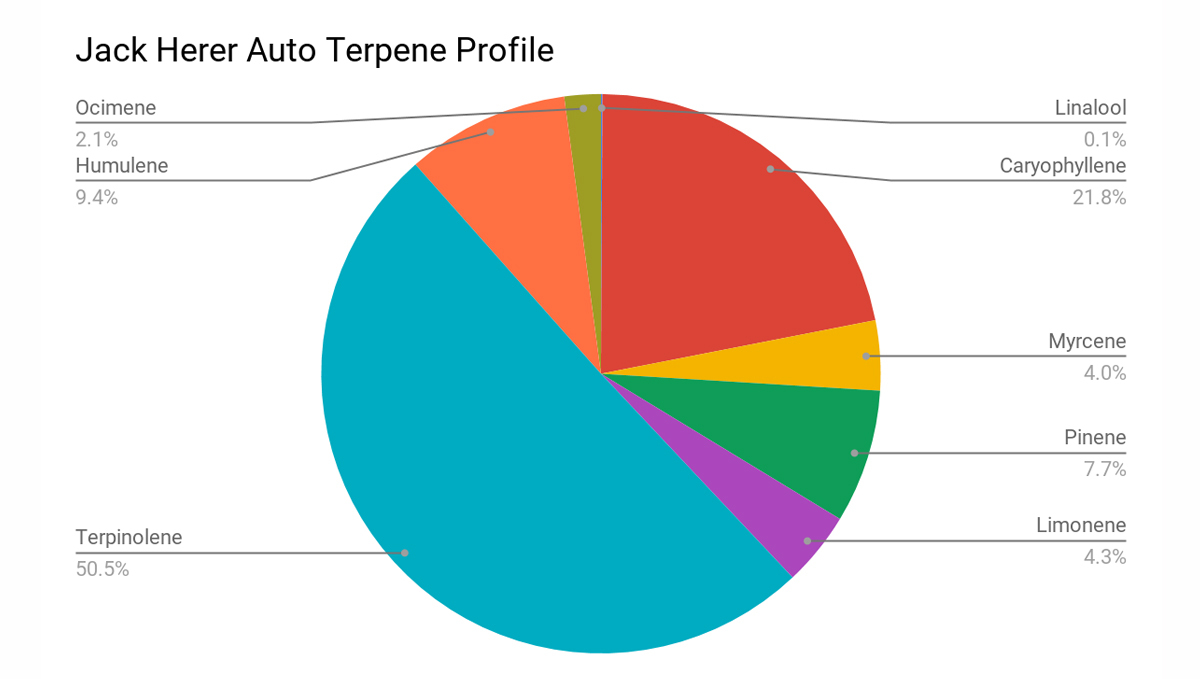
This terpene profile provides an extremely floral and fruity flavor that results in a 65% Sativa and 35% Indica effect that offers the best of both worlds and will keep you energized and uplifted while also allowing you to go through your day relaxed and stress-free.
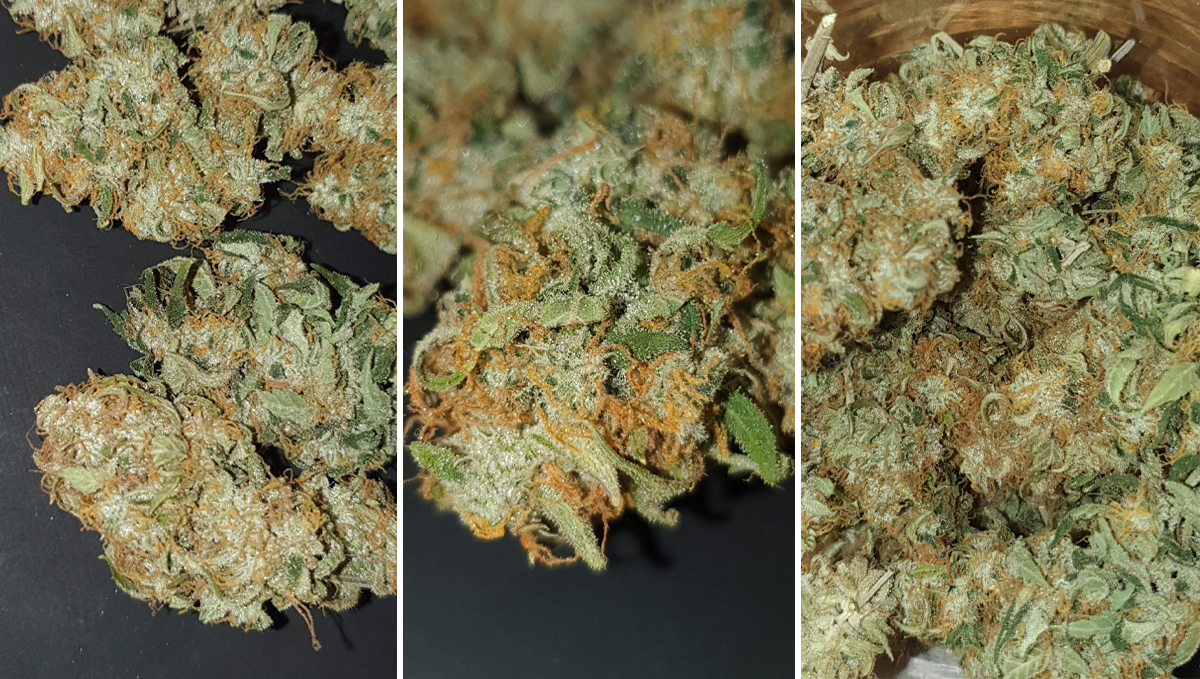
Growers haven’t reported any negative effects but some people have reported that the effect can be overwhelming. So you’re not used to this type of effect we recommend being extra careful if it’s your first time smoking cannabis.
5. Drying, Trimming and Curing Your Jack Herer Harvest
Although we have quickly touched on the drying and curing process above, this part of the process can be often overlooked. Let’s take a deeper examination of exactly how to look after your crop once the harvest is over and done with.
How do you properly dry cannabis?
A contentious issue for sure. You will most likely get a different answer from every experienced grower, with everyone having their own drying “recipe”. But one point that everyone will agree on is the need to control the dry room environment. If you want to get the best out of your crop (and why wouldn’t you, after months of work getting it to this stage), then you need to be able to control both the temperature and humidity in the drying room.
The first thing to consider is whether you want to wet or dry trim your buds. In most situations, we recommend dry trimming over wet trimming. Why?
Look, there is a time and place for wet trimming. If you live somewhere where you are going to struggle to control the drying environment, and the humidity levels are higher than recommended then wet trimming may be your only option. But, if you are able to keep everything under control then dry trim. It allows you to control the drying rate, it offers a better end smoke, and it is much easier to handle dry buds than wet. All of the following info refers to dry trimming.
What are the correct environmental conditions for drying weed, and how long should the process take?
You want to aim for a temperature range between 60-70°F (15-22°C). For relative humidity, a range between 55-65%.is absolutely perfect. Keep a close eye on your harvest as it dries, and if it seems like the process is taking too long, or happening too quickly, then adjust the temperature and humidity to either speed things up or slow it all down. You want the drying period to take anywhere between 10 to 14 days. Any less than this and you have probably degraded at least part of the terpene profile. Terpenes are all the rage right now and are what give cannabis (and many other plants) their aroma. The more we research, the more it seems that the old-school thinking of Indica v Sativa seems to be redundant in a certain respect.
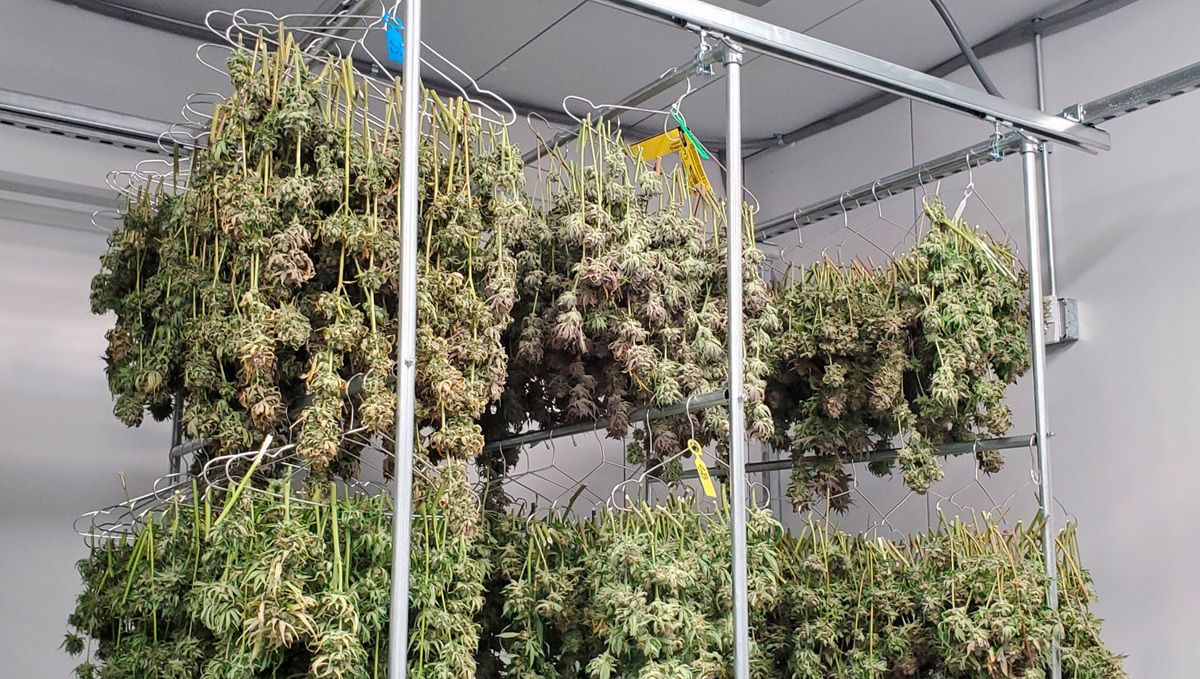
The combination of both cannabinoids and terpenes seems to play a vital role in how a high “feels”, but God damn are they sensitive and easy to upset. The reason why we go to such huge lengths in terms of drying and curing is so the terps (and cannabinoids, although they seem to be less picky) have the best chance of reaching their full potential.
Some pieces of kit to invest in for a dry room include a humidifier (or a dehumidifier, or both), an AC unit, some fans, a temp and humidity meter, and if you live in an area where cannabis is still illegal then you may want to grab a high-quality carbon filter and extraction fan. Weed in the drying process stink like nothing else! Keep in mind that you want to space the buds out so they have room to dry. You never want to point an AC unit or fan directly at the buds as this poses a high risk of the buds drying inconsistently which can also cause terpene degradation.
Once they have finished drying, what’s next?
Time to trim, everyone’s favorite pastime! Seriously though, if this is your first run then you are probably pretty excited to trim. And don’t let us rain on your parade. Trimming can actually be pretty good fun, especially if you don’t have mountains of bud to trim, some friends on hand to help, and maybe a few beers to sip on.
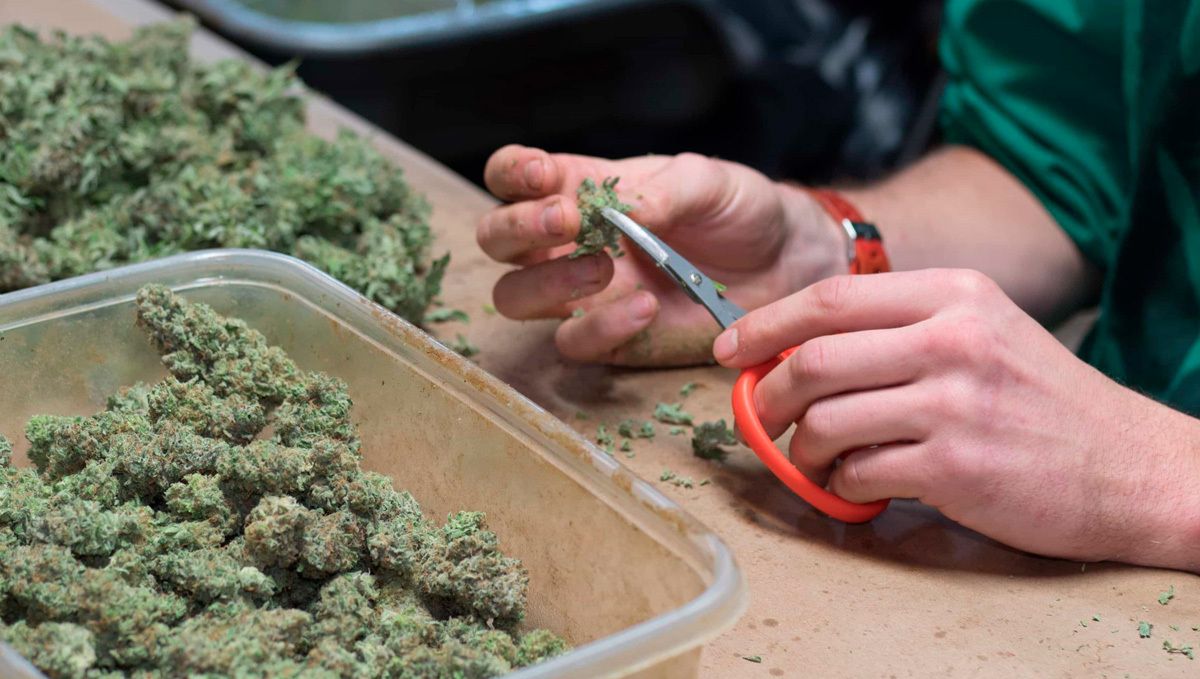
But, if you have been in the game for a while and are producing decent quantities then you are probably rather over-trimming weed. Trimming can become pretty laborious very quickly, as it is slow, messy, tricky, and takes at a fair bit of concentration if you are not used to the process.
How do you trim correctly?
The golden rule is to never shave the bud. Use the tips of your scissors to dig into the flowers and try to cut only the bases of the leaves while leaving the rest of the bud intact. Also, grab a decent trimming tray and scissors - you definitely won’t regret it.
Now it’s time to cure that sticky-icky!
Properly curing weed is a pretty easy task, but one that is often overlooked. The more we understand how weed works, the more important we realize curing really is. Growing and drying the stuff is only half the job, with curing being just as important. To properly cure your stash you will need a few things. Some airtight containers (sealable mason jars are what most people use), some hygrometers, and that’s usually about it. Again, it’s pretty important to control the environment, with temperature and humidity levels being vital to control.
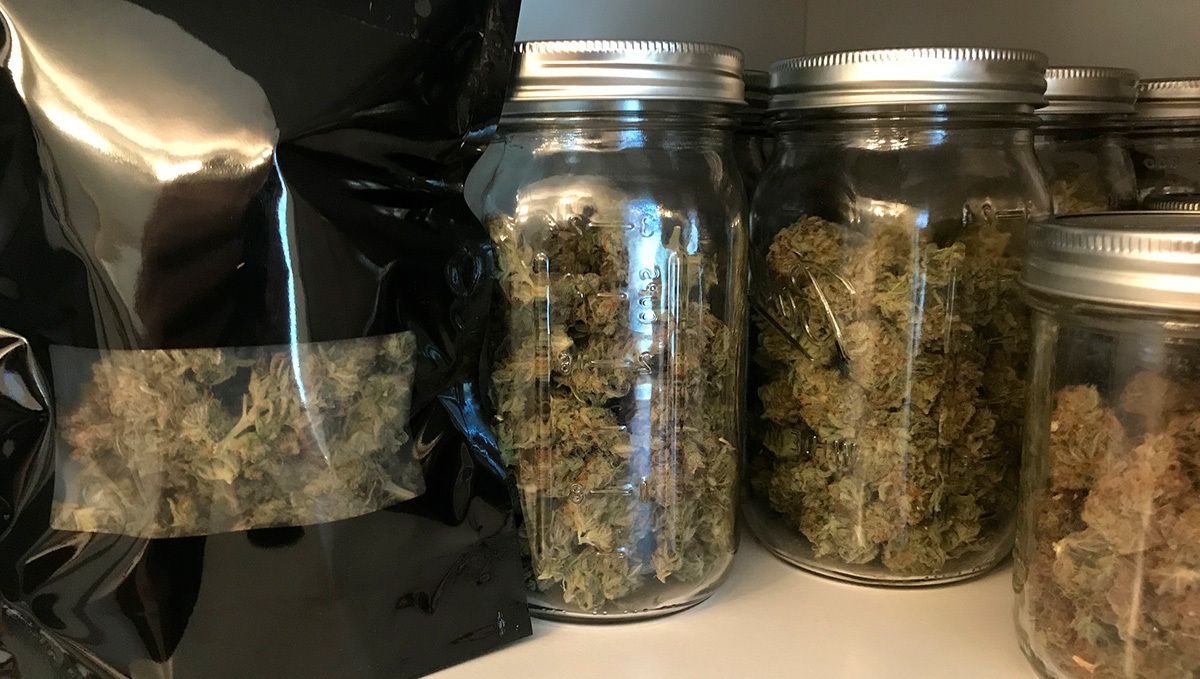
You want a temp of around 70°F (22°C) with a humidity level of 60-65%. Carefully put the nuggets into the jars, being sure to not pack them in too tight or fill past the 75% mark so they have room to breathe. There are specific products on the market to help keep your buds at the correct moisture levels for curing, just run a quick Google search to find them (we suggest Integra or Boveda packs). Burp the jars twice a day for the first ten days of curing, then twice a week for the rest of the curing period. Cure your buds for anywhere between 2 weeks to 6 months. Once the curing process has finished, store your weed like you would with an expensive bottle of wine. A cool, dry, dark area away from prying eyes is always best. That’s it!
6. Jack Herer Auto Grow Guide - FAQs
While the above week-by-week strain guide is about as comprehensive as they come, we understand that there may still be some lingering questions or doubts - especially for growers just starting out. All good! You would think growing something known by most as 'weed' would be a walk in the park. Who would have guessed that it's anything but? Anyway, let's quickly run through all the queries we receive most regularly for Jack Herer Auto grows, and try to answer them in the simplest terms possible.
How many days does it take the Jack Herer Auto strain to get from seed to harvest?
That's a pretty hard question to answer accurately, as there are a bunch of variables that can affect the time it takes to grow a cannabis plant. Plants grown indoors, with optimal environmental conditions and a perfect feed schedule can finish in slightly less than 9 weeks. Outdoors you are looking at a little longer, often closer to 10 weeks. Then there are the different phenotypes to consider. Although - here at Fast Buds - we take huge pride in only offering our seeds once we have them at a super stable point, there will always be some slight fluctuations between the characteristics of different phenos. This means that you could germinate two plants from the same seed pack, and grow them in the same environmental conditions, and there could still be a few days' difference between the finish date.
How do you tell when a plant is ready for harvest? The only way to know for sure which plants is to inspect the trichomes with some kind of magnifying device. Our go-to is a portable USB microscope. Sure, you can use a magnifying glass or jeweler's loupe, but these handy microscopes have come down in price by a huge amount in the past year or so, so just buy one. Trust us, its going to make your life a whole lot easier come harvest time. Back to the question at hand. The average time it takes to grow a Jack Herer Auto plant from seed to harvest is about 68 days - simple.
Can you grow Jack Herer Auto plants outdoors?
Yes! Jack Herer Auto is a phenotype of the original Haze strain, so it will stretch quite a bit during the early flowering stage. If you are growing in an urban environment and want to keep your plants on the down low, then perhaps an indoor grow room is best suited. However, if you have some space in the yard and can set up a little makeshift greenhouse, then you are good to go. Just be mindful of how much your plants will stretch, as they can easily get too big for their surroundings if left unchecked.
Any other tips on growing Jack Herer Auto?
Again, she's a big old beast when the crop comes to the last week or so. Jack Herer Auto responds really well to LST techniques, and we have had some of our best results when SCROGging her. SCROGs are super easy to set up, cost next to nothing, and will definitely boost the overall yield. Thanks to the chunky bud formation, you will most likely need to offer her some support in the final 3 or so weeks of flower anyway.
Is there a stand-out growing medium for Jack Herer Auto?
No, not really. This strain seems to do really well in both soil and hydro setups. Hydroponics will almost always offer increased yield sizes, and possibly a boost in potency, but they can be a pain to get going - specifically for beginners.
If you're just starting out, we suggest giving coco-coir a go. It's cheap as chips, easy to use, and you can find it in any grow shop worth its salt. It also offers most of the advantages of both soil and hydroponic cultivation techniques combines into one.
What feeding schedule should I use for Jack Herer Auto?
This is another difficult question to answer with certainty, because - once again - there are a bunch of variables that will affect how your plants respond to nutrients. But, as with almost all autoflowering strains, you should hold back on the nutes. Too much and you will end up doing more harm than good. We suggest starting with 25% of the recommended dose and then increasing gradually as needed. If your plants start to display any nutrient deficiencies, then that is a sure sign that it's time to start upping the feed. We have added a handy table above outlining the correct feeding protocol for this strain.
When it comes to watering, always check the soil before giving your plants a drink. The last thing you want to do is overwater, as this can lead to all sorts of problems further down the line. A good rule of thumb is to water when the top inch or so of soil is dry to the touch. Over the first few grows you will intuitively come to understand the weight of thirsty pots, as they are much lighter than pots freshly watered.
What are the ideal climatic conditions for Jack Herer Auto?
This strain can handle a fair bit of abuse, but she will perform best when given the following conditions;
- Ideal temperature - between 21 and 26 degrees Celsius.
- Ideal humidity - between 40% and 50%.
- Ideal air circulation - While she's no bushy Indica, good air circulation is still essential for preventing mold and bud rot.
This strain actually does quite well in lower temps when compared to other Sativa dominant autos, but will flourish under mid-range temps.
What size and type of pot should you use for Jack Herer Auto?
One thing that is super important for autos is to try and reduce any chance of overstressing. This can lead to the growth being stunted for up to a week, which is fine for photoperiod strains, but not autos. Why? Because autos don't have time to bounce back before the flowering stage of growth starts. So, always plant ALL auto seeds in the pot you intend to harvest them from. Transplanting will always put a plant under a bunch of stress, no matter how careful you are. This strain can get pretty big, especially if you let her run to full term. We suggest using at least a 3-gallon / 11-litre pot at minimum, but you can go a little larger if you like.
In terms of which type of pot works best, we can't go past fabric smart pots. They just offer higher percentages of oxygenation at the root zone than traditional pots. Air pots are also quite good. No stress if you can find these (although they are sold almost everywhere - from big box outlets to hydro stores, and online), as your regular, everyday pots will work just fine. Be sure to check the drainage situation before planting, though. Cheap pots are notorious for not having adequate drainage, so you may need to go ahead and drill a couple of extra holes in there to help out. Always add a layer of clean pebbles to your pots if they drain solely from the bottom, as this will increase the drainage capacity immensely.
What is the ideal lighting schedule for Jack Herer Auto?
20/4 or 18/6 from start to finish. This strain loves her some light, and will really stretch if given the chance. If you are growing indoors then make sure you have a good reflective surface on the walls, as this will help keep that stretching to a bare minimum.
What does Jack Herer Auto taste like? Is she a loud strain?
Aren't all strains these days pretty loud? Look, Jack Herer Auto isn't the absolute stinkiest strain going, but you don't wanna be walking past a cop in Louisiana or Texas smoking a fat one, that's for sure. The flavor is a bit of a stand-out when it comes to current trends, actually. Deliciously sweet while at the same time wonderfully earthy.
7. In conclusion
If you’re looking to grow some old-school classics, this strain is a must-try! This Sativa-dominant hybrid delivers a really pleasant effect that won’t leave you couch-locked and will allow you to do your chores without thinking twice.
If you have grown this strain before and want to give fellow growers a couple of tips to improve their growing experience with this strain, please leave a comment in the comment section below!
External references
- Stomata and Trichome Development. - V, Vadivel. (2020).
- Terpene Synthases and Terpene Variation in Cannabis sativa. Plant Physiology. - Booth, Judith & Yuen, Mack & Jancsik, Sharon & Madilao, Lina & Page, Jonathan & Bohlmann, Joerg. (2020).





Comments